After an agonisingly long wait, we’re finally embarking on our long-term test of Shimano’s new XTR Di2 11-speed groupset! Over the coming months, we’ll be putting the most high-tech mountain bike groupset on the market to the test. Hold onto your butts.
We’ve previewed (and ridden) the XTR Di2 groupset extensively last year at the product launch in October. Make sure you read all about it in our XTR First Ride Impressions piece: https://flowmountainbike.com/tests/seismic-shift-xtr-di2-first-ride-impressions/
But what we’re interested to learn now in our long-term review, is what it’s like to actually live with this groupset: what the installation process is like; what it all weighs; how hard is it to setup and maintain; how does it perform in different conditions; how useful are all the programmable shifting modes; is a double or single-ring our preference; is the twin-ring / single-shifter option any good; how useful is the Syncro Shift mode….?
These questions, and many more, are what we hope to answer. But for now, let’s look at our bike of choice for the build, and what the installation process was like for a Di2 newbie.
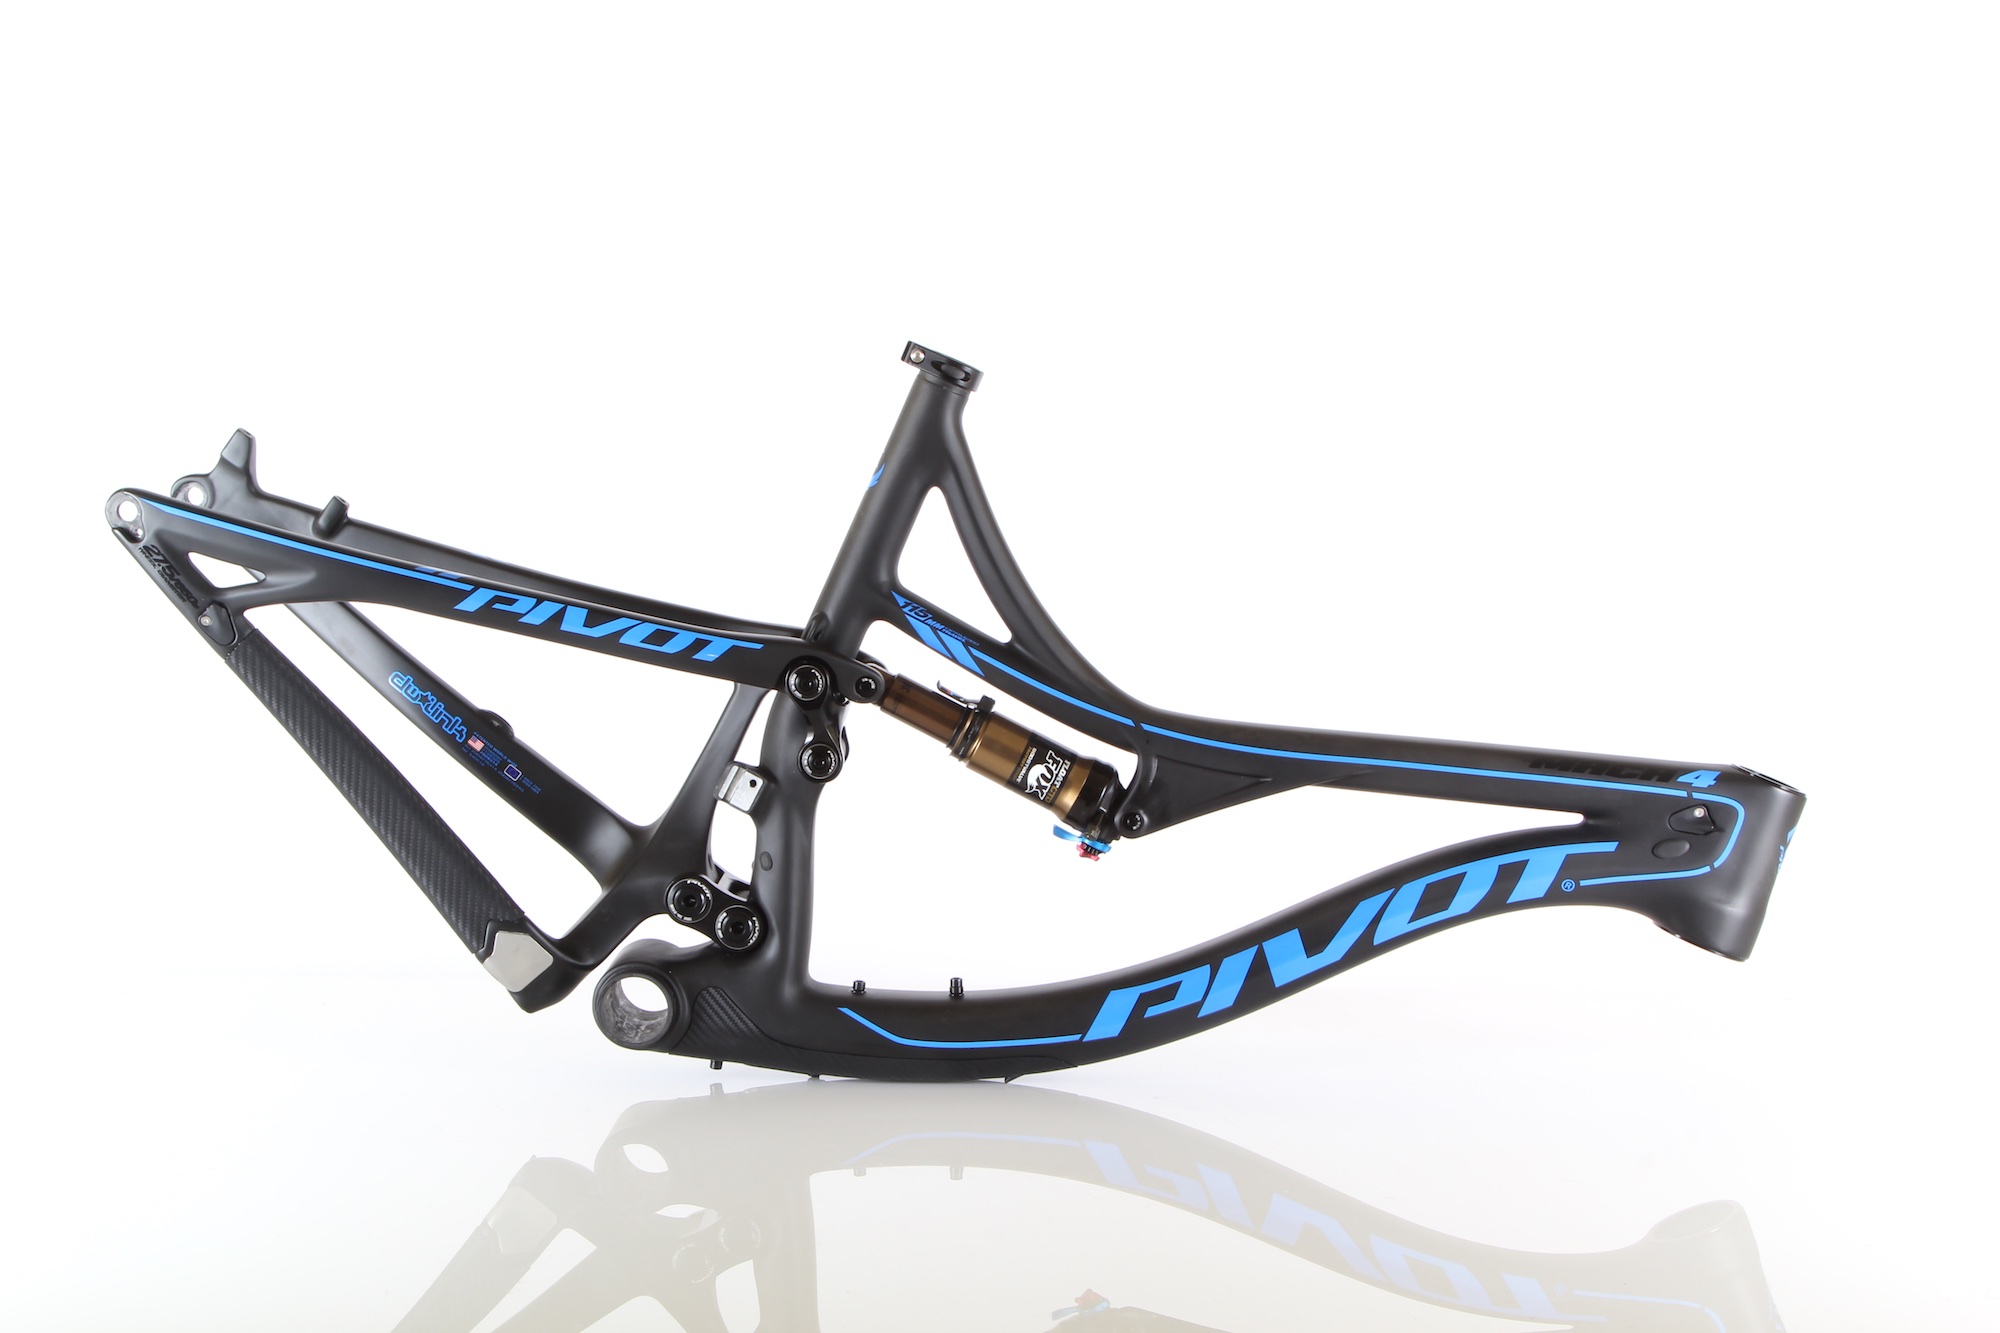
For this long-term test, we chose the 2015 Pivot Mach 4 Carbon as the frame for our XTR build. Why? Well, it’s freaking gorgeous. We have a real fondness for Pivot bikes, and we’d have to rank them as one of the best engineered bikes on the market. They’re amazing performers.
The new Mach 4 Carbon hits the sweet spot in terms of usage too; with 115mm of DW Link rear travel and geometry designed around a 120mm fork, it’s just a banging trail bike, and ideal for the bulk of trails we ride around home and on our travels.

But there’s another reason we picked this bike too, and that’s because it’s the first Di2 optimised frame on the market. The frame features a battery port, and the cable port covers are interchangeable to accept either regular gear cables/housings or Di2 electric wires. Pivot are leading the way for Di2 compatibility.
Getting started with a Di2 installation requires more forethought than your standard build. You can’t just install all the components and then bung the housing/cables in at the end – you need to be a little more strategic than that. Our XTR Di2 system included two shifters (you can run just one, even if you’re using multiple chain rings), front and rear derailleurs, a display, two junction boxes, battery and a bunch of wires in varied lengths (1 x 250mm, 2 x 300mm, 2 x 500mm, 1 x 750mm and 1 x 1000mm) – now we just had to connect the whole web.
Before we delve into the detail, it’s worth mentioning a few things. Firstly, we’re only going to be focusing on the Di2-specific elements of this bike build now – the other elements (brakes, cranks etc) we’ll touch on in later pieces.
Secondly, there are no concrete rules around how you have to wire up a Di2 bike – we could have done things in a variety of ways – the parts don’t have to be wired up in some precise sequence. All that matters is that all the elements of the system are connected in some fashion. As long as they’re joined up, it’ll all talk to each other and work fine.
The third point worth mentioning is that it’d be bloody handy to have a proper internal cabling kit/tool before tackling a Di2 installation. Compared to regular internal cables, the flexible wires of a Di2 system can be a menace to manipulate through the labyrinth of a carbon dual suspension frame – we used every trick in the book, especially when installing the wiring for the rear derailleur. Get the right tools and you’ll swear a lot less than us.
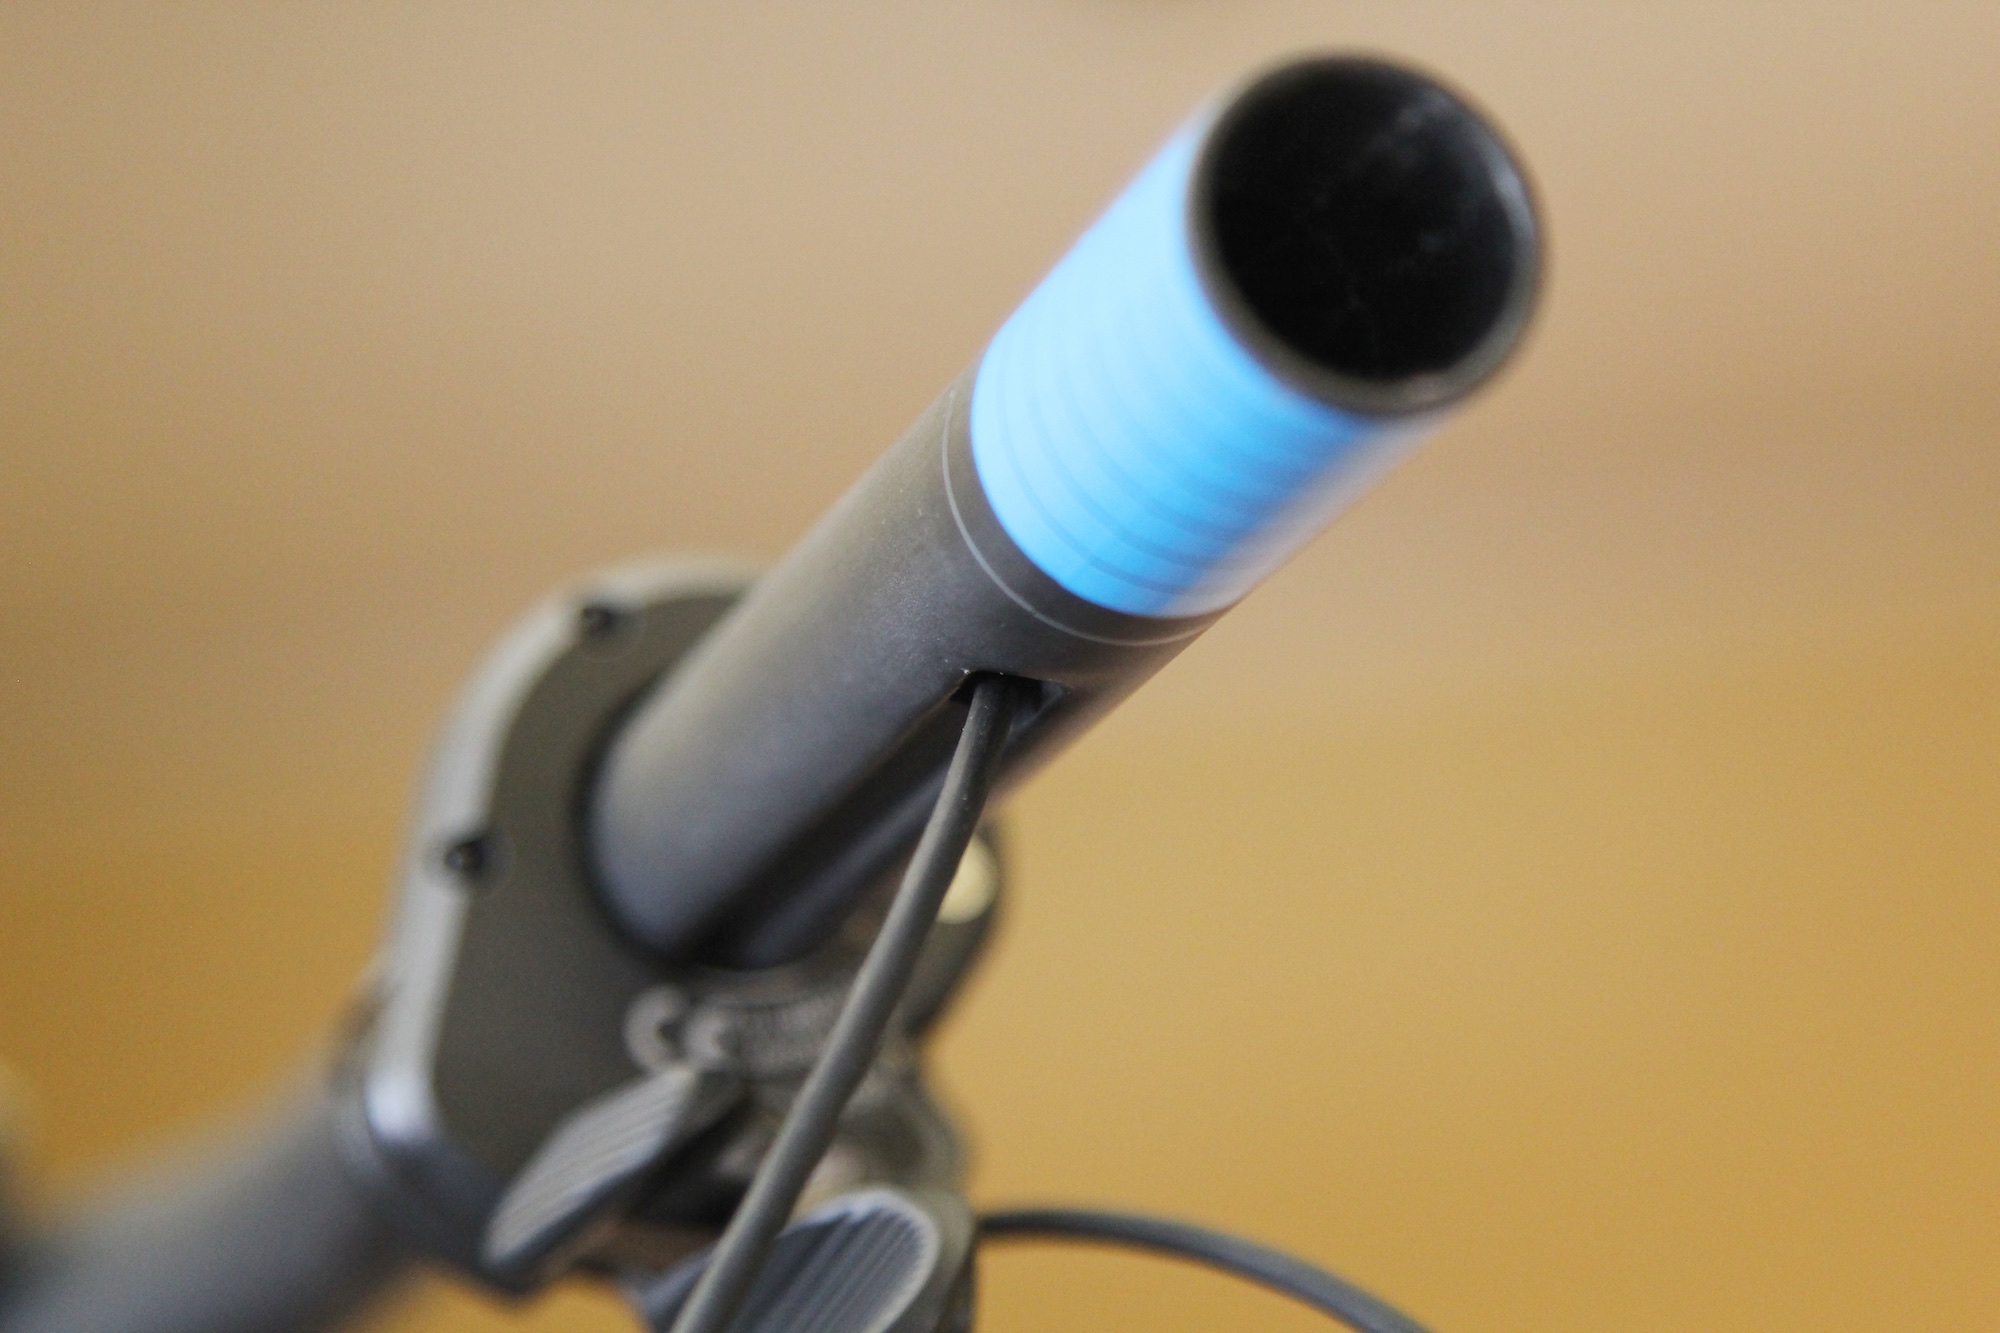
The shifters and handlebar were the first port of call. For the same reasons that we chose the Pivot frame, we opted to run the new Tharsis XC bar and stem from PRO. This equipment is Di2 optimised, with provisions for running all the wiring largely internally, making for an exceptionally neat build.
The PRO Tharsis XC bar has three small holes in it – one in the rear-centre and towards each end of the bar – so you can run the Di2 wires from the shifters through the bar and back into the stem. Threading them through was initially a nightmare, until we realised we’d accidentally chucked out the special tool to aid this process. After digging it out of the bin and watching this incredibly helpful video, things became much easier.
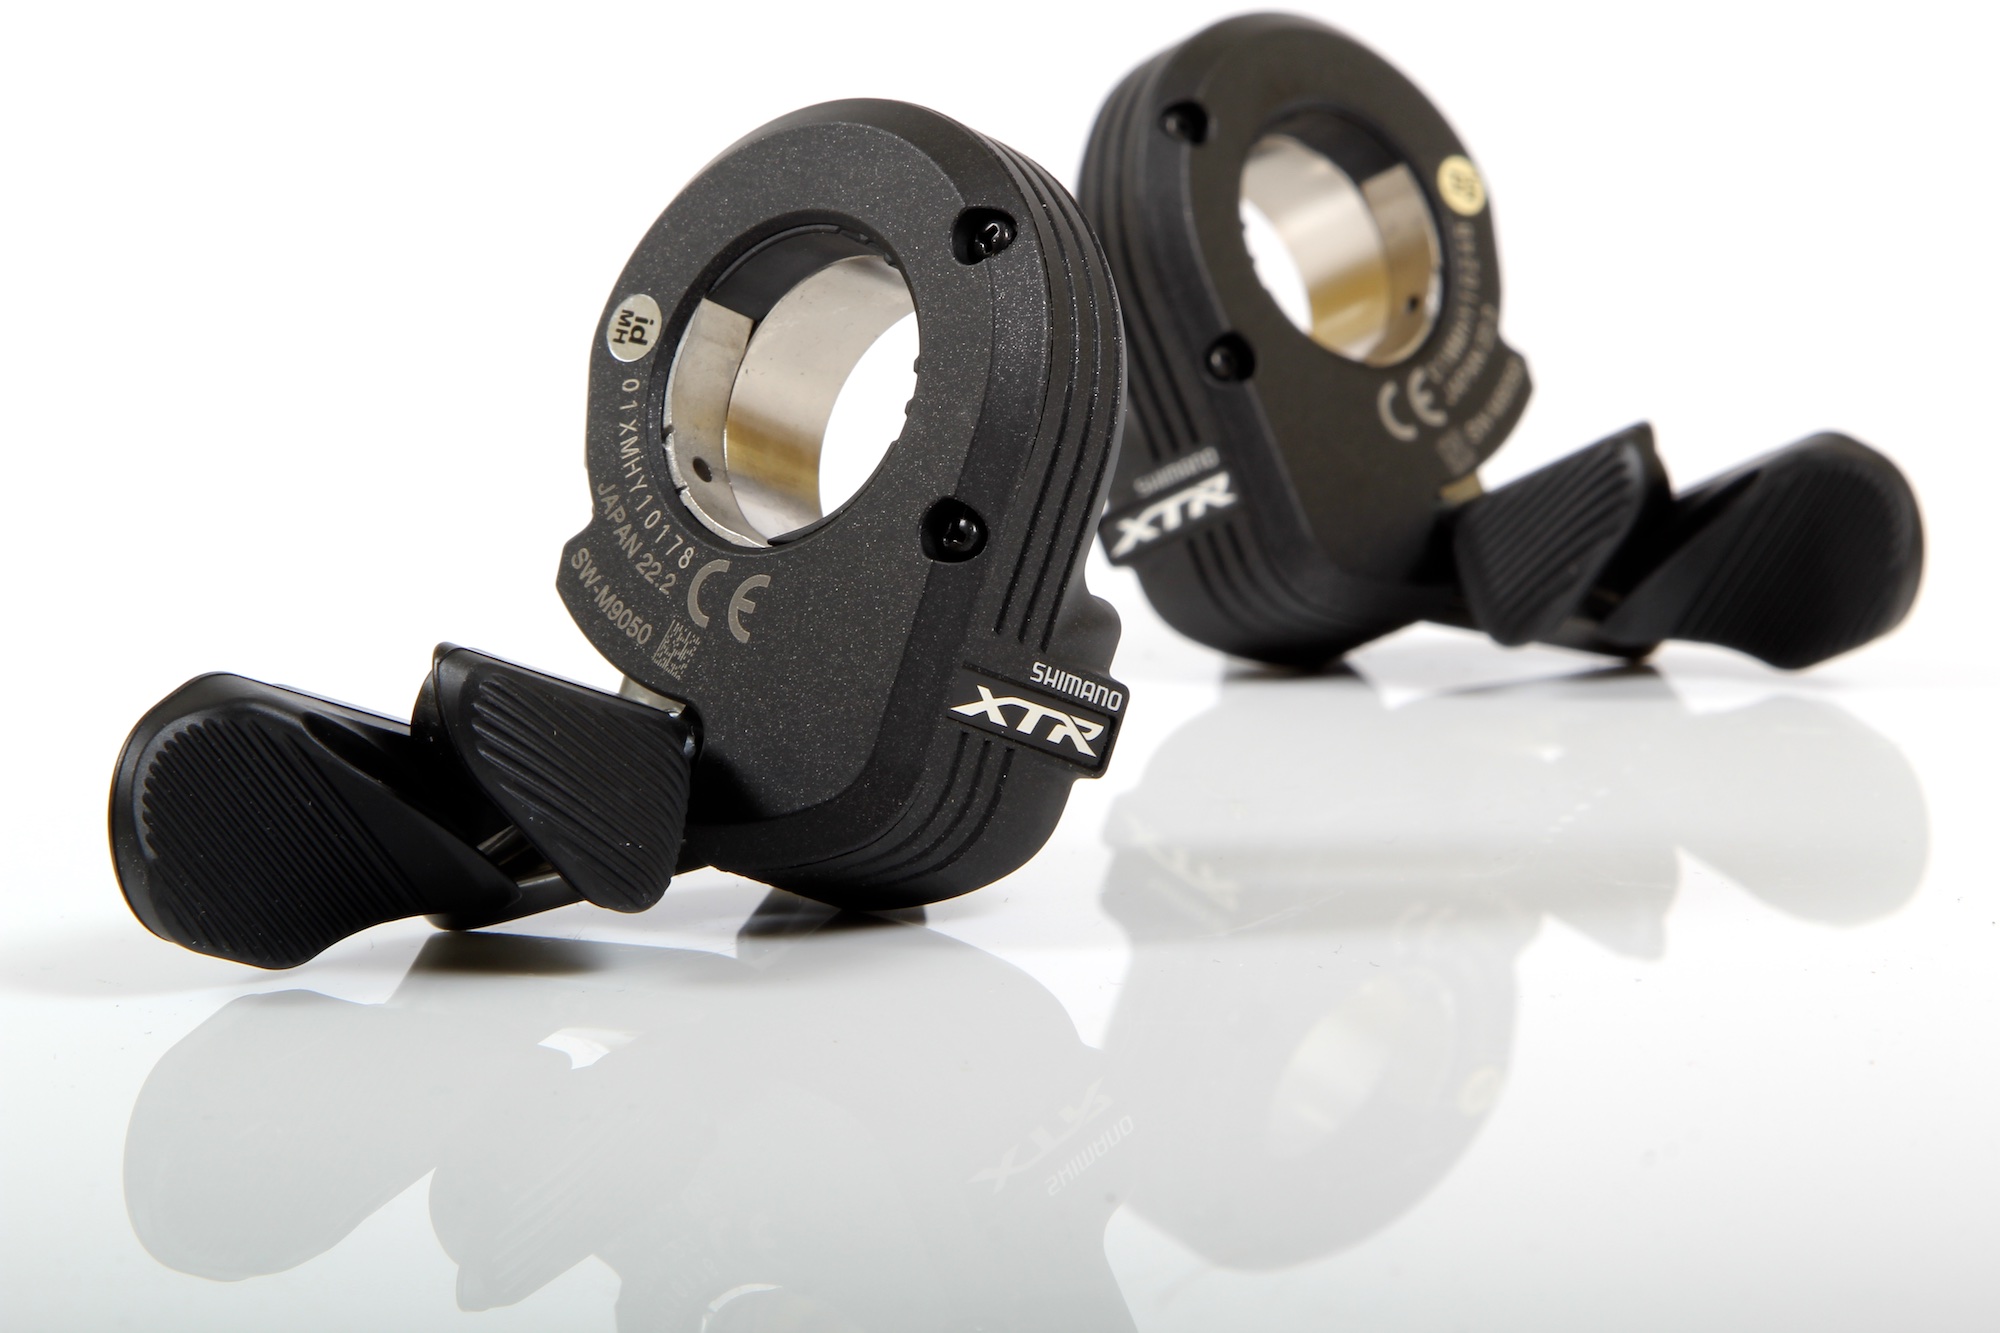
The shifters themselves are one of the neatest elements in the whole groupset. They have sturdy highly-textured paddles, which have a really positive mechanical click to them (unlike road bike Di2 shifting, that kind of feels like pushing a Nintendo controller). For now, we’re running both left and right shifters, though later we’ll experiment with running just the one using the Syncro Shift mode.

The final element of the cockpit area is the display unit which mounts alongside the stem. We’ve heard plenty of mutterings from people saying it’s one element of the system they could do without, but it’s very unobtrusive in fact, and carries all kinds of good info about battery life, shift mode as well as facilitating adjustment of the derailleurs.
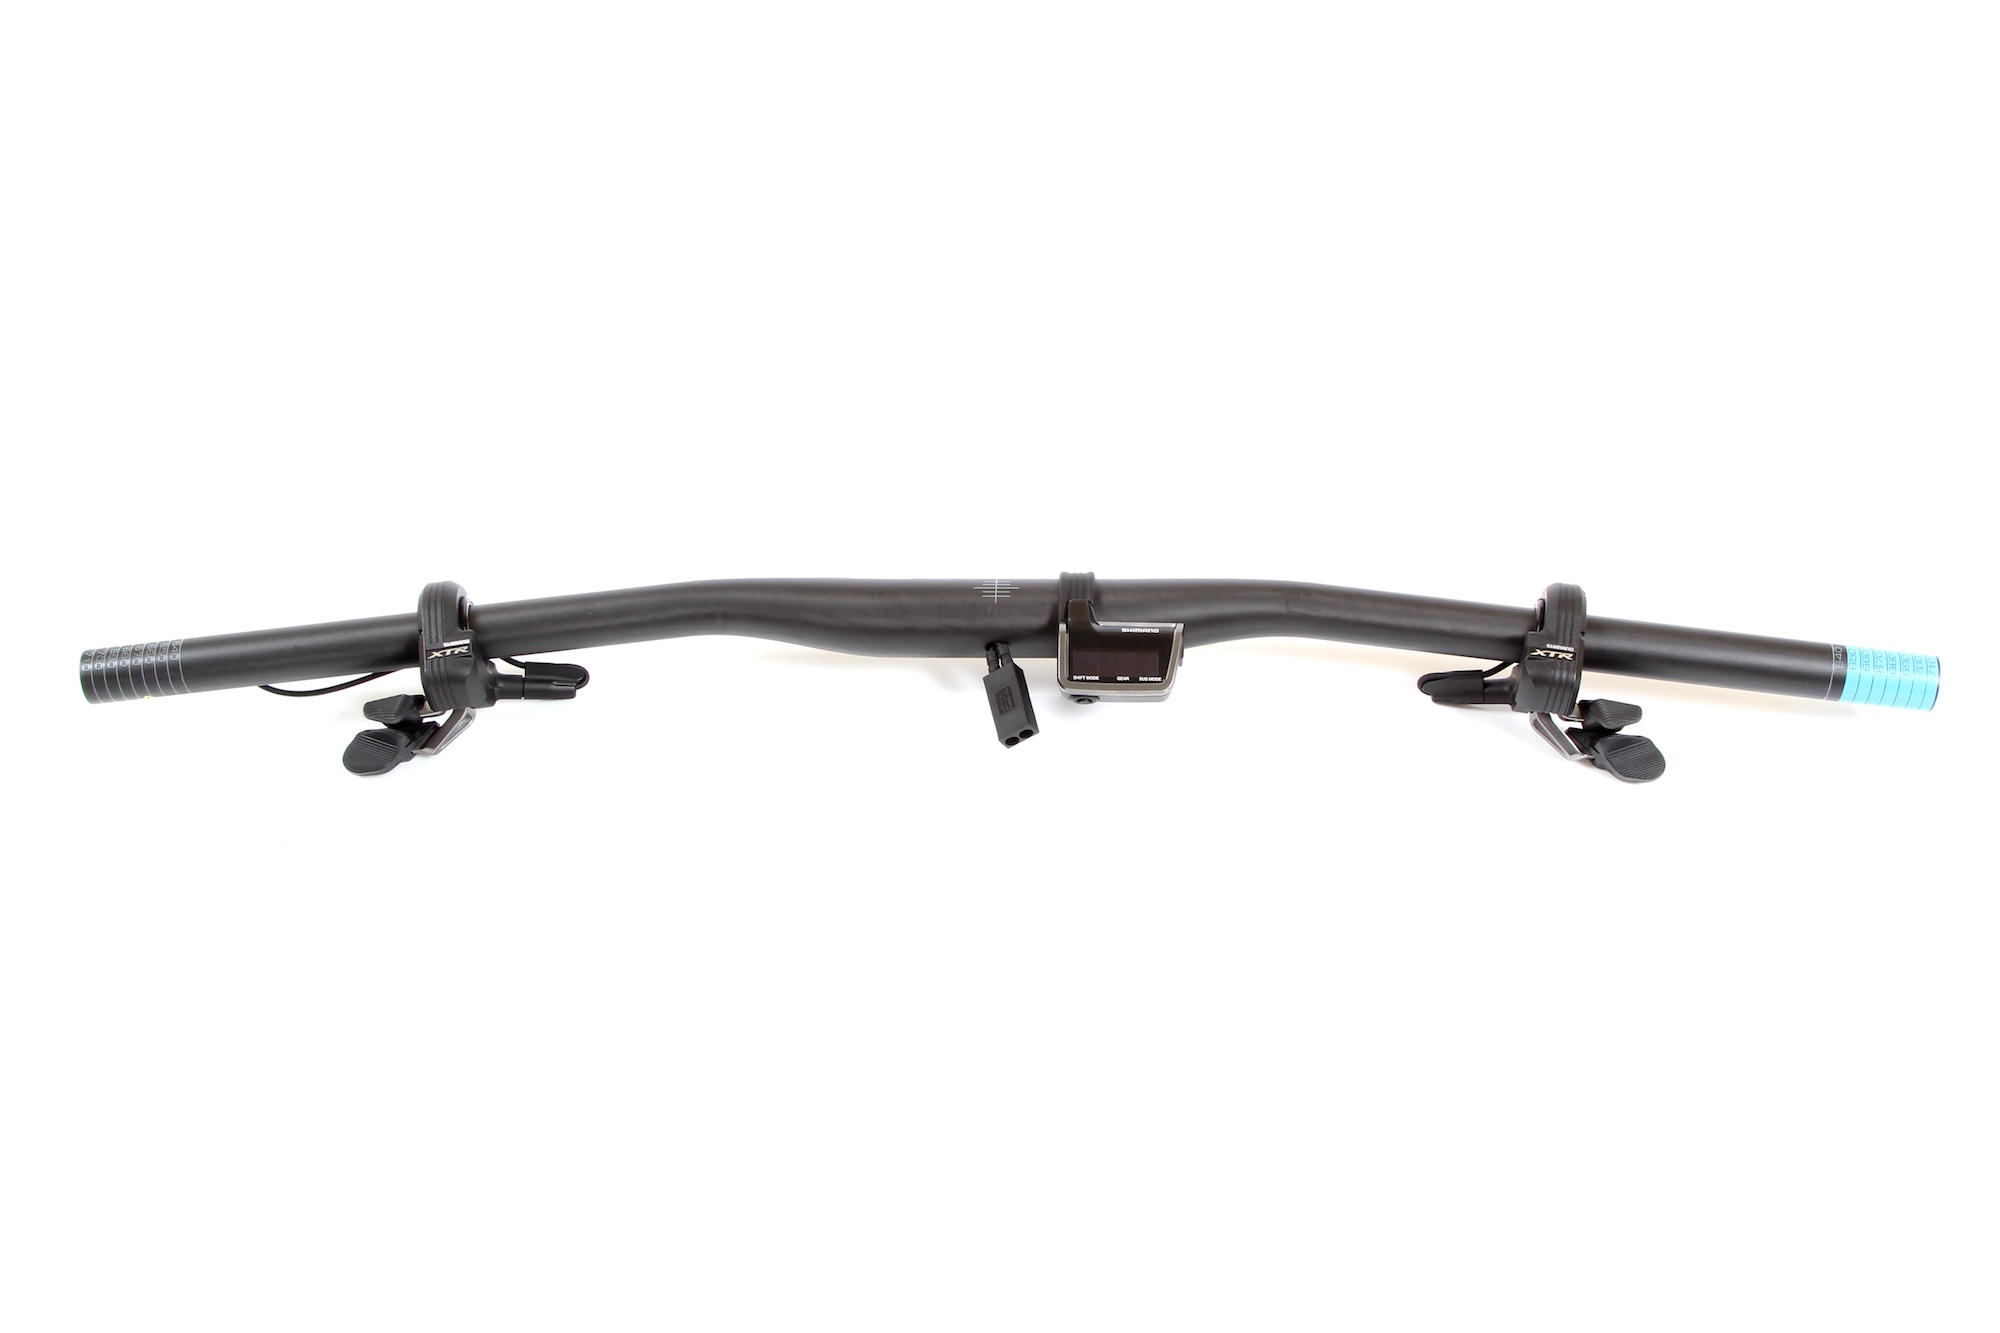
We used the two 500m wires to run from each of the shifters and back out the port in the centre of the bars, and into a junction box. The junction box would then be housed inside the body of the stem. Our experience is that the 500mm wires are only just long enough for the job – in this configuration they’re pulled quite tight. Ideally, we’d have gone with slightly longer wires to make threading them easier. As it stands, if we ever wanted to swap the current 720mm bar for the 740mm version, then we’ll need to install some longer wires to make it work.

Next up we installed the fork and stem. The stem is a little different – it uses a threaded collar/insert to preload the headset, which removes the need to run a star nut. Without a star nut, you’re able to install the Di2 battery into the fork steerer, a feature that we didn’t take advantage of as the Pivot already has its neat battery port. If you did want to go down the route of a steerer-mounted battery, it’s worth noting that the PRO Tharsis stem is not available in lengths shorter than 80mm.

From the junction box we ran two wires – a 250mm wire to the display unit, and the 1000mm wire to the battery – with both wires exiting from inside the stem on the lower edge of the face plate. Although super neat, mounting the junction box inside the stem was a super tight fit – the cables had to be bent pretty severely to get it all in. If you were hoping to run a shorter stem, you’ll need to find a different location for the junction box – either inside the handlebar (yes, that’s an option), or externally somewhere.


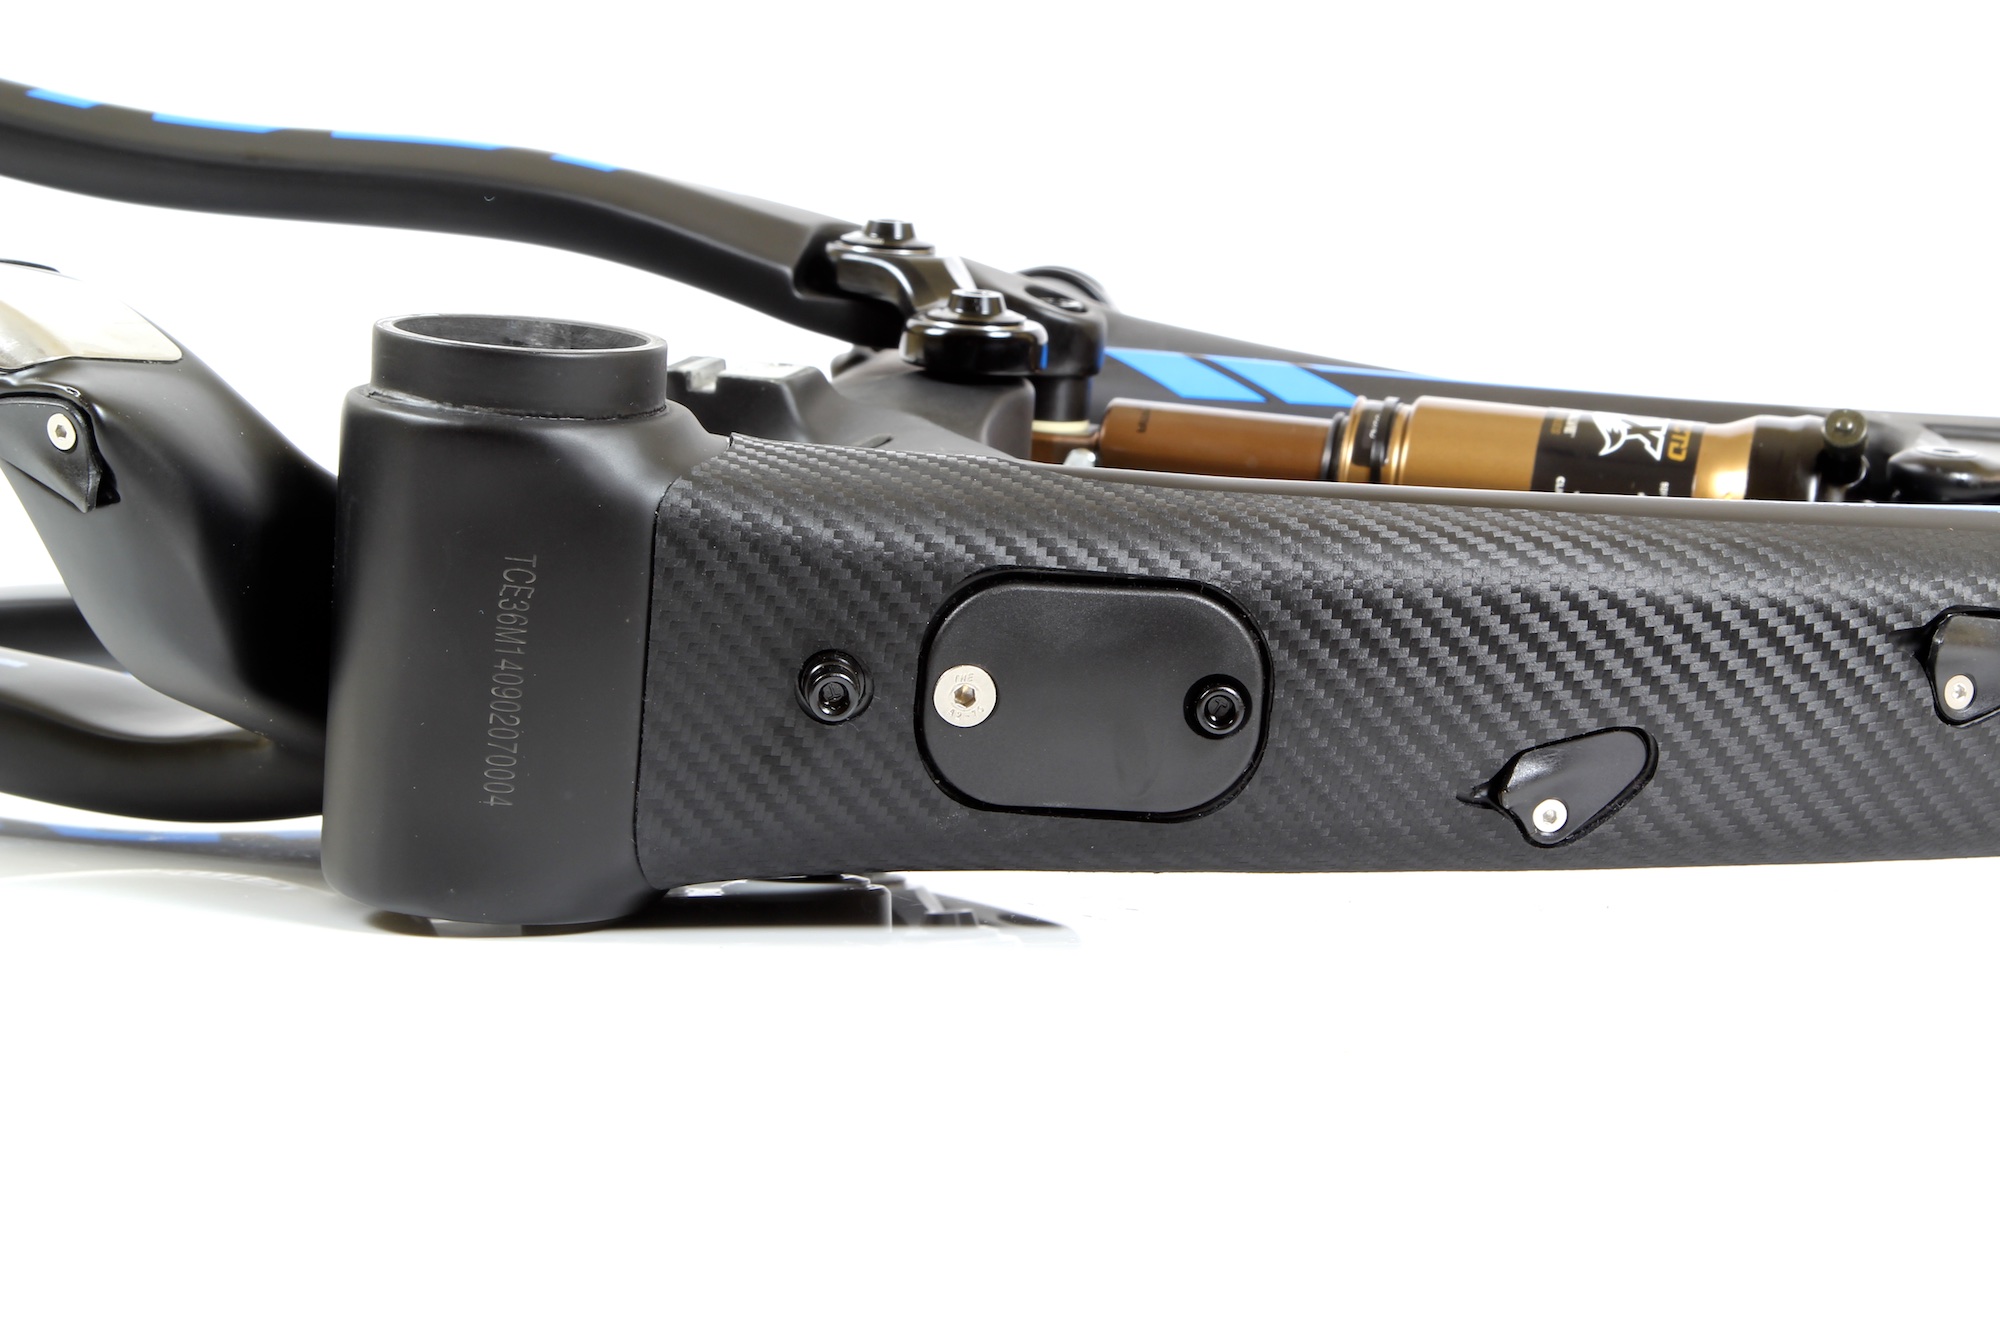
The longer 1000mm wire was then routed inside the down tube to another junction box, which we were able to easily install via the battery port. Into this second junction box, we also plugged the wires for the front derailleur (300mm wire), rear derailleur (750mm wire) and battery pack (300mm wire).
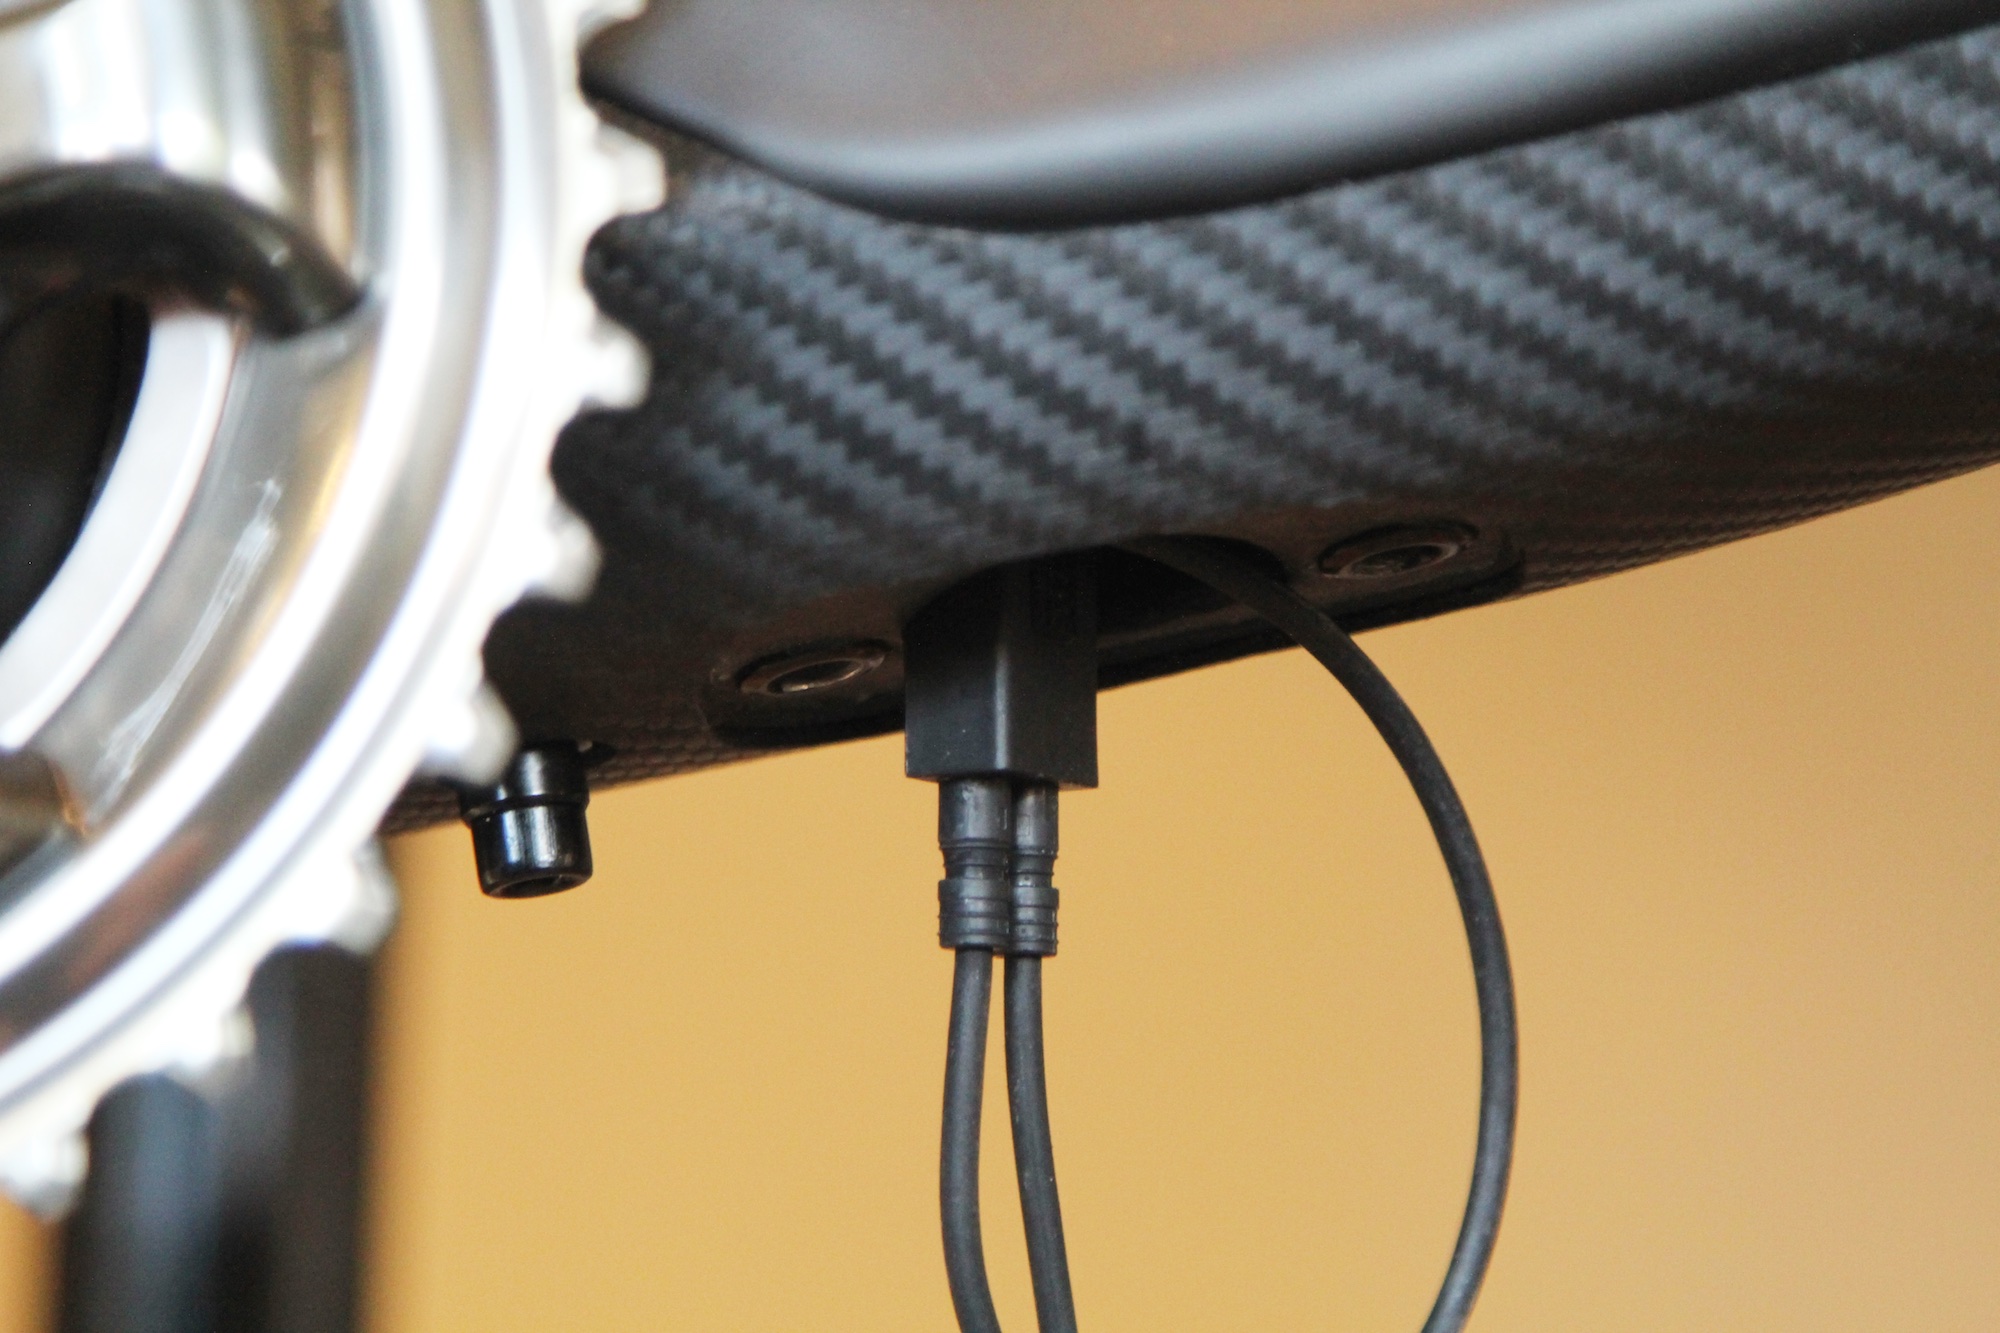

It was here that the Pivot’s Di2 port system came into its own. While threading the cables through the swingarm for the rear derailleur was enough to make us weep (read our point above about using a proper internal cabling tool/kit), the end result is exceptionally clean. The battery port tucks the whole hoohah up inside the seat tube perfectly too, and because all the battery charging is done via the display unit, there’s no need to ever actually take it out of the frame again.
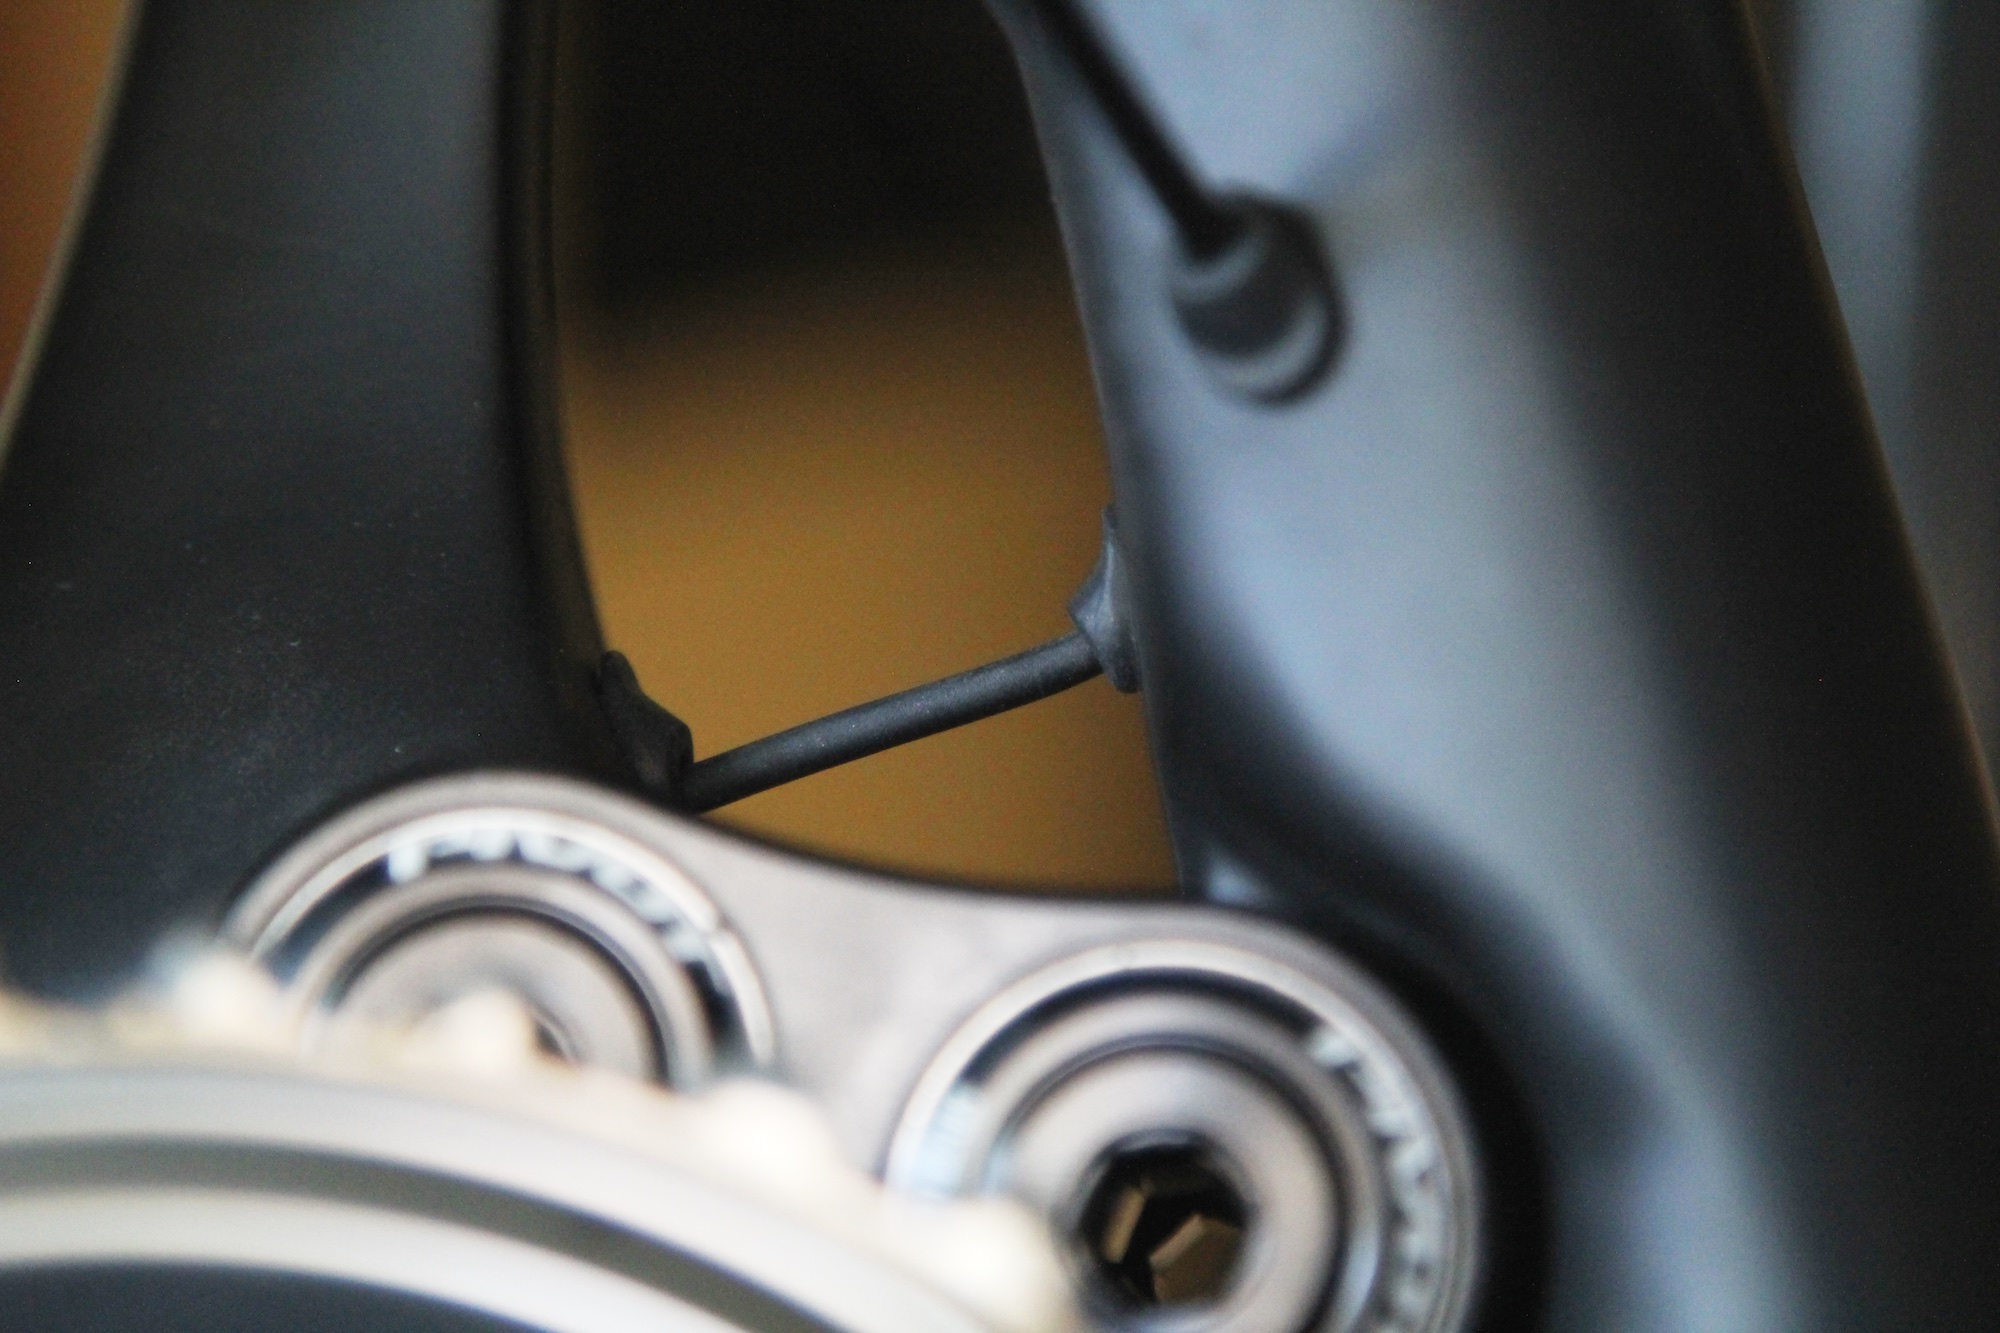


Installing the derailleurs is a damn sight easier with Di2 than with non-electric shifting. There’s no trimming cable housings, fitting cable crimps or fiddling with barrel adjusters. You just bolt the derailleurs on in the regular fashion and plug in the wires and they come alive like magic.

Setting the derailleurs up is a largely a plug and play affair too. You simply set the limits up limit for the for rear derailleur, shift to the gear number five, then change the computer to ‘adjustment mode’ which allows you to make tiny tweaks to the derailleur position using the shift paddles to get it perfectly aligned. You then set the lower limit and b-tension and you’re done. The front mech is even easier, as the lower limit is all you need to worry about.


The final step is to charge the battery, which is done via a port on the side of the display unit. A full charge takes about an hour and a half. Shimano are reluctant to put a figure on how many shifts a fully charged battery will give you, but if it’s anything like their road Di2 shifting, a few weeks of regular riding wouldn’t be out of the question.
Overall, the installation process did take us longer than what we’d usually expect with mechanical drivetrain, but we put that down to inexperience – this was our very first Di2 build, while we’ve been building bikes with cables for decades. And having said that, some recent bike builds we’ve had to contend with, in this era of internally cabled everything, have been equally as tricky.

Knowing what we do know about how it all goes together and what length cables should be used where, we’d love to have another go at building a Di2 bike from scratch, as we think the whole process would be quite fast and smooth. The actual adjustment element once all the components and wiring were in place was far easier than with mechanical shifting, and hopefully it’ll require a lot less maintenance in the long term too.
Feel free to post any questions you have in the comments section below too, and we’ll do our best to answer them.