Wil takes us through his favourite XC bike upgrades
You’ve already got a bike that you absolutely love, but lately you’ve found yourself riding increasingly more technical trails, and you’ve been doing your level best to keep up with some of your faster mates too. The bike is great, spot-on for what it’s designed for. Efficient, light, quick up the climbs, but not quite cutting the mustard on those descents. It’s a bit too nervous and sketchy on the steep stuff. And it’s probably not quite as versatile as you’d like for taking to new trails further from home. It’d be real nice if it was just a little more planted, and had a little more grip. While we’re at it, a tad more comfort for rougher trails would be bloody lovely too.
So the question is; do you bite the bullet and buy a whole new bike? Sure, that’s an option. But that’s potentially a lot of cash to outlay, and you still really like your current bike, it’s mint. Also, the market isn’t exactly flush with stock at the moment. It could be a heckuva long wait for a new bike.
Instead of replacing your bike then, what about making a few choice upgrades instead?

XC Gets Rad
XC (Cross-Country) used to be cool. Then it became uncool. But now it’s starting to become cool again. I think. Well, maybe that’s a stretch. It’s about as cool as anyone can look while wearing a helmet and figure-hugging activewear.
Questionable costumes aside, a big part of XC’s resurgence is due to World Cup level XCO racing becoming way more interesting to watch. The competition across all divisions – women’s, men’s, youth and elite – is absolutely fierce, and the courses have become super technical, delivering thrilling viewing on TV. In fact, more people these days are watching XC than Downhill. Perhaps the group racing format is simply more interesting for fans? Or perhaps the riding is more relatable? Whatever the reason, it’s popular.
Another factor towards XC’s ongoing popularity in Australia is the fact that the best mountain bike events going are destination based multi-day stage races. Events like the Cape to Cape, Port to Port, Redback and Dragon Trail.
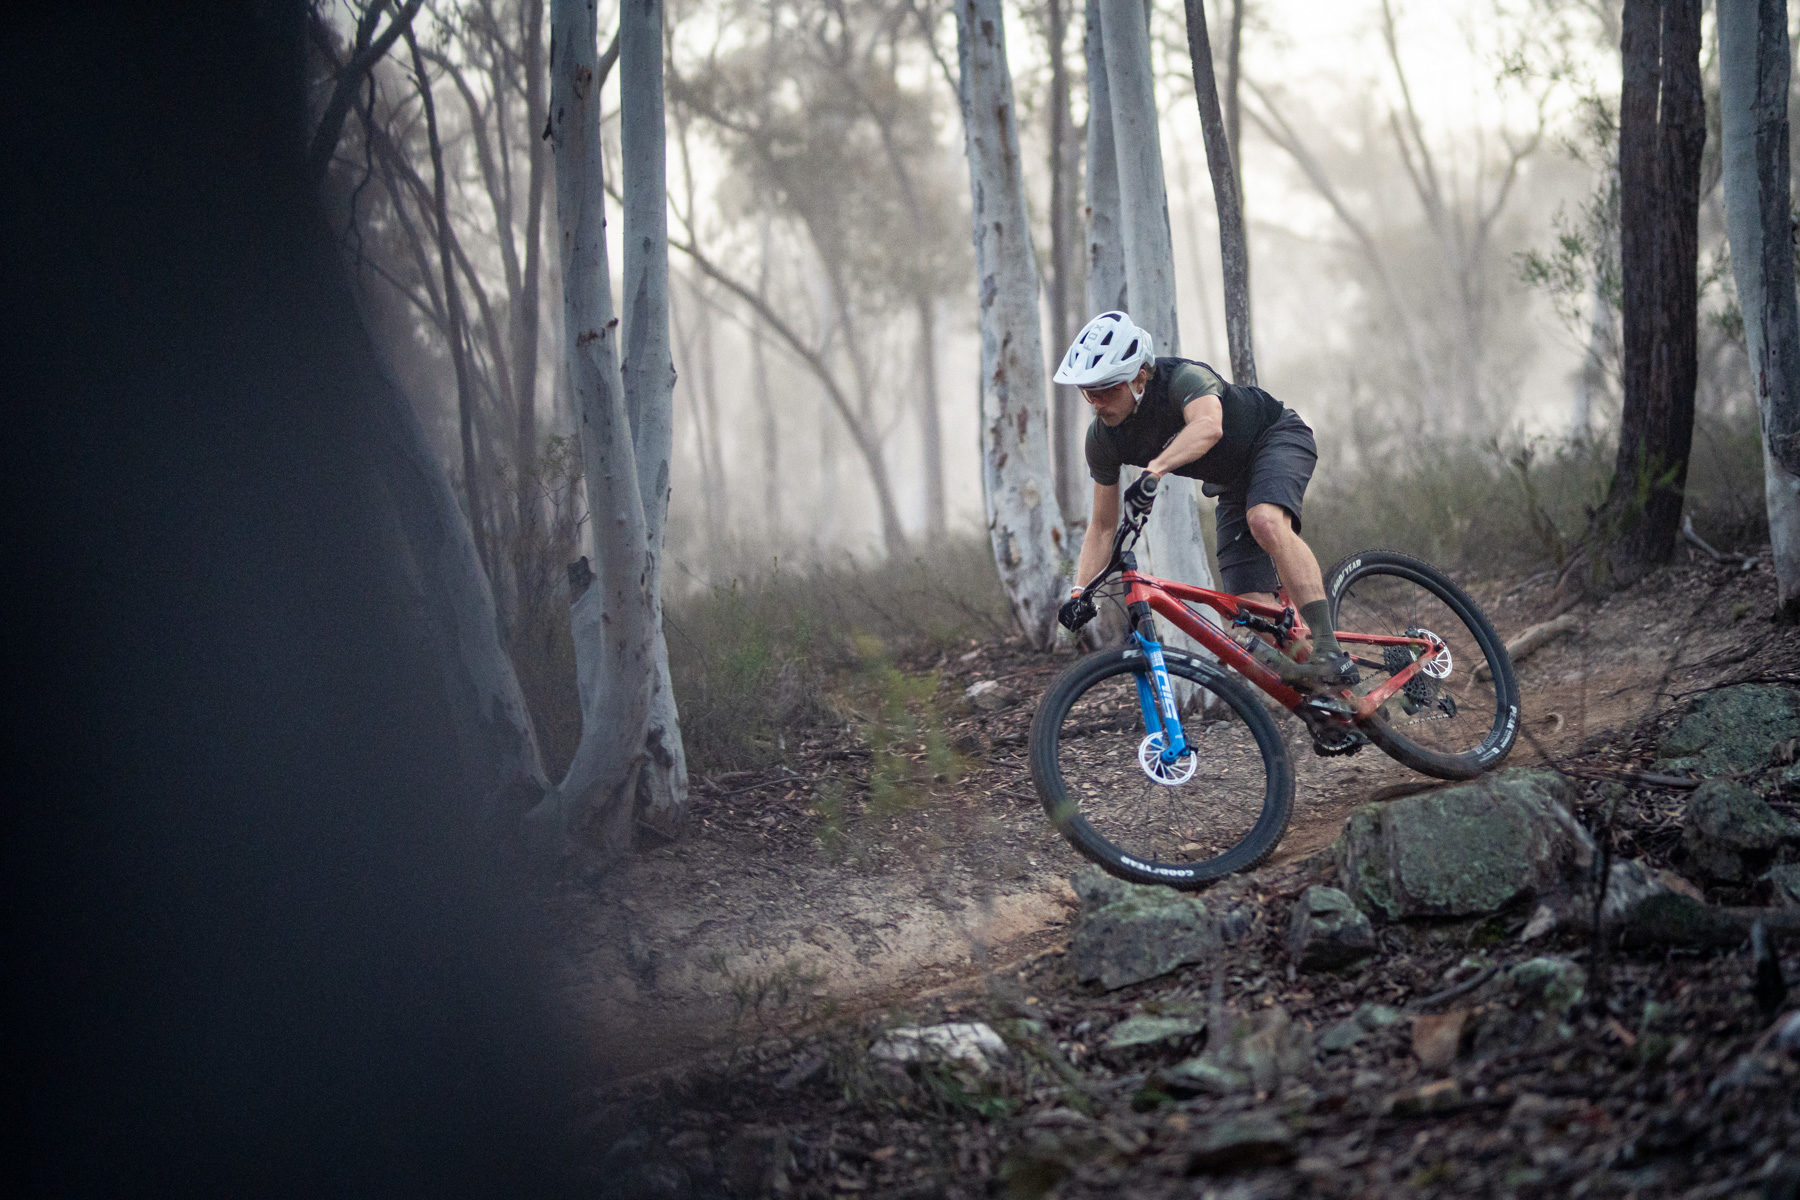
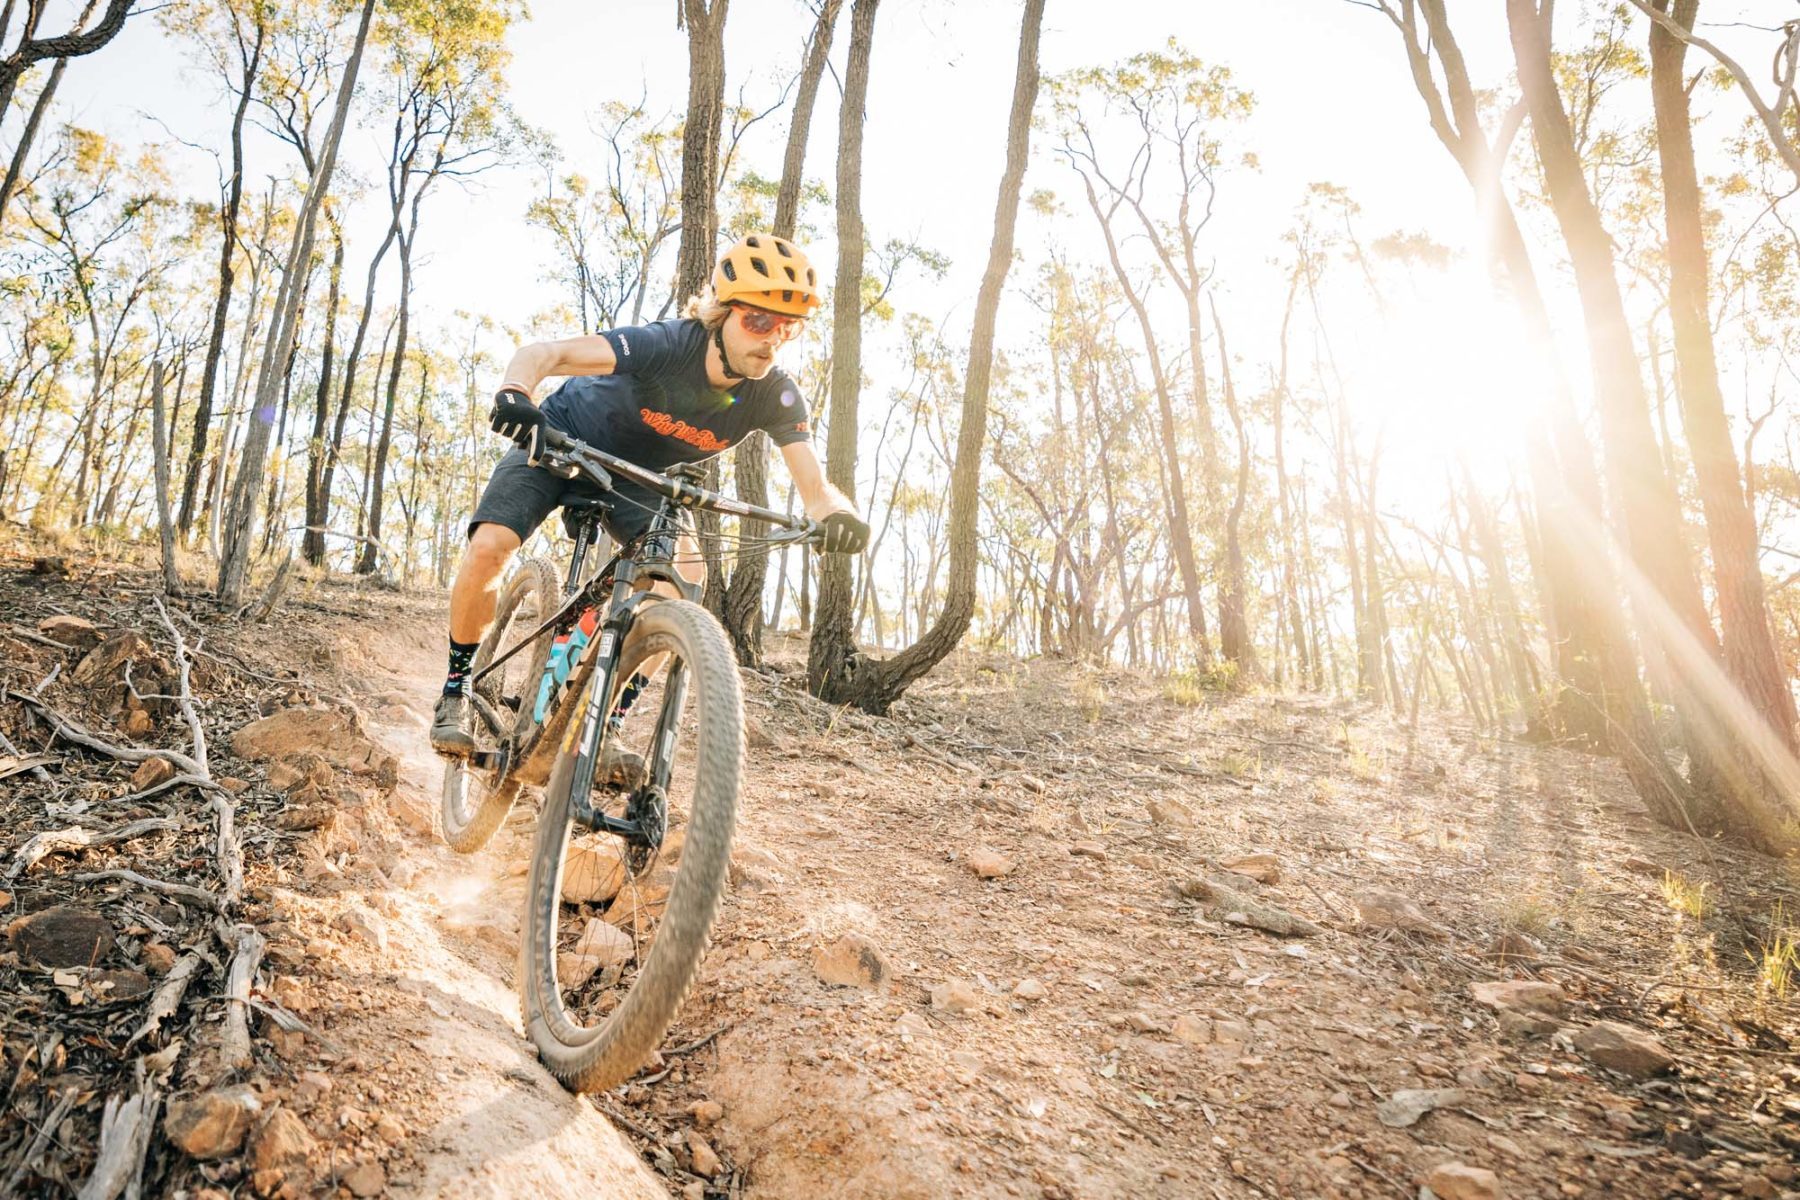
The final part of XC’s gradual de-dorkification is the fact that XC bikes are also vastly less terrifying than they used to be. Suspension performance has improved out of sight, contemporary geometry is far more confidence-inspiring, and components are evolving accordingly. All of that means that modern XC bikes can be ridden harder and faster than ever before, without causing you to shit your dacks every time you ride a black trail.
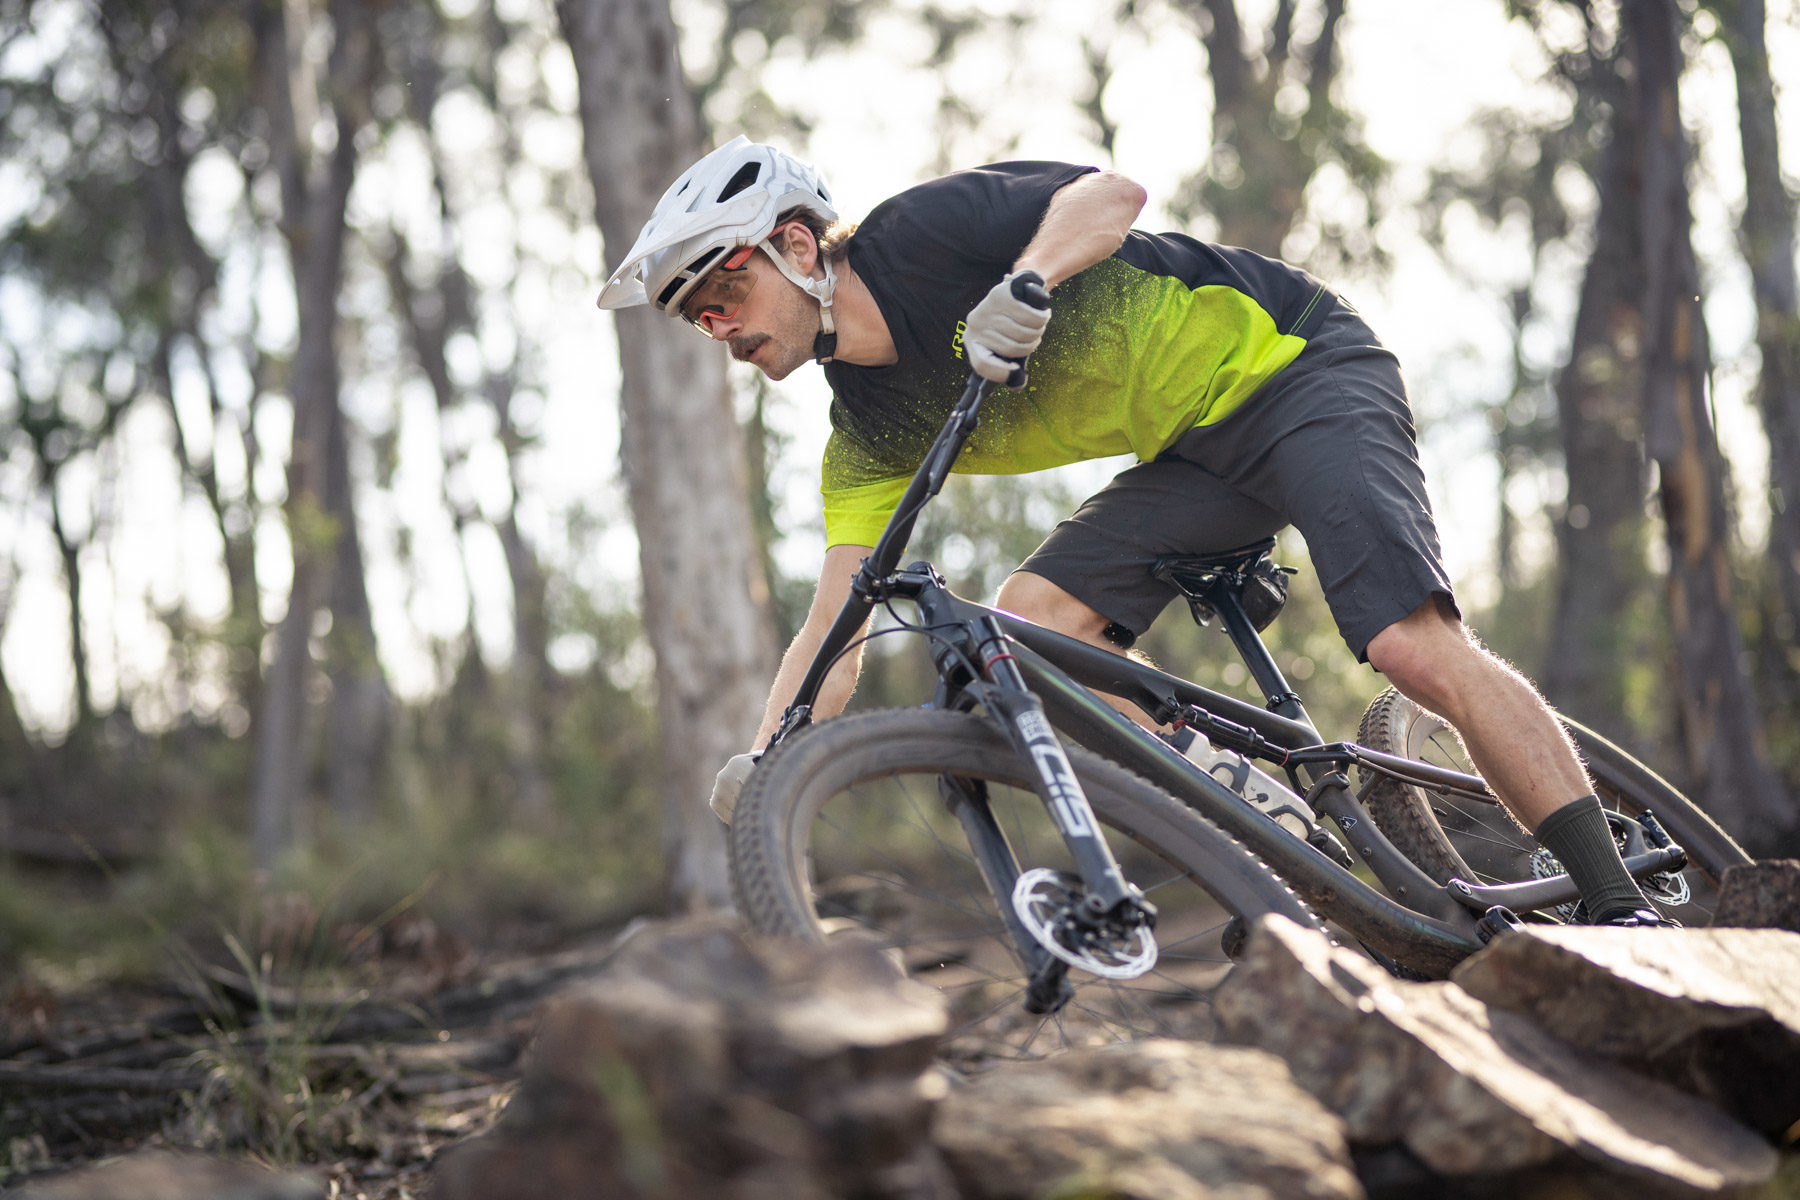
I’ve spent a load of time on some of the latest and greatest XC bikes on the market, and there’s no denying that you can get an impressively versatile package these days, which still only weighs a couple kilos more than your average skinny tyre road bike. As part of the review process, I’m often swapping around parts and trying out different setups to see what additional performance we can squeeze out of those test bikes. After all, no one bike is perfect right? Some of those changes end up being quite subtle, while others can completely transform the bike’s personality, sometimes for the worse, most of the time for the better.
With that in mind, and for those of you who would rather not buy a whole new bike, I’ve put together a list of our eight top upgrades to help unlock the capability, comfort, and fun factor of your XC bike.

1. Brace Yo’self
One of the easiest changes you can make to improve an XC bike’s stability is by fitting a wider handlebar. This might seem like an obvious upgrade, but we’re continually surprised to see a lot of bikes out there still fitted with awkward, narrow handlebars. As well as broadening your stance on the bike, a wider bar also gives you more leverage over the front end steering, and it also allows you to tip the bike over and corner more assertively.
Of course there is a limit to how wide you can go. A wide bar won’t work for every rider and every trail, and both your height and build will play important roles in determining the ideal width.
That being said, we’re starting to see a lot more XC bikes fitted with 760mm wide bars as standard. That includes the latest Cannondale Scalpel, Specialized Epic and Orbea Oiz. Polygon is fitting 760mm wide bars to its budget full suspension XC bikes, and even Canyon, a typically conservative brand, is outfitting its ultra-racy Exceed CFR hardtail with a 740mm wide bar as standard.
Not everyone is embracing the new-school though. The Trek Supercaliber I recently tested still has 720mm bars, and the difference was immediately noticeable alongside the competition. So too was the Giant Stance 29, which came fitted with itty-bitty 690mm bars. In both cases, I decided to bring them into the future with a 760mm wide Renthal Fatbar. This made an immediate improvement to control and stability, and it also made for a more spacious and open cockpit. A recommended upgrade for both bikes.
For most XC bikes and riders, a 760mm wide bar will be a good place to start – I wouldn’t suggest going much bigger than that. And if 760mm is too wide, you can of course easily trim them down with a hacksaw.
Other things to take into account? Those Renthal carbon bars have a 35mm diameter, and that means they’re very stiff. For a lightweight, short-travel XC bike that’s already quite firm, a 31.8mm bar will (all things considered equal) offer better compliance. Depending on your bike’s geometry and reach, you may also want to consider going a little shorter on the stem as you go wider on the bars. The general rule of thumb is that for every 20mm increase in bar width, you’ll want to go 10mm shorter on the stem. It’s important not to go too short though, especially with a steep head angle, as it can make the steering overly light and twitchy. As with all changes, there’s a balance to be had, so consider making one change at a time.

2. Fit A Dropper
A wider bar is great, but the biggest upgrade you can make to your XC bike? Or any other mountain bike for that matter? That’d be a dropper post, duh!
This is another obvious one, particularly as we’re seeing more and more World Cup XC riders choosing to run a dropper. And if the skinniest, pointiest, and most skilled riders in the world see the advantage of running a dropper post, then you know the benefits will be even more pronounced for mere mortals like us. On an XC bike, I’ve found a dropper doesn’t just give you more confidence to hammer the descents. It also improves your cornering performance by helping to lower your centre of gravity, encouraging you to lean the bike over through the turns. On twisty racecourses, that can allow you to stay off the brakes for longer, helping you to maintain speed and preserve energy. And outside of racing? It’s just simply more fun to ride.
Known benefits aside, dropper posts are still not commonly spec’d on stock XC bikes. The new Merida Ninety-Six is a notable exception, and Canyon is also now fitting a droppers to all the Lux range for 2021. But for most options on the market, a rigid post remains as the safest, lightest and cheapest option.
For those looking to make the leap (or drop) I can thoroughly recommend the BikeYoke Divine SL, which I’ve been using for the past year on both my Santa Cruz Blur, and more recently on the Trek Supercaliber. This lightweight dropper weighs just 401g (31.6mm) for the post on its own. By the time you add in a remote and cabling, you’re looking at around 491g in total. The total weight penalty? Compared to the stock XXX carbon post on the Supercaliber, the dropper upgrade resulted in a 319g increase. That’s about half a water bottle – a paltry amount given the huge difference it offers in the ride experience.
The Divine SL has just 80mm of travel, but as I detailed in the long-term review, that’s a good amount for XC use. Much longer than that, and using a dropper post can actually add to fatigue, seeing as you’re basically doing mini squats every time you compress and extend the post. There is also such a thing as having too much confidence on an XC bike. 80mm has worked out well for me, giving enough clearance so that I can move around the cockpit more freely on the descents, while also allowing me to make better use of the organic suspension in my elbows and knees – an important consideration for a firm, short-travel XC bike.
My experience with the Divine SL has been flawless so far, and I’ve recently converted it to 30.9mm by simply swapping the outer tube, so I can now fit it to another test bike. It’s easy to rebuild, and almost every component is serviceable and replaceable, which is mint. There are other lightweight options on the market, like the DT Swiss 232 One and the Vecnum Nivo, which I’m keen to try out. And for hardtail riders, KS also offers the LEV Ci dropper in a 27.2mm diameter.
3. Crank Up The Volume
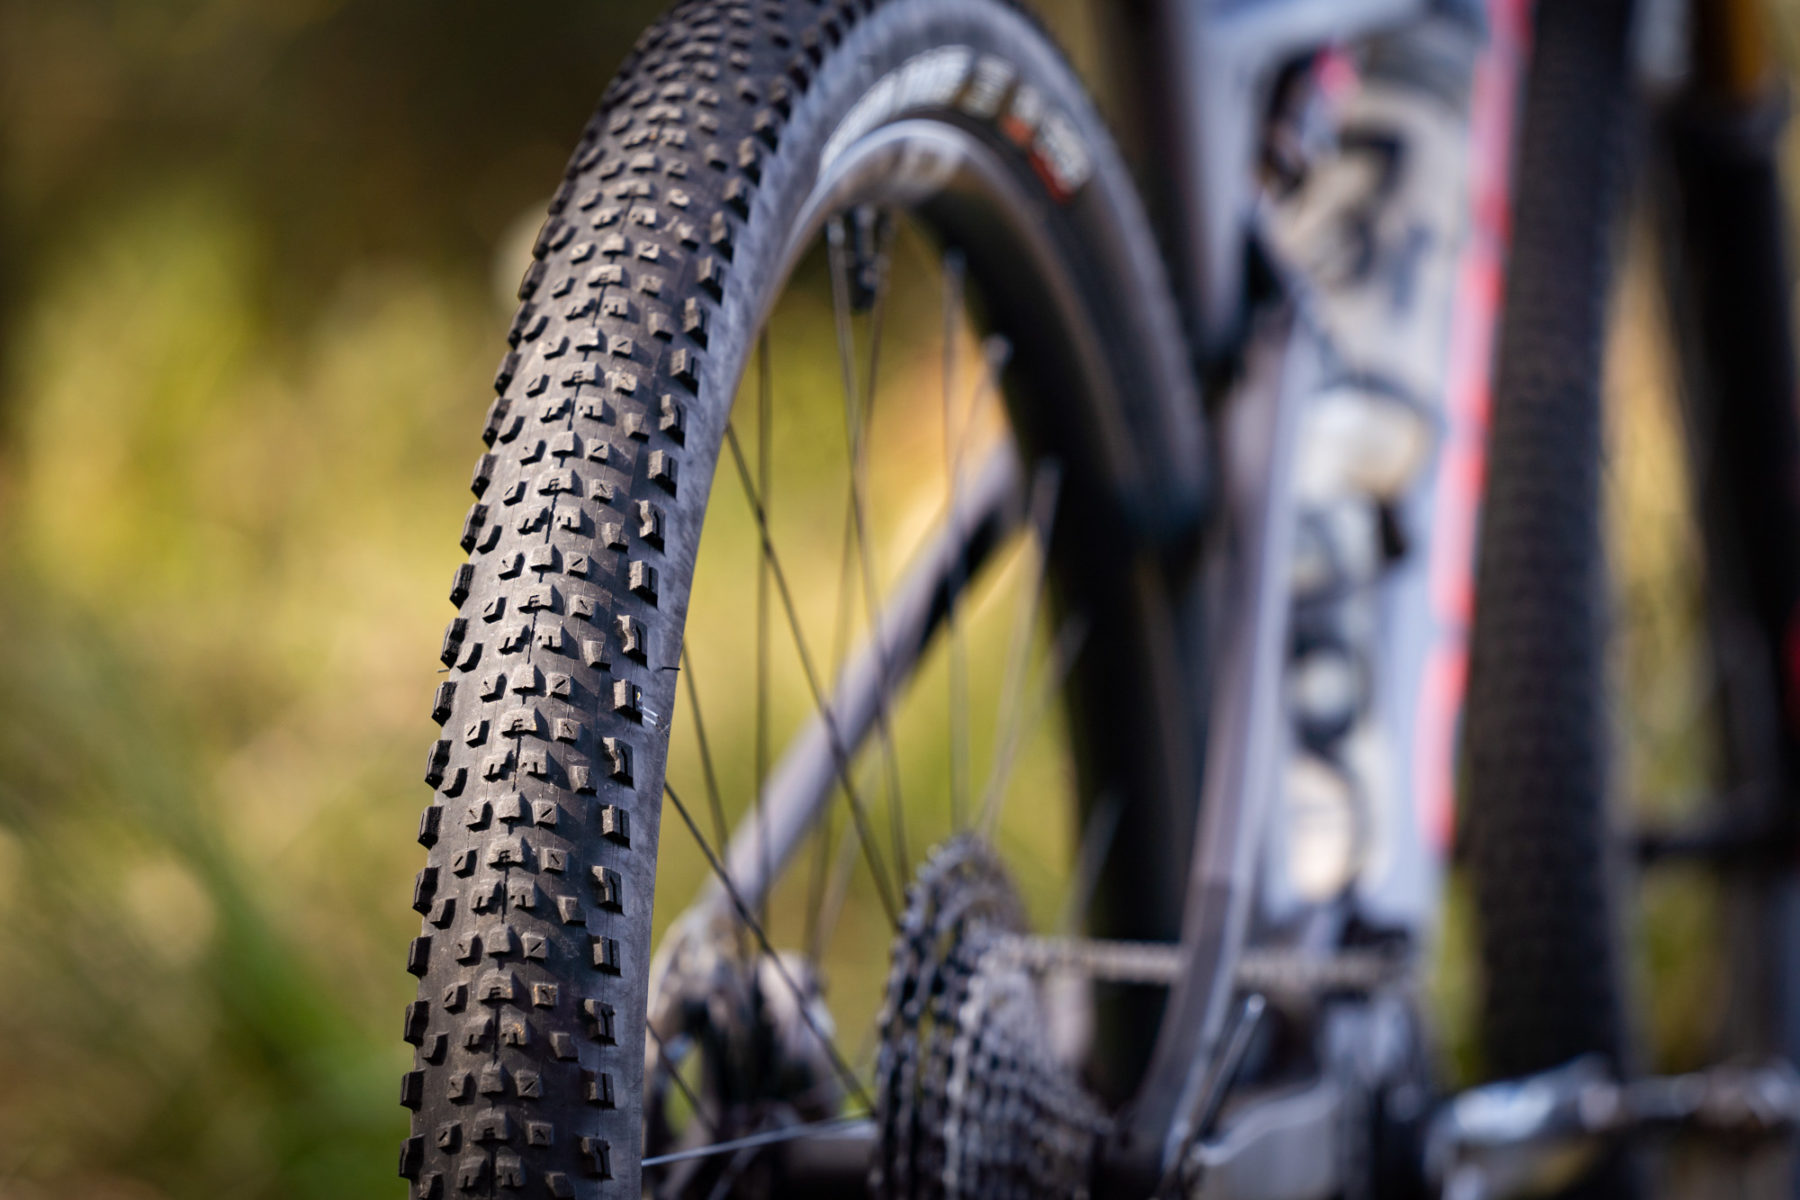
Tyres are a relatively easy and affordable way to instantly improve the feel and performance of your bike. While many XC bikes typically come fitted with 2.2in tyres, moving up to a 2.35-2.4in tyre will allow you to run lower pressures for more damping and comfort, and the broader contact patch can offer more traction too.
Of course those benefits don’t come for free. For the same given construction, a wider tyre will be heavier. And with more tread in contact with the ground, rolling resistance can potentially increase, though that is frequently being debated – both in the road and off-road world.
That aside, many older generation XC frames and forks are somewhat limited on tyre clearance. However, that’s improving thanks to Boost hub spacing, 1x drivetrains, and cleverly engineered chainstay yokes. As a result, some modern XC bikes are now capable of accommodating up to a2.4in wide tyre.
The rubber is getting better too, and a finely treaded tyre can be surprisingly quick rolling even in those larger sizes. Case in point; the latest 2.4in WT (Wide Trail) tyres from Maxxis. I’ve been using the Rekon Race EXO and the Aspen EXO for the past few months, and it’s proven to be a brilliant combo for riding a variety of XC trails.

These WT tyres are optimised for use on rims with a 30mm inner width. However, Maxxis says you can fit them to rims down to 25mm wide. I fitted them to the Canyon Exceed CFR Team with 30mm wide DT Swiss XRC 1200 wheels, and I’ve also used them on the Trek Supercaliber with 29mm wide Bontrager Kovee XXX wheels. In both cases, there was sufficient clearance in both the frame and fork, though it was definitely tighter on the back of the Supercaliber.
Despite the broader width, both tyres are still quite light thanks to their 120tpi construction, and they’re not that much heavier than their skinnier counterparts (749g for the Rekon Race & 729g for the Aspen, confirmed). The higher volume rubber has allowed me to run lower pressures though, around 20-23psi, providing noticeably greater damping on rough terrain. Furthermore, a wider tyre can actually be faster on choppy trails, because it more easily deforms over roots and rocks rather than bouncing off of them, resulting in increased forward momentum. The added compliance also decreases rider fatigue on longer rides too.
In my experience, the Aspen is more supple and much more effective in this 2.4in size. It’s still very fast rolling, but it absorbs trail debris more smoothly, and overall grip is vastly more consistent. Up front, the Rekon Race is a little slower, but it does offer more traction and improved versatility, particularly across loose conditions. If I was less concerned about speed, I’d likely run the Rekon Race front and rear.
These wouldn’t be my first choice for wet conditions, but for typical XC race courses in the dry, the confidence-inspiring Rekon Race up front and speedy drift-happy Aspen on the rear is a superb combination. And at $75 each for these dual compound versions, they’re not ridiculously expensive either.
4. Support That Rubber
You’ll know where I’m going with this one. If you’re hoping to take advantage of your frame and fork’s clearance to run those wider tyres we just talked about, then you’ll want to be thinking about the wheels you’re fitting them to.
Wide rims are nothing new, but they’re still emerging within the XC world. High-end bikes are evolving more quickly, though it’s still common to see entry and mid-level XC bikes supplied with 21-23mm wide rims. As more high volume XC tyres hit the market though, expect to see wheels following suit, with rims migrating towards a 27-30mm internal width.
Why go wide? Simply put, broad rims push the tyre beads out further to provide more support, which is perhaps even more important with a lightweight, and very supple XC tyre. I’ve found I can get away with lower pressures when using the same tyres on wider rims. Even at lower pressures though, the broadened support can help to decrease deformation in the casing, resulting in better steering accuracy, with less wobble when cornering hard.
I’m not convinced that wide rims are for everyone though. Stretching a narrow tyre onto a wide rim can actually do horrible things on the trail. As well as reducing the available vertical deflection of the tyre, which results in a wooden and less comfy ride quality, you can also end up with a situation where the casing plumps out further than the tread. And with bare sidewall in contact with the trail, the consequences can be…dramatic.
From this perspective, you’ll want to make sure you’re matching the tyre and rim width together. A 25mm wide rim will be perfectly fine with a 2.25in tyre, but if you want to go for those new-school 2.4in WT tyres, then bumping up to a 30mm wide rim is the way to go.

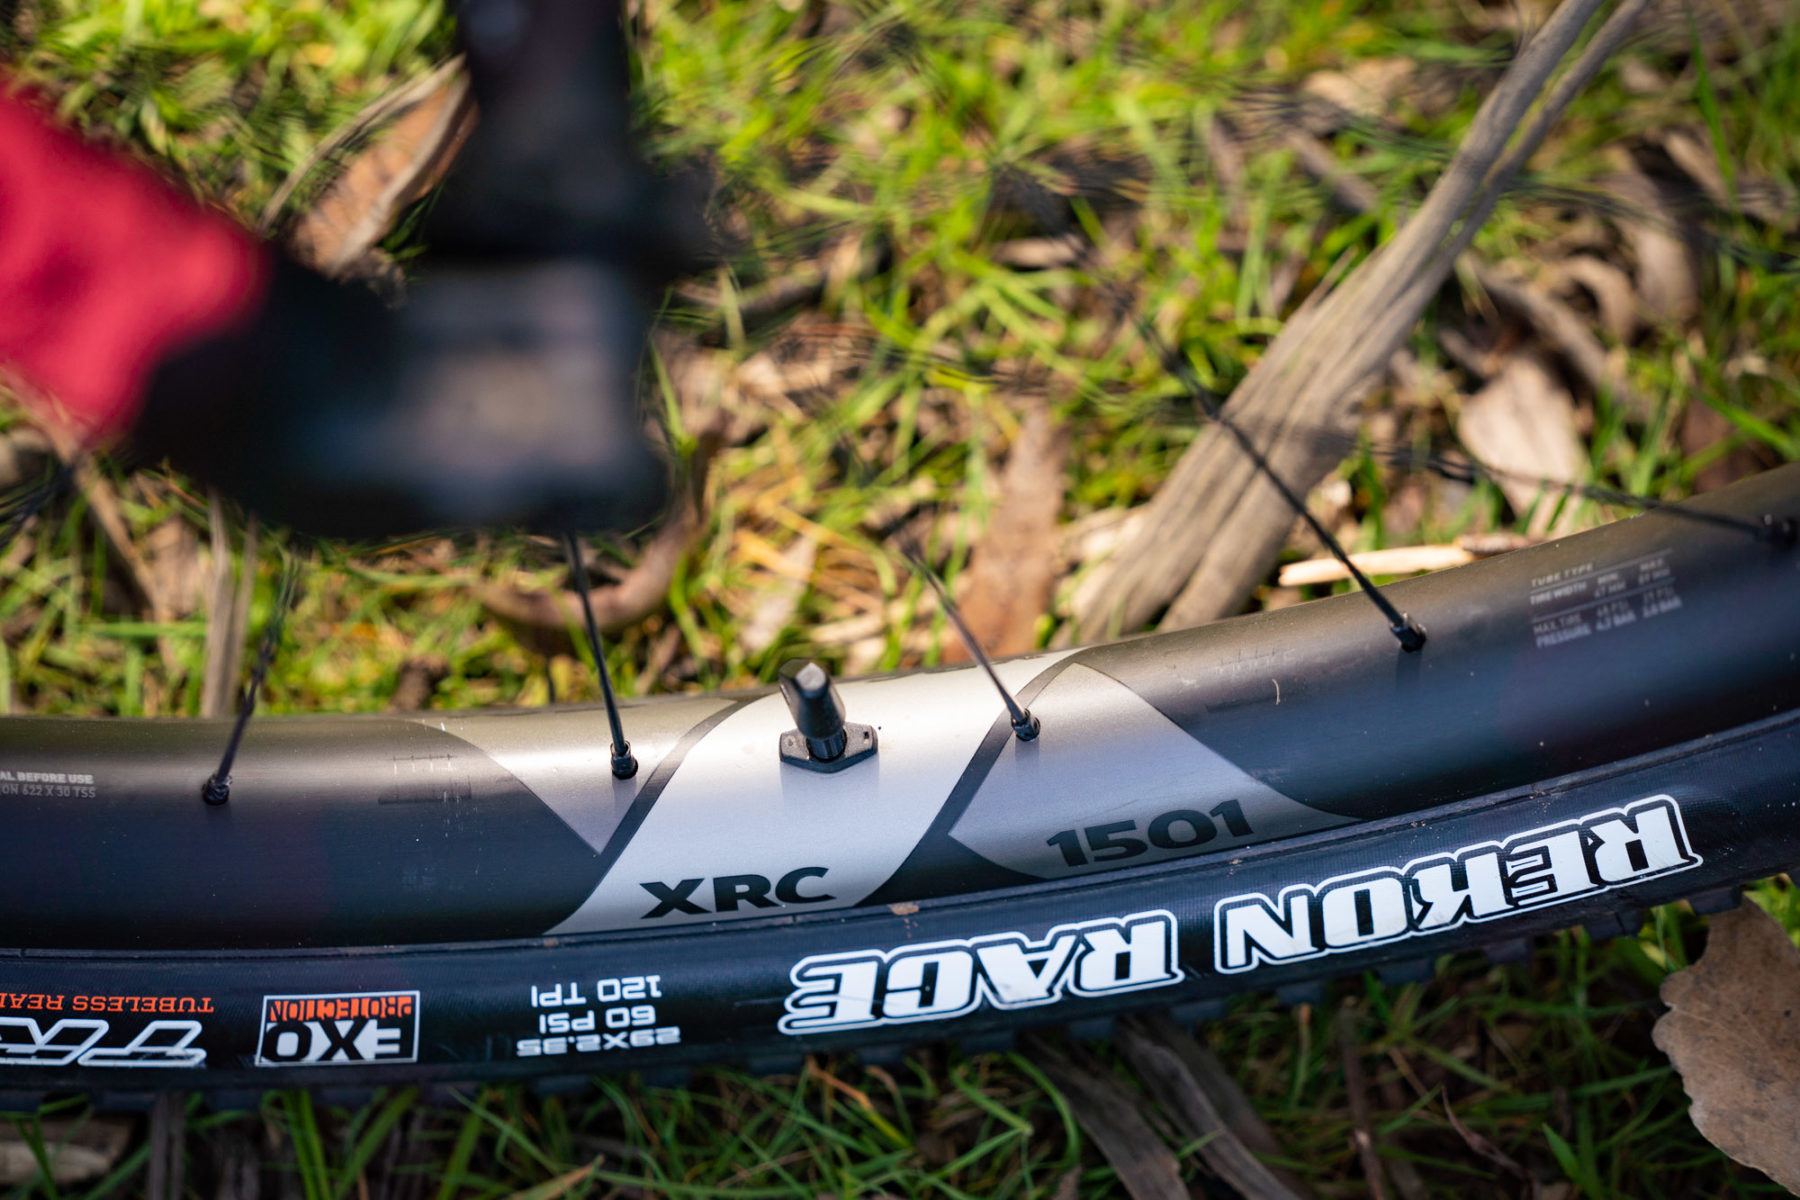
As for wheels? We’ve had a load of experience on DT Swiss’ newest carbon hoops, including the XRC 1200 that we reviewed recently, which are very lightweight (1,460g), but also bloody tough for proper trail riding. Sitting below those, the XRC 1501 wheelset that came fitted to the Orbea Oiz have been equally impressive, if a little heavier (1,581g) due to the use of 240s hubs instead of 180s. Either way the build quality is exceptional, and handling on the trail is precise. We’d have no troubles recommending either.
We’ve also had positive experiences with the Bontrager Kovee XXX wheelset on the Trek Supercaliber, and the stupendously light (as in, sub-1,300g light!) Roval Control SLs on the Specialized S-Works Epic.
What about alloy? Well, it really depends on what your definition of ‘lightweight’ is. And this might be the reason why we haven’t seen wide rims permeate the mid and entry-level side of the XC market, because there just doesn’t seem to be many lightweight alloy options. The Stan’s Arch MK3, Hunt Trail Wide, Newmen Evolution SL A.30 and Mavic Crossmax XL S wheelsets are all sufficiently broad, but we’re still talking weights around 1,800g, which is considerably heavier than their carbon counterparts. Certainly if you want to go wide and light, then you’ve got a lot more choice with a carbon wheelset.

5. Use Protection
Hold on. A tyre insert? For an XC bike? That might sound like the very definition of overkill, but allow me to explain.
For a start, there are quite a few more World Cup racers using them than you might realise. And we’re not talking Schwalbe Procore or any of the other heavy duty inserts that downhillers are using.
In my case, I’ve been using the Tyreinvader inserts from Effetto Mariposa. These lightweight inserts are made in Italy from high density EVA foam, which is a closed cell polymer that doesn’t absorb sealant. Available in a variety of sizes to suit different width tyres, their function is to add protection, reducing the likelihood of rim damage and a race-ruining pinch-flat. The inserts are just shy of 10mm thick, and they feature cutouts that facilitate sealant migration, while also reducing weight.
Speaking of, a 50mm insert weighs just 72g, which makes it one of the lightest tubeless inserts on the market. The 50mm insert is designed for 2.1-2.4in tyres, which should cover most XC users. For those 2.4in Maxxis WT tyres though, I prefer using the 55mm insert, which gives more rim coverage and a more snug fit inside the tyre, while being a whopping 10g heavier.
Fitting a Tyreinvader is pretty straightforward and a lot easier than CushCore, though spraying a bit of soapy water inside the tyre helps the insert to slide into place. Once fitted, the insert hovers above the rim, providing an additional barrier between the beads and the tyre casing. Since I never pinch-flat on the front, I’ve only ever run the inserts in the rear wheel. However, they’re light enough that those who are really prone to pinch-flats may want to consider fitting one up front as well.
On the trail, the insert is completely unnoticeable. It doesn’t bounce or shift around inside the tyre, and unlike some of the bigger volume inserts on the market, it’s not designed to interfere with the overall compression rate of the tyre. There’s a little more sidewall support, but that’s not their primary function. That said, I have been able to ride more confidently with lower pressures, which helps to smoothen out the ride. This was particularly advantageous on the very racy and stiff Canyon Exceed hardtail.
Since using the Tyreinvaders, I have drastically cut down the number of punctures that I would typically get on my local test trails. And not just with XC bikes either. In fact in four months of riding, which includes testing the Giant Trance X, Specialized Stumpjumper & Stumpjumper EVO, Polygon Siskiu T8 and Canyon Spectral 29, I’ve had just one single puncture. It was on the Orbea Oiz, though it didn’t actually happen while riding, mind you.

If you do puncture and you can’t get the tyre to seal with a plug, the downside of using an insert is that you’ll have to remove it to fit a replacement inner tube. On the day that I cut the Orbea’s rear tyre, I ended up wearing the Tyreinvader around my neck and chest, in some sort of hastily-conceived haute couture fashion, for the remainder of the ride.
Another downside is that while the material itself doesn’t absorb sealant, you will get small coagulations around its edges, which means you should really add about 50% more sealant than usual. So in effect, the weight penalty ends up being around 100g per wheel. Also, the inserts aren’t invulnerable – I did still manage to ding a rim on the Stumpjumper EVO, and a fellow tester encountered a fatal pinch-flat with his rear tyre, despite having a Tyreinvader inside. That said, these are lightweight inserts – I’d suggest riders with bigger travel trail and enduro bikes look towards a heavier duty insert, such as CushCore.
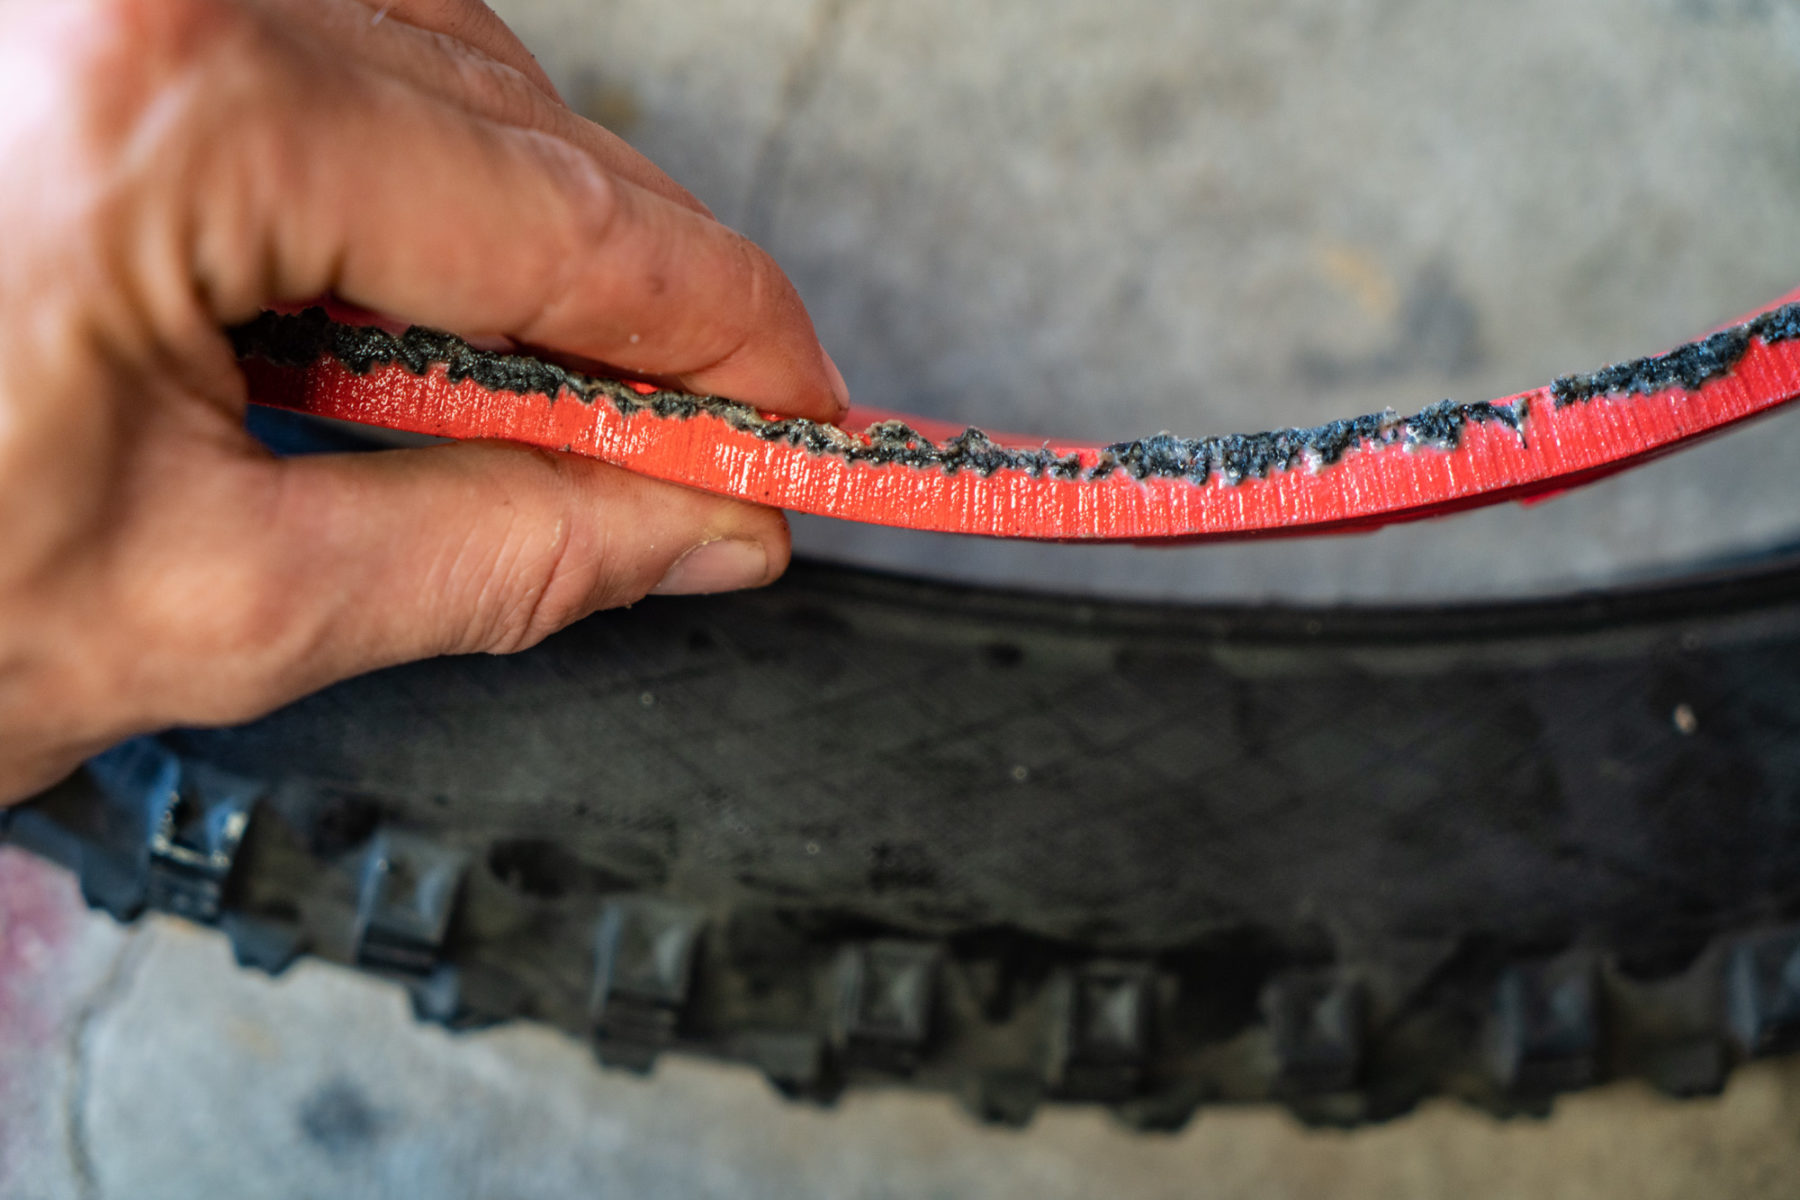
Like any insert, they also have a finite lifespan. After removing a Tyreinvader following three months of solid testing on the Siskiu T8, I discovered a myriad of cuts and slits all the way around – shown in the above photo. This means you’ll have to view it as more of a consumable item, and definitely more consumable than CushCore.
Still, the radical reduction of punctures means these inserts have paid their dues many times over already, and the reliability has been so good that I’ll no longer ride a test bike without one. Does everyone need tubeless tyre inserts? No, particularly if you favour much higher pressures and a pinch-flat is only something you’ve read about on the internet. But if you ride in rocky terrain and you’re looking for a little extra insurance to protect both your rims and tyres, while being able to increase traction from running lower pressures, then for sure put it on your list.

6. Jack It Up
Alongside a set of carbon wheels, upgrading your fork isn’t exactly going to be cheap. It’s cheaper than buying a whole new bike though, and if done right, it can also present one of the biggest opportunities to improve your bike’s ride quality.
It may come as a surprise, but a lot of 100mm travel XC bikes out there are actually rated for use with up to a 120mm fork. That includes the Oiz, Scalpel, Epic, Blur, Mach 4 SL, Spark and Supercaliber. Ever since I rode one of the earlier Santa Cruz Tallboys back in 2013, I’ve been exploring this up-forking opportunity on a variety of XC bikes.
My favourite option right now is the 120mm RockShox SID, which weighs in at just 1,525g. With its bigger chassis and 35mm diameter upper tubes, the SID isn’t as light as the 100mm-specific SID SL (1,300g) or the Fox 32 SC (1,408g), but it’s still very impressive, and it’s considerably lighter than its main competitor – the Fox 34 SC (1,641g). In fact, if you’re running an older SID, Reba or Float 32, there’s a strong chance you’ll actually drop weight by upgrading to the SID.
Weight aside, the SID will offer a drastic improvement in suspension performance over those aforementioned forks. It’s much smoother, with better small-bump-compliance and more control on bigger, faster impacts. That supple performance allows you to generate more grip on the front tyre, while the stiffer chassis provides better steering precision and less deflection under braking. Overall, it adds welcome comfort on rough terrain, and boosts confidence on the descents.

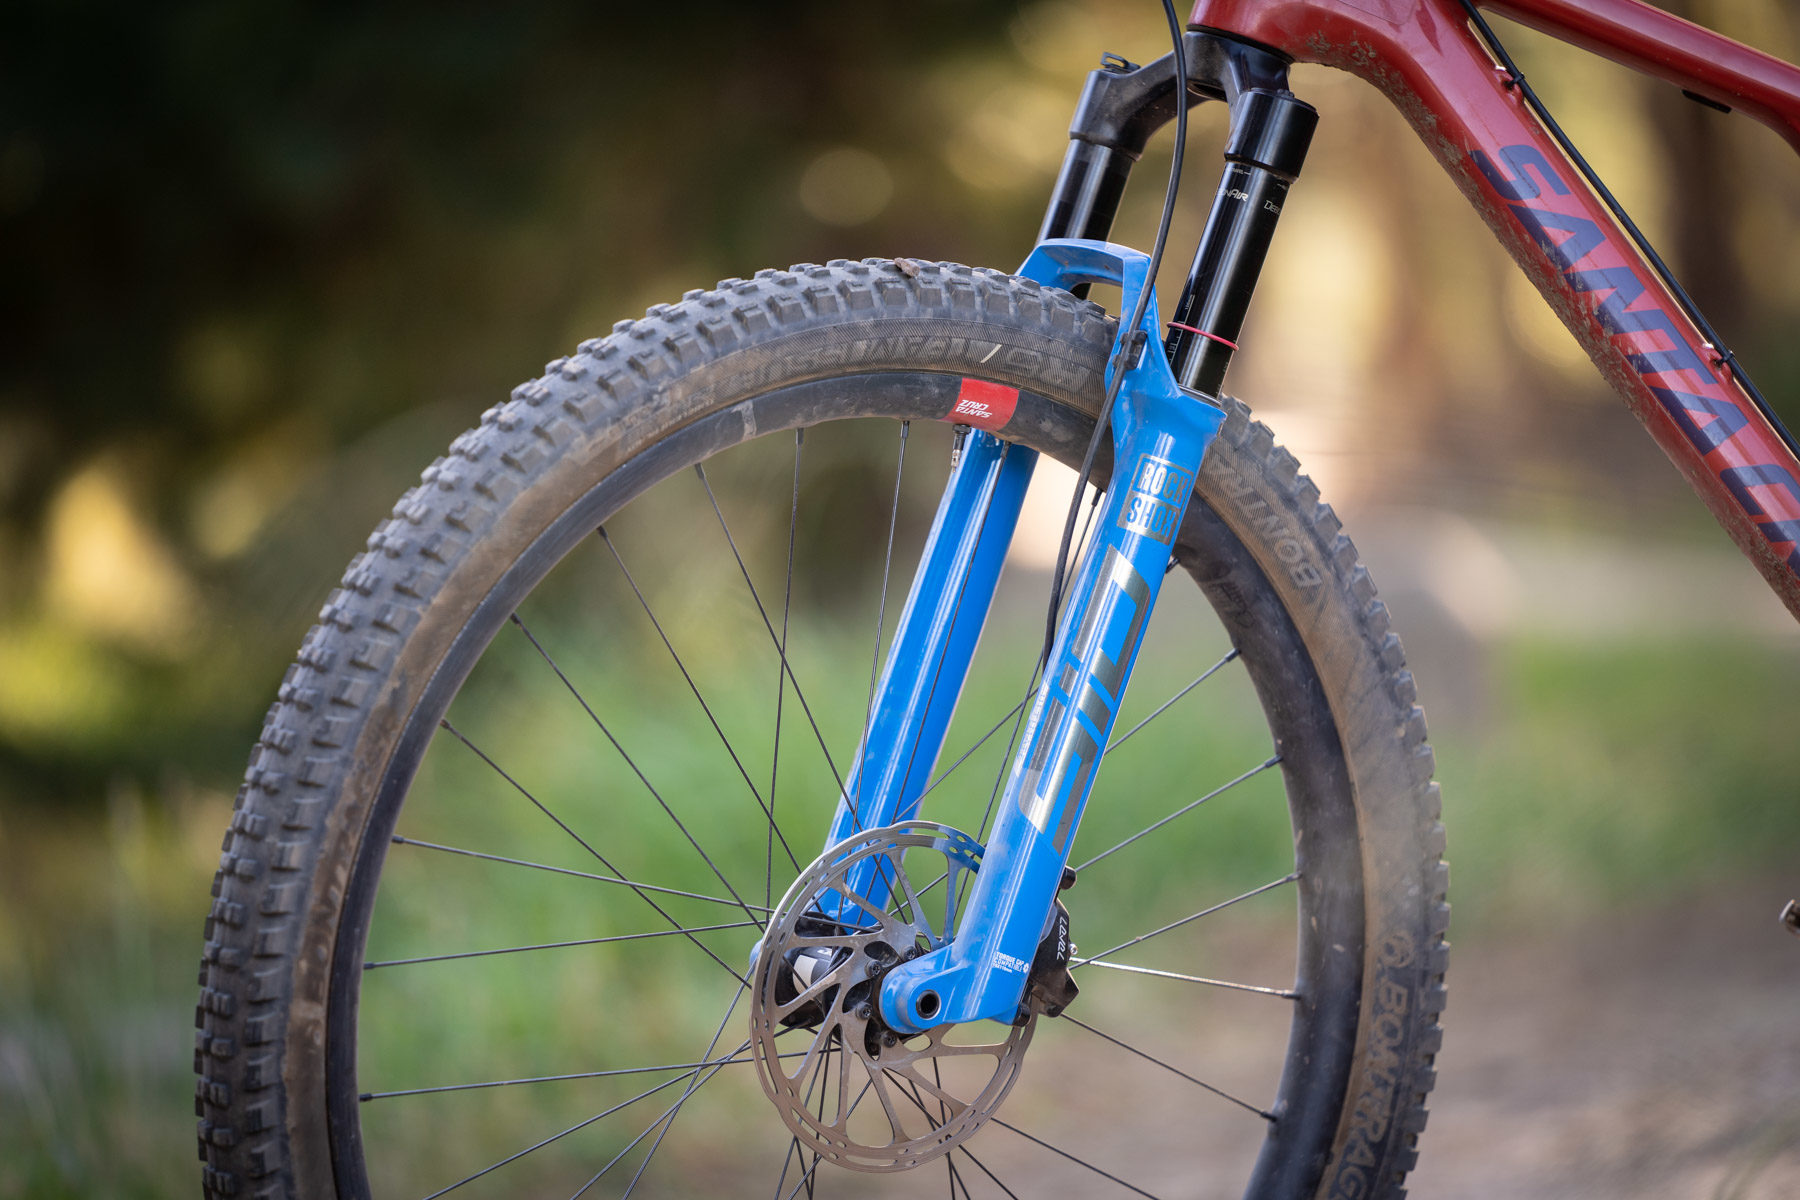
Downsides? It’s still heavier than its dedicated 100mm travel cousins. The taller axle-to-crown height also means that you will lift your bike’s front end, resulting in a higher bottom bracket, and the seat tube will slacken off around a degree. In most cases I’ve gotten around this by sliding the saddle forwards on the rails to get that degree back, and you can also lower your stem height to bring the bars back down too. As for the BB height? Well, it really depends on the bike. In most cases I’ve actually found the added ground clearance to be welcome, but the taller ride height and slacker head angle can mute some of the bike’s steering speed, and it’ll require more effort getting around tight uphill switchbacks. This was the case on the Trek Supercaliber. Though for what the bike lost in raciness, it made up for it with more rough-terrain comfort and control, and descending was an absolute treat. If you do find the steering to be a little too heavy with the longer fork, then going to a wider bar and shorter stem will go some ways to lightening it back up.
Also worth mentioning is that the SID (and the Fox 34 SC) can also be setup as a 110mm fork with a relatively simple air spring swap. This way you only modify the frame’s geometry slightly, but retain the superior suspension performance and improved tracking of the bigger fork. You’ll actually find this setup on some of the stock Canyon Lux models, and all 2021 Scott Spark RCs are now coming with a 110mm fork exclusively. It’s also the setup that Nino Schurter chooses to race on, so the advantages are clearly worth the weight penalty for him, and they’ll for sure be obvious to more aggressive, and heavier riders. Read more about our experience testing the RockShox SID here.

7. Get A Grip
If a new fork and wheelset aren’t exactly accounted for in the recreational outdoor hobbies budget, how about an upgrade for less than $40?
Grips may seem like an inconsequential component, but they’re the main contact point you have with your bike. And with your hands being the most sensitive part of your body, getting the right grips can make a significant difference to both comfort and feel.
I’ll also point out that stock grips are, more often than not, a bit shit. An easy area for product managers to save dollars, you’ll often find cheap compounds, unergonomic shapes, and thick plastic cores that don’t do anything for vibration absorption. This isn’t particularly useful, because for a short travel XC race bike, you want as much comfort as possible. That’s especially the case if you’re riding long distances too.
For this reason, I generally favour non-locking grips on an XC bike. I’ve had good experiences with ESI grips, though more recently I’ve been digging the ODI F-1 Vapour grips. These also use a silicone-based compound, though it feels tackier, with a dimpled profile and a textured surface to increase traction. I’ve run them on a few bikes lately, including the Exceed, Oiz and Ninety-Six, and a quick spray with isopropyl alcohol during installation is all they need to be kept in place.

They’re very light at just 74g for the pair, and the 31.5mm diameter is on the medium-to-slim side. The squishy material gives them fabulous vibration absorption, though with more damping and support than foam grips.
Some riders may find them a little too squidgy, and bigger hands will likely be better served by the thicker Extra Chunky option from ESI. Also, any foam or silicone grip is not going to be particularly durable – this set of ODIs is starting to show signs of wear, and if you bin it, then they’re much easier to tear up than a rubber lock-on grip. Still, for less than $40 they’re a terrific and relatively cheap way to add a little comfort and feel to the front of your bike.
8. Aaaaaaand Stop!
Finally, now that you’re feeling more comfortable and more confident on your XC bike, and you’re riding faster than ever before, you’re probably going to need a little more braking power right?
XC bikes are commonly spec’d with lighter twin-piston brake callipers, 160mm rotors and softer, organic compound pads. That isn’t necessarily a problem for every rider – especially lighter folks and those who are riding gentler singletrack. But the harder and faster you ride, the more advantageous it will be to have more braking power and consistency at your disposal.
On entry and mid-level bikes, it’s common to find cheaper stamped rotors, and they’re often resin-only too. While those resin/organic brake pads are fine in dry conditions and are generally pretty quiet, they’re not necessarily as well suited to sustained braking on longer, steeper descents, and power can suffer in wet conditions too.
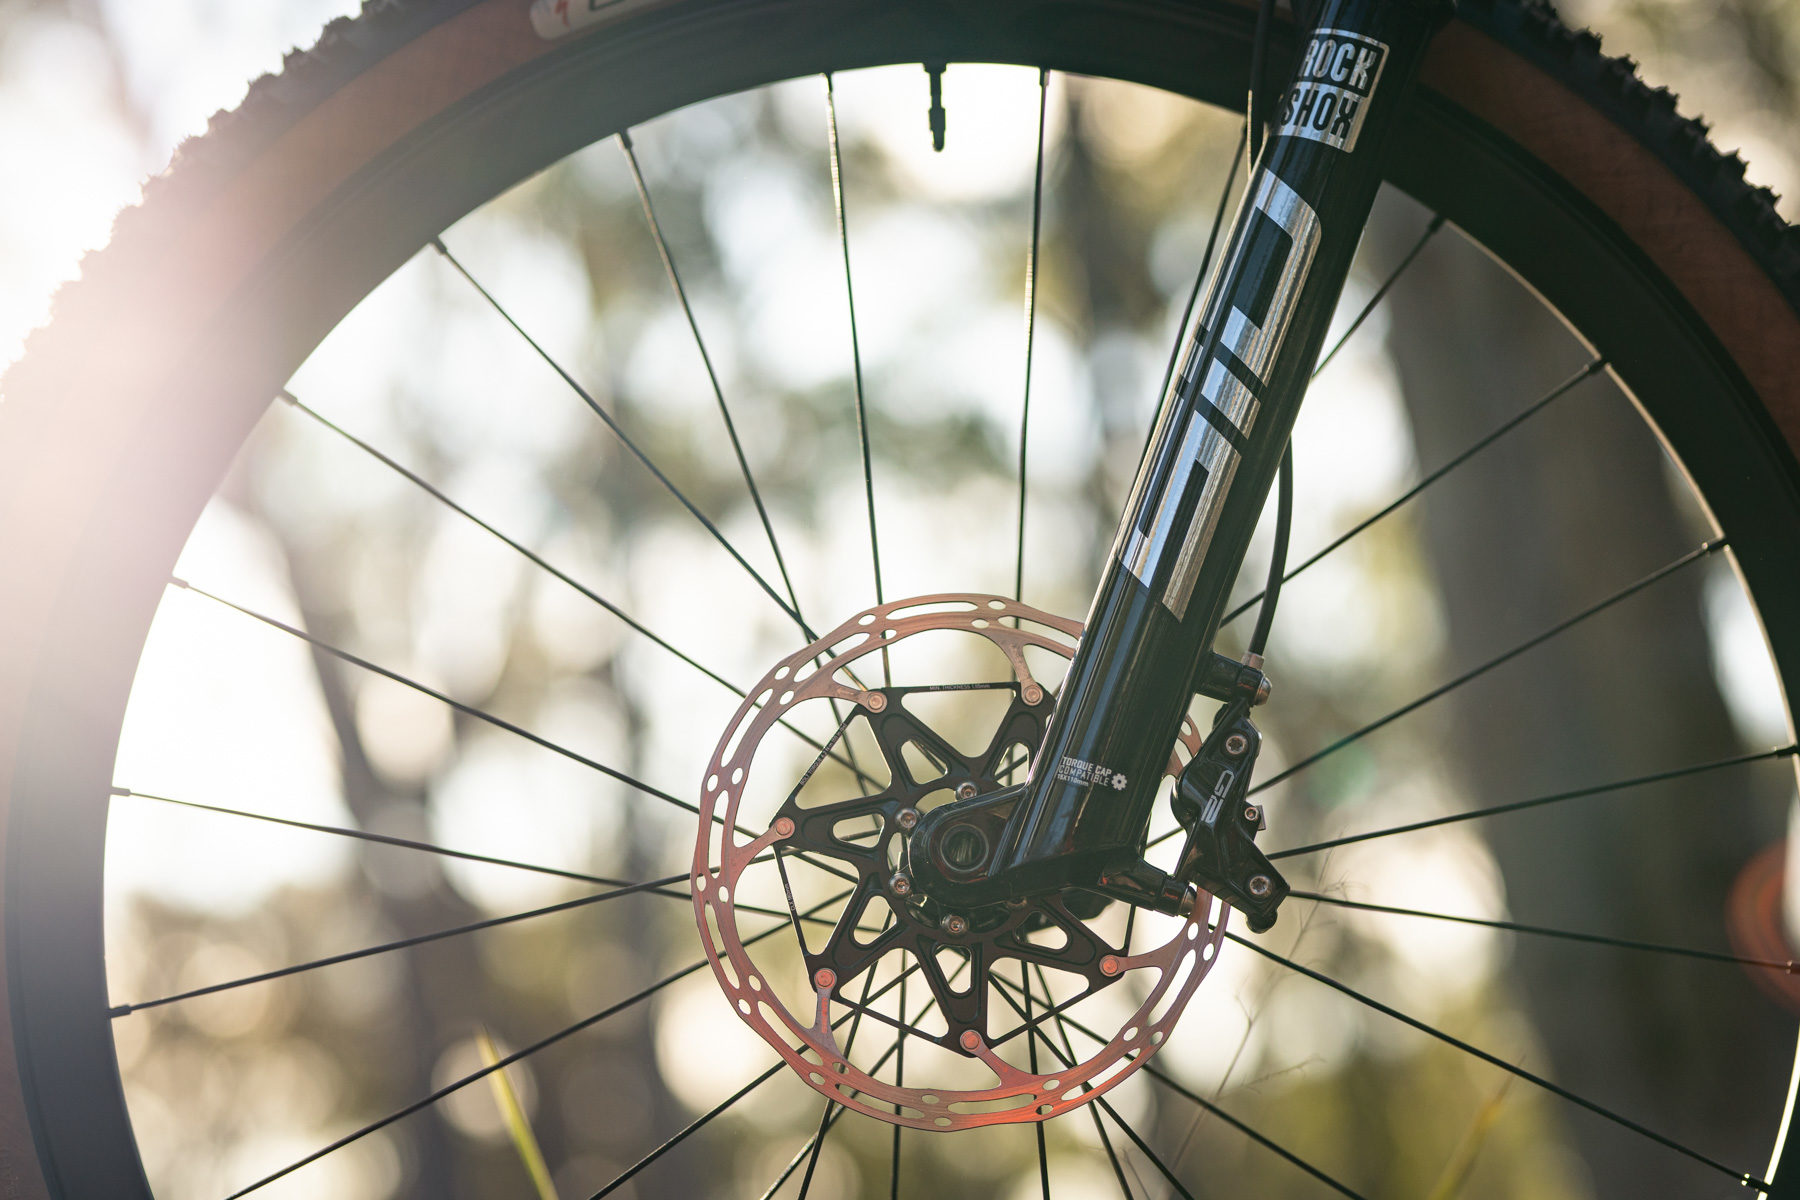
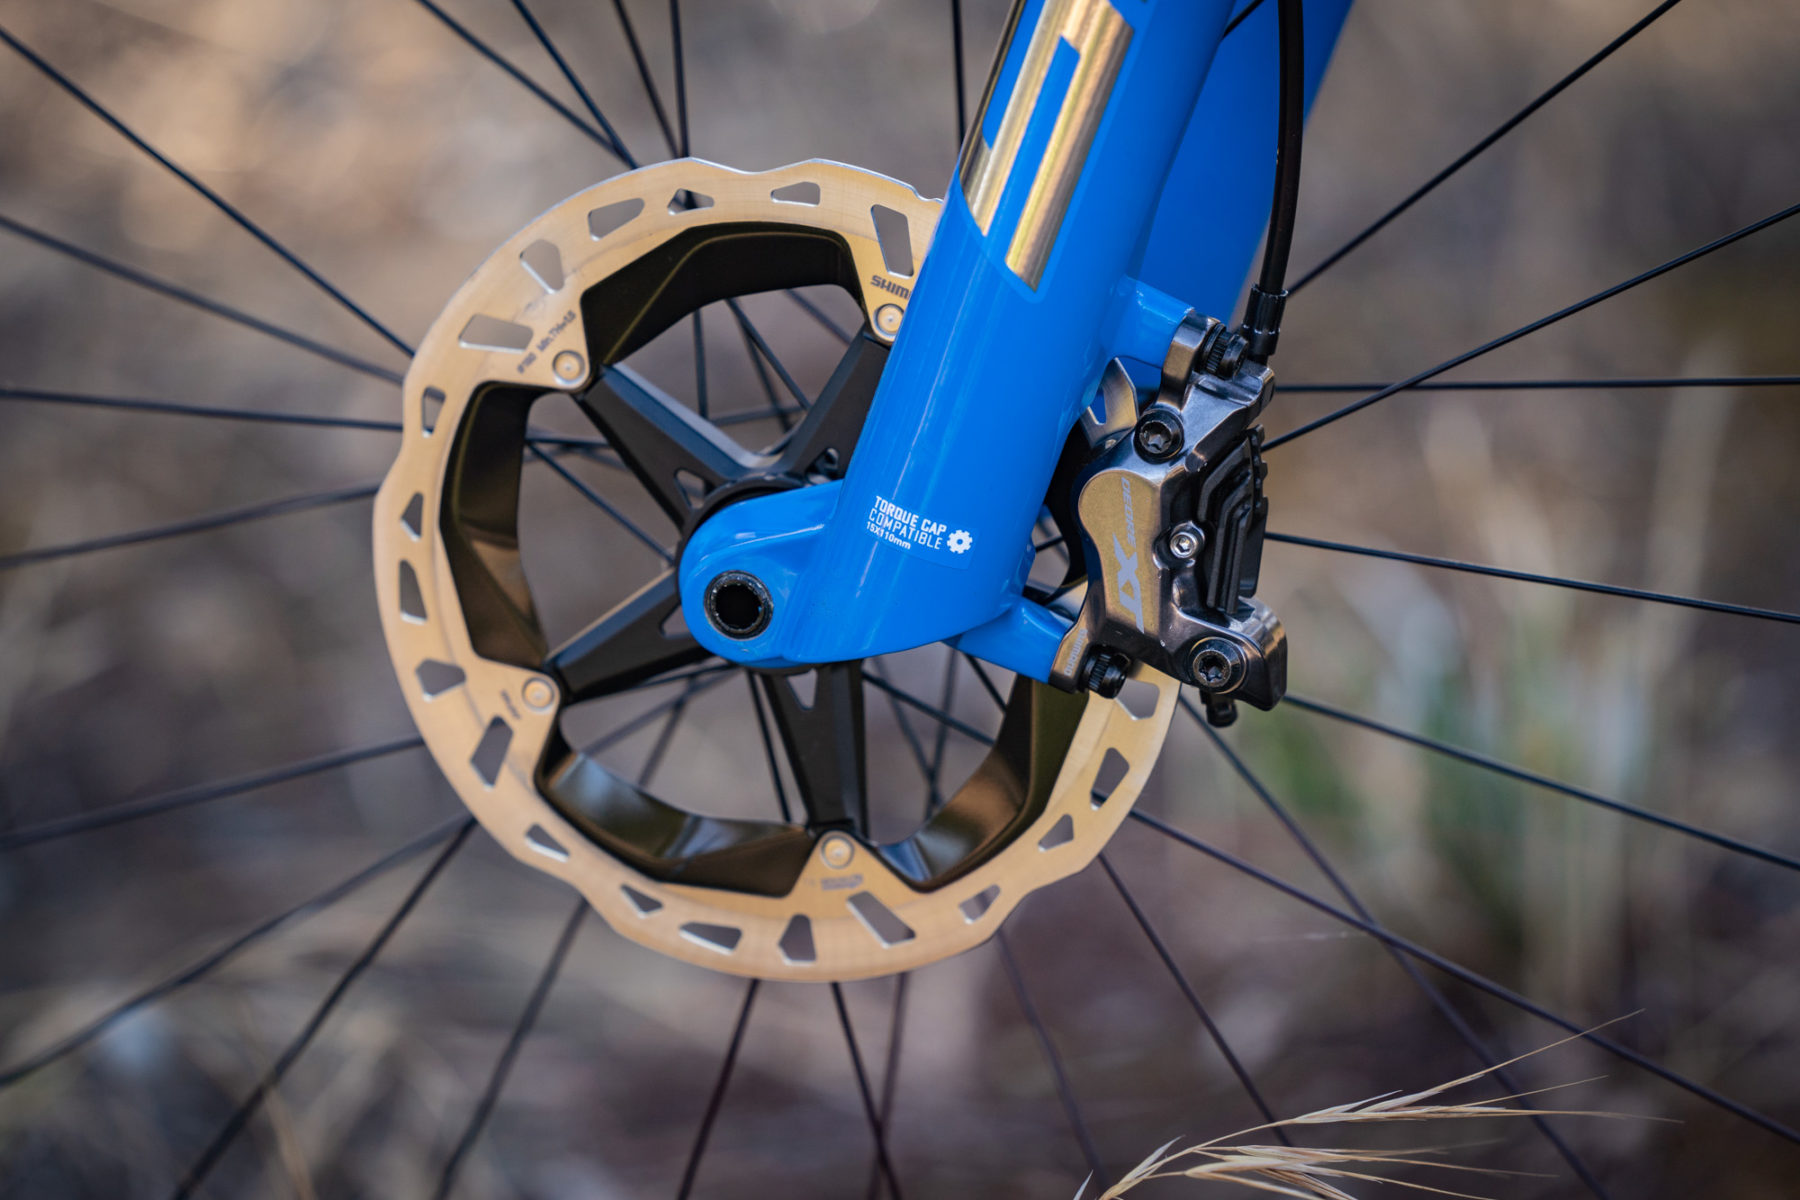
Upgrading to higher quality machined rotors is a great place to start, and consider upsizing to 180mm rotors to provide more power and heat dissipation. It’s worth noting that while going to a bigger rotor on the front is pretty easy with the addition of an adapter, some frames are limited to a 160mm rotor on the rear – like the Orbea Oiz. If you’re looking for more consistent descending performance across a wider range of conditions, consider a semi-metallic or a full metallic/sintered brake pad.
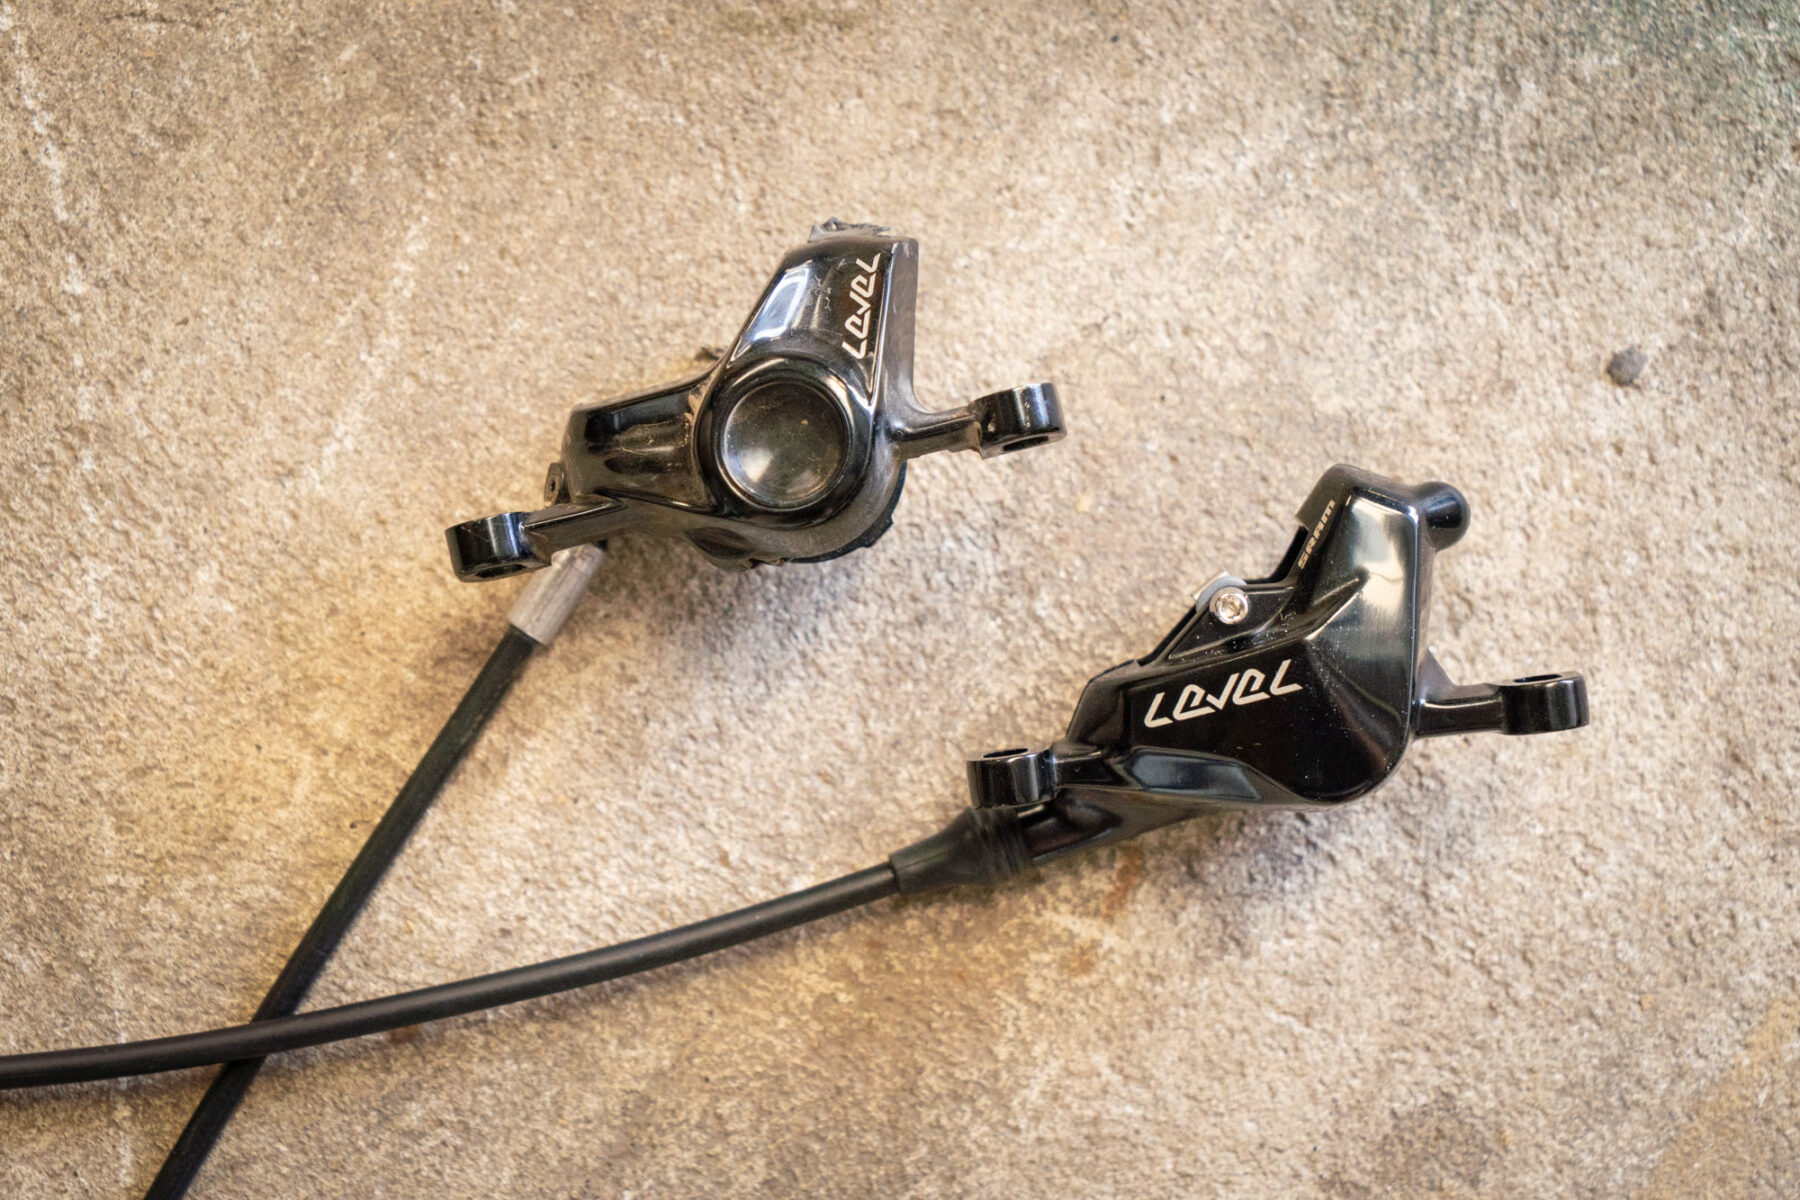
Beyond rotors and pads, you could even look at upgrading the brakes themselves. We’ve gotten along well with lighter twin-piston options, including the superb XTR Race brakes that come standard on the Oiz M-Team. And we’ve also tested the SRAM Level Ultimate brakes separately, which offer surprisingly good power thanks to their beefier callipers and the latest Power brake pads. Not so worried about weight? Going to a four-piston brake will add a few more grams, but you’ll also get significantly more power, and in the case of the Shimano SLX M7120 brakes we’ve tested, more modulation too.
So, What Next?
And there you have it – my top upgrades for making your XC bike more capable, more comfortable, and most importantly – more fun!
I will say that there are plenty of other upgrades and modifications beyond this list though. Originally I was going to put a saddle into this list, but as we all know, those are such a personal preference that it’s difficult to make a single recommendation. As with grips however, the saddle is a key contact point with your bike, so it’s worth taking the time to find the right one to maximise your riding comfort.
Likewise, pedals and shoes are another good place to consider. XC racers generally favour very stiff carbon-soled shoes and small bodied clip-in pedals, which offer good power transfer, but can be fatiguing on longer rides. For non-racers, consider looking at more of a trail-oriented shoe with a little more ‘give’, and pair it with a broader platform pedal. And if you really want to break out of the XC mould, flat pedals and some sticky-soled shoes will up the comfort and vibration damping levels up a notch again.
Beyond components, servicing your suspension regularly is another simple, but crucial way to ensure your fork and/or shock are performing at their full potential. It doesn’t matter how fancy your bike and fork are, if they’re poorly maintained, expect the ride to be less forgiving as a result.
So what do you folks think of these upgrades? Have you made any of these changes to your own bike? And what top tips did we miss? Be sure to tell us your thoughts in the comments below!
