Wil reviews the Cotic BFeMAX
It’s been around six months since we first built up our Cotic BFeMAX long-term test bike. For those who haven’t been acquainted already, the BFeMAX is the UK brand’s steel hardcore hardtail. It’s essentially the big brother to the SolarisMAX – a 29er trail hardtail that I’ve had loads of experience with, having tested two of the previous generation models. The BFeMAX is a decidedly bigger and burlier beast however, with slacker geometry and the option to run up to a 160mm travel fork. Pwoaar!
Despite not having a rear shock, it’s a seriously fast and capable bike. You can check out the original build and my initial impressions in our first ride review here.

Being a long-term test bike, the BFeMAX has morphed and changed considerably over the past six months. It’s played host to a range of components, and I’ve also been tweaking the setup to dial in the riding position and fine-tune the handling, while attempting to eke out a little more comfort and control. It’s been a gradual but thoroughly satisfying process. Here we’ll be taking a closer look at those seven key upgrades, and how they’ve helped to elevate the BFeMAX’s on-trail performance to the next level.
The 140mm RockShox Lyrik

According to Cotic, the BFeMAX frame is rated for use with a 120-160mm travel fork, though optimised for 140mm. To start off with, I had the BFeMAX built up with a 150mm travel RockShox Lyrik Ultimate. Suspension performance was mint, but I found for my local terrain it made the bike a touch too slack and high at the front, giving it a slightly unwieldy feel on anything that wasn’t an alpine descent.
To drop the front end down and rebalance the weight distribution, I sought out a 140mm air spring for the Lyrik. This is as low as the Lyrik can go, and the necessary air spring shaft isn’t exactly a common aftermarket part – I ended up sourcing it directly from RockShox in the US. This was still easier and cheaper than getting a whole new fork though, and it meant I could keep the excellent blood-red Lyrik.

With travel set at 140mm, the BFeMAX’s stack height lowered a touch, bringing everything a bit closer to the ground while steepening the angles too. There’s still plenty of pedal clearance – the BB sits 325mm off the floor, and the latest Lyrik also rides quite high due to the DebonAir C1 spring design. The mid-stroke is noticeably better supported, and I’ve also set the low-speed compression damping about halfway to resist diving under braking. It’s still beautifully plush, with excellent sensitivity and control from the Charger RC2 damper.
Of course the Lyrik is heavier than an equivalent Pike – you’re looking at a 150g weight penalty here (2.01kg vs 1.86kg). But it is stiffer with a sturdier feel on the trail, particularly with the extra bushing overlap in this 140mm configuration. For a stout enduro hardtail like the BFeMAX, it’s a terrific match.
If you’re looking to tweak the handling on your own bike, or you have a slightly older RockShox fork, consider an air spring upgrade. The assembly costs just $69.95 AUD, and with the correct tools it’s pretty easy to fit. You can check out our separate tech feature on the latest DebonAir C1 air spring here for more info.
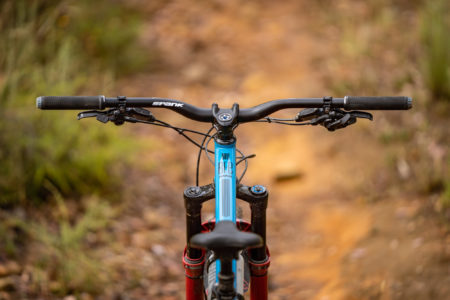
Spank Spike Vibrocore Bars

In the search for more compliance and comfort, handlebars were a key consideration. Originally I had a set of 35mm diameter PRO Tharsis carbon bars fitted to the BFeMAX. It was clear early on that these were miles too stiff for my liking though, with an excessive amount of trail buzz being transmitted through to my hands and wrists. This is pretty typical of my experience with 35mm carbon bars – the OneUp Components bar being a notable exception.
To get more flex back into the front end, my preference was for a 31.8mm diameter bar, and something made of alloy. I sought out the advice of a pal of mine, a fellow bike tester in the UK who’s had a lot of experience reviewing fatigue-fighting components including the Fasst Flexx bars and Revgrips. While those products certainly worked, he actually recommended I try out a set of Spank Vibrocore bars as a much cheaper, but still effective alternative.


The Spike Vibrocore bar is constructed from 6000-series alloy, though it’s the green expanding foam inside the hollow bar that aims to increase vibration damping to reduce hand numbness and arm pump.
They’re not particularly light at 361g on the workshop scales (a full 160g heavier than the carbon PRO bars), but they are very comfortable, and vastly smoother on the trail. The increased damping was immediately noticeable after making the switch, and I’ve not experienced any wrist pain or numbness since.

The shape is good with an 8° backsweep and 4° upsweep, and I’ve elected for a 30mm rise (15mm and 50mm are also available). They sit tall on the BFeMAX, but being such a slack and long hardtail, you do want the bars higher to begin with, particularly as they get lower once the fork sags into its travel. I chopped them down from 800mm to 780mm wide, though I may go a touch narrower again since the Spank Spike lock-on grips I’m currently using add a little extra width due to their tapered end caps.
For $139.95 AUD I reckon they’re top value, especially with the slick shot-peened and anodised finish. And given I’ve already binned it and put a couple of scratches into them, they’re proving to be a good match for the hardy BFeMAX frame.
Spank Split Stem

With the change in bar diameter, I was also in need of a new stem, and decided to go for a matching Spank Split. Made from 3D forged 6000-series alloy, the Split gets the same shot-peened and anodised finish as the bars. The 5mm hardware gives it a robust clamp on both the bar and steerer tube, and the included top cap with its o-ring rubber seal is a nice touch. Price is $129.95 AUD.
Given the very generous reach of the BFeMAX (our Medium test bike has a claimed reach of 461mm with the fork at sag), Cotic recommends a 30-45mm stem length. And with the steering being quite heavy due to the slack head angle and short fork offset, I went for a 33mm stem length to keep things as responsive as possible.


For the short-stem hunters out there, it’s also worth noting that Renthal does make a 31mm Apex. However, it’s about $30 more expensive, and being CNC machined, the edges are much more pronounced – something worth thinking about for a component that your knees get very close to. Personally, I prefer the smoother design of the Split stem with its tapered bolt heads.
As well as suiting the handling and reach of the BFeMAX, I also like that the Split stem has a compact 34mm stack height, which offers a bit more adjustability for dialling in the bar height. It’s pretty light at 125g, and you can also get it in 38, 43 and 48mm lengths.
BikeYoke Sagma Saddle

At the other end of the BFeMAX’s cockpit (the business or party end?), I’ve been totally happy with the Specialized Power Expert saddle I originally chose for the build. Having heard about the new BikeYoke Sagma saddle with its suspended rails though, I decided to try out something quite different.
Upon initial glance, the Sagma is a pretty whack-looking saddle. Much of the magic is found within the padding, which is made from heat-moulded idbeads, resulting in the upper’s goose-skin texture. These idbeads are a type of slow-rebounding memory foam – a bit like what you’ll see in modern running shoes. As well as providing vibration damping, BikeYoke’s claim is that they’re more suitable for conforming to a rider’s, err, bits.
Where things get really interesting though is with the in-built suspension. The rails are actually separate to the carbon-reinforced shell, connecting via elastomeric shock absorbers. These inserts compress during impacts, allowing the saddle to rock slightly from side-to-side during pedalling, purportedly increasing power transfer. They’re also interchangeable, with softer and firmer inserts included with the saddle.

Does the design work? Absolutely. The Sagma effectively dampens smaller trail vibrations and impacts, which has allowed me to stay seated for longer on the BFeMAX. On rocky and technical climbs, there’s less jarring felt at the sit bones, with the elastomers and foam upper helping to take the sting out of the tail.
BikeYoke says the Sagma is a unisex design, and you can get it in two widths – 130mm or 142mm. The narrower option is generally recommended for gravity riders, so I went for the 142mm width.
The overall shape isn’t dissimilar to the snub-nose Specialized Power, though the Sagma is a touch longer overall, the nose is a little broader, and the central divot is slightly wider too. Initially I didn’t find it as comfortable – I generally prefer a flatter saddle profile, with either a narrow channel or none at all. If I was nitpicking, the channel/divot on the Sagma is just a touch too wide for my sit-bone width.

Unlike most saddles however, the Sagma actually gets more comfortable throughout the ride, to the point where I soon forgot about the shape about half an hour in. As well as offering better damping, the slow-rebounding memory foam does well to adapt and contort without being spongey.
This is evident when you press into the upper with your thumb. Instead of giving way in a linear fashion, the foam becomes harder to compress the more you push it. The progressive foam means there’s still good support there, and the longer you ride the more you notice (or rather don’t notice) that support.
Each successive ride the overall comfort has improved to the point where it’s now entirely unnoticeable. Either I’m getting used to the saddle, or perhaps it’s getting used to me – whatever the case, this is a very good perch indeed.


It’s not the lightest option at 224g. The suspended rail design also reduces clearance for threading through a saddle bag strap (if like me you use such things), and it gives the saddle a taller 50mm stack height. I had to lower the seatpost by around 7mm when changing from the Power to the Sagma.
That aside, this is a genuinely simple way of improving your bike’s seated comfort. It’ll be noticeable on any bike, but particularly for hardtail riders, and gravel enthusiasts too. The construction is suitably high-quality with a durable PU-skin covering for the upper. You won’t find any staples or messy glue anywhere, and the split design allows for forged AL2014 rails to be used. Given the construction and ride quality, the $215 AUD price seems totally reasonable.
CushCore Pro Tyre Insert

I’ve been a tyre insert user for a number of years now, and it’s helped me to drastically cut down the number of punctures and damaged rims I’d typically encounter. For that reason, I fitted a Vittoria Air-Liner to the rear wheel of the BFeMAX before it ever set foot out of the workshop. The Air-Liner is thoroughly effective and durable, though it is quite heavy in the larger 29er size (292g per insert), and it takes up a considerable amount of volume inside the tyre. When paired to a tyre with a stiffer casing, the reduction in compliance is noticeable.
To qualify that theory, I recently swapped the Air-Liner for a CushCore Pro insert. Perhaps the best known insert on the market, CushCore is also designed to protect rims and reduce pinch-flats. It has a significantly lower volume than the Air-Liner though (see below photo), the shape and material are different, and it’s a little lighter – 266g confirmed in the 29er size. According to CushCore, it’s manufactured from a proprietary closed-cell foam that aims to better control the compression and rebound forces your tyre experiences on the trail.


As with the Air-Liner installation can be awkward, though it gets easier with practice. CushCore’s own Bead Dropper tyre lever certainly helps the process, but it’s not essential. The insert itself is also quite expensive – you’re looking at $269 AUD for a pair of CushCore Pro inserts, or $145 AUD for a single insert. They do come supplied with excellent insert-compatible tubeless valves though.
Compared to running no insert at all, it’s possible to get away with lower pressures using CushCore – I consistently run around 2-3psi less. With the 2.6in rear tyre on the BFeMAX, I’ve been able to go as low as 20psi. One of the big advantages of CushCore is the way the insert fills the rim channel, helping to create a tight fit that locks the tyre beads into place. This pretty much eliminates the chance of burping, and the thick insert also increases sidewall support and stability. Even at lower pressures with the big 2.6in tyre, there’s noticeably less squirm when cornering.

The other aspect you’ll notice with CushCore is how much quieter the rear wheel is. The foam insert adds damping to the inside of the big hollow tyre cavity, which reduces noise and helps to smoothen out impacts too. In my case, what I noticed with CushCore compared to the original Air-Liner is the improved small-bump compliance. Since the lower profile insert leaves more open air volume above it, it allows the tyre to compress more naturally over small-to-medium size impacts, with the added damping only really kicking in on bigger impacts. It’s on these impacts that CushCore helps to protect both your rim and tyre, significantly reducing the likelihood of rim dings, flat spots and ride-ruining pinch-flats. However, it’s not totally invincible, as you’ll see shortly.
Overall the CushCore Pro insert has boosted rear wheel compliance compared to the Air-Liner insert before it, which tended to make the tyre feel a little too wooden and dull. That said, I’m now keen to try out a lighter and more supple tyre casing. Since the insert does such a good job of preventing pinch-flats, it opens up the option of using a lighter tyre to help offset some of the weight gain, and potentially eke out a little more comfort again.
Stan’s Flow CB7 Wheels

One of the biggest changes on our BFeMAX test bike has been to the wheelset. I first built the bike with a set of Bontrager Line Pro 30 carbon wheels, which feature an updated rim design that boasts significantly greater strength than their predecessors. They’re certainly a solid wheelset on the trail, stiff and responsive, with a decent weight and fast-engaging Rapid Drive 108 hubs. Our fellow tester Ben has been thoroughly impressed with them, and you can check out his ride impressions here.
In my quest for maximum compliance however, I didn’t find them to be the smoothest wheels going. And then I came across Stan’s NoTubes newest carbon wheelset; the Flow CB7.
Of course wheels can drastically transform the ride quality of any mountain bike. Unfortunately when carbon rims first arrived on the scene, there was an overwhelming trend to pursue lightweight and super-stiff rim designs. These certainly felt accurate and responsive on the trail, but it came at the expense of comfort and compliance. After all, everything on your bike is a spring of some sort.
Thankfully the pendulum has been swinging the other way though, with the likes of the ZIPP 3Zero Moto and Crank Brothers Synthesis wheels showing that the ‘stiffness-above-all-else’ ethos may not actually be a positive thing.

Radial compliance has always been a strong theme with NoTubes’ carbon rim designs too, and the new Flow CB7 carries on down that path. Based on the alloy Flow MK3, the carbon CB7 uses a very blunt and shallow rim profile. In fact, its 18.3mm depth is the shallowest of any of NoTubes’ carbon rims. It’s particularly pronounced when compared to the taller 27mm depth and more triangular shape of the Bontrager Line Pro 30 rim.
On the trail the difference from the shallow rim profile is considerable. Setup with exactly the same tyres and pressures, the Flow CB7 wheelset delivers a much smoother ride quality, with noticeably less feedback than the Bontrager wheels. They’re slightly lighter (1,822g vs 1,881g confirmed, both wheelsets including tubeless tape and valves), though it’s really the quieter and more damped performance of the Flow CB7 wheelset that stands out the most. Of course this quality will be less noticeable on a big travel full suspension bike, but on the BFeMAX hardtail it’s a significant improvement.

The 29mm inner rim width is a great match for the 2.6in Specialized Butcher/Eliminator tyre combo I’m currently running. NoTubes employs its BST carbon rim design for the Flow CB7, which results in very a low sidewall height that effectively mimics a wider rim, since it doesn’t pinch the tyre casing as much. The sidewalls are quite thick at 3mm, and being so short they’re (in theory) stronger and less vulnerable too.
Compared to other carbon rims from NoTubes, the Flow CB7 features an asymmetric profile with a 4mm offset for the spoke holes. This results in more balanced spoke tensions, and on our 29er Boost wheelset, it also means they use exactly the same spoke length all-round. I also like that NoTubes builds the wheels with standard J-bend spokes and external nipples, making them easier to work on and easier to source replacements for.
While NoTubes’ own Neo hubs don’t have the best reputation, I’ve personally not had any dramas so far. The 10° engagement is adequate from the 6-pawl freehub mechanism, and they’re a doddle to pull apart for general maintenance. However, the main freehub seal is quite sloppy – with the rear wheel out of the bike, the cassette doesn’t need a lot of encouragement to pull the freehub body off the hub, annoying when you’re changing a tyre or tube.


There was one slight hiccup with our test wheels though. While riding a very fast and rocky descent on some rugged off-piste singletrack, I managed to smack the rear wheel into the sharp edge of some embedded granite during a poorly miss-timed landing. Thanks to my riding speed and general lack of skill, the force of the impact was horrendous, and it managed to crack the rim. Impressively, the tyre itself was fine and continued to hold pressure – the CushCore insert performed its job there, and the inner wall of the rim itself remained relatively intact.
Upon inspection, the rim appeared to have failed in a seemingly controlled manner, which isn’t something I’ve seen with other carbon rims I’ve cracked in the past – in some cases they’ve shattered in a much more dramatic fashion. Since the seal was fine and the tyre was holding pressure, it meant I could carry on riding the final 15km to get home. It was nice for me not being inconvenienced, but I can imagine this kind of controlled failure would be a godsend in a race setting, allowing you to carry on and get to the finish line.


Given the violent nature of the impact, I hold no blame against the wheelset for the failure. Any rim would have discombobulated to some degree under the same circumstances. However, it would have been disingenuous of me not to mention it here. And perhaps it’s a timely reminder that in the world of mountain biking, any component – no matter how good it is – can break. That’s just the nature of the beast.
In speaking with NoTubes, it turns out that all of its carbon wheels come with a 7-year warranty to cover against any potential manufacturing defects. On top of that, if you register your wheels when you first buy them, you’ll get a lifetime crash replacement on the rims as well. For someone like me who bungled a landing, I’d be able to buy a replacement rim at a 50% discount. You can check out the nuts and bolts of NoTubes’ warranty and crash replacement policy here.
So would I recommend the Flow CB7 wheelset? If you’re after a set of responsive carbon wheels that doesn’t rattle your fillings out, absolutely. The $2,199 AUD pricing is middle-of-the-road in the realm of carbon wheels, and the Flow CB7 is particularly appealing thanks to its lovely smooth ride quality, asymmetric rim design, ease of tubeless setup, and normal J-bend spoke lacing. If your budget is more alloy-oriented however, I’d also consider the Flow MK3 wheelset, which is only a little heavier (1,905g claimed) while costing less than half the price.
SRAM Code RSC Brakes

As I’ve gotten more comfortable aboard the BFeMAX, my confidence has grown and I’ve started riding it quite a bit harder and faster. To match those changing demands, the most recent upgrade I’ve made has been in the braking department.
I originally built the bike with a set of SRAM G2 Ultimate brakes, which I’ve gotten along well with for the most part. The carbon lever blades and sealed bearing pivots offer a lovely light action, and modulation is excellent through the four-piston callipers. Paired up to 180mm rotors, there’s a notable improvement in braking bite over the previous generation Guide brakes, and the lever feel is snappier and more positive. Still, the overall power and bite point aren’t quite as sharp as I’d like for a burly bike like the BFeMAX.
Lucky for me though, I had a special set of Code RSC brakes tucked away in a box in the workshop, awaiting a suitable build. And the BFeMAX would do nicely.

Compared to the G2s, the Codes are pitched more for gravity use, with beefier levers and callipers. They’re still a four-piston brake, but the piston diameter is larger – 15/16mm on the Codes versus 14/15mm on the G2. The result of the extra chunk is around a 50g weight penalty per end, so 100g extra for the pair.
In my experience, that additional weight is more than worth it. The Codes offer noticeably greater braking power, with more initial bite and better sustained performance that’s far less affected by heat. I currently have them paired to 180mm rotors, and I feel no need to go any bigger.

The lever feel is much better too, with the Codes giving a very solid and defined bite point. Being the RSC model, you also have tool-free adjustable lever reach and pad contact, so it’s easy to tweak the lever stroke to your digits. And of course they use SRAM’s MatchMaker system, offering direct-mount compatibility with dropper post levers and SRAM trigger shifters.
The downside? The stock metallic pad compound is noisier, and they’re more likely to squeal if you don’t bed them in properly. Modulation also isn’t as smooth or as controllable as the G2s. For this reason I’d still recommend the G2s for lighter riders and those on shorter travel bikes with less grippy, faster-rolling tyres. Otherwise for those who would prefer not to be left wanting for power, the Code RSCs continue to be my favourite brake option on the market right now.

So much tweaking! How’s it ride?
With all of those changes, the BFeMAX is now riding better than ever. It’s more balanced with the 140mm fork, and overall comfort has improved considerably thanks to the new wheels and touch points.
Weight has gone up by around 300g, so the complete bike is now at 13.72kg without pedals. It’s certainly a solid bike, but personally I’ve found the overall mass to be totally reasonable given how capable it is.

It’s very planted at speed, courtesy of the slack head angle and long wheelbase. With the 140mm fork the static head angle is around 63°, which is bonkers! The chainstays are also quite long, with a 444mm rear centre measurement on all sizes. Compare that to the Curve DownRock we reviewed last year, which has scaled rear centre sizing, meaning the chainstays get longer on the larger frames. On the Medium size I tested, the DownRock’s back end was just 424mm – a whole 20mm shorter than the BFeMAX.
As a result, the BFeMAX isn’t as inherently playful as the DownRock. It doesn’t dip down into corners as willingly, it takes more effort to pop up the front wheel, and it’s less nimble on squiggly sections of flow trail. It’s not that it won’t get around those tighter bends, you just need to boss it about with more deliberate intention.

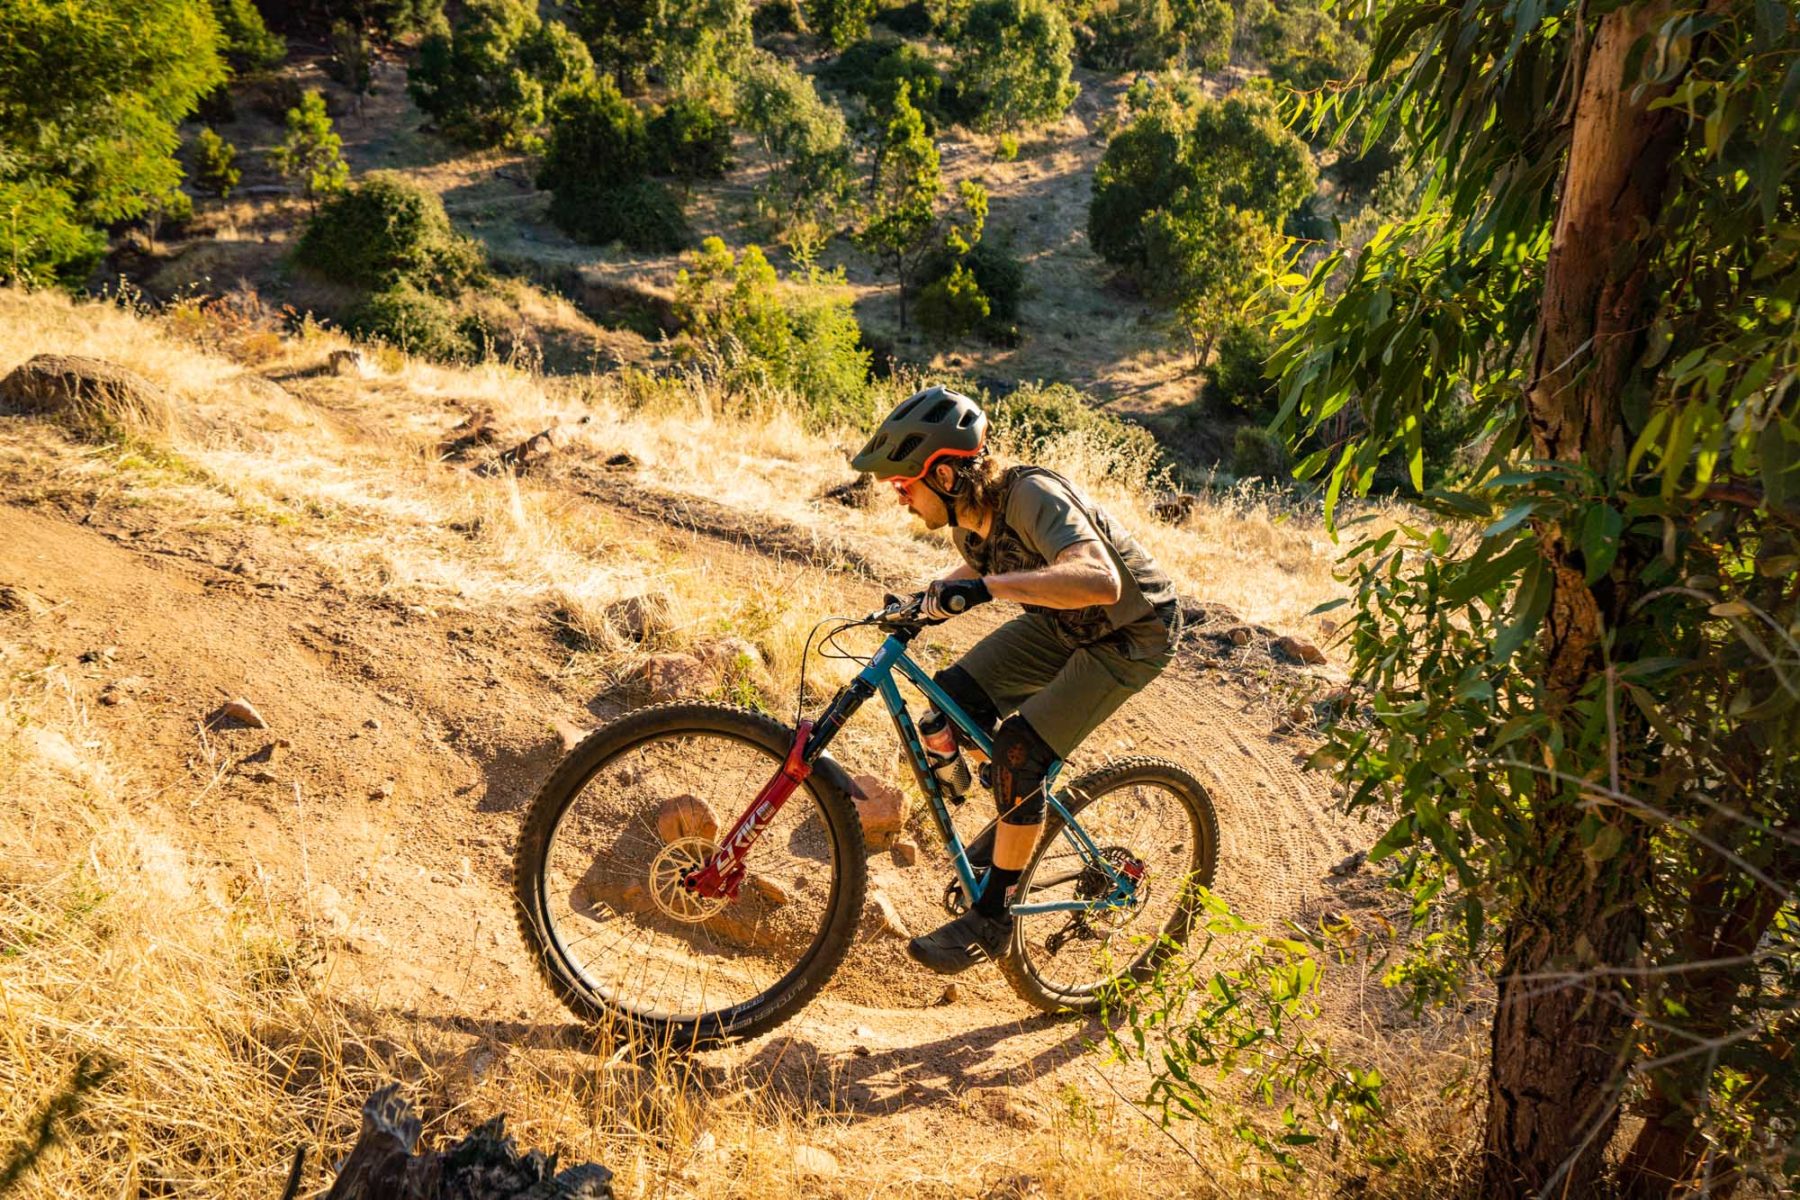
Stability in spades
With the long wheelbase and slack head angle, the stability is truly amazing though, with the BFeMAX capable of building and maintaining momentum on rough trails very quickly. Combined with the big fork and robust steel tubing, it’s a real British Bulldog of a bike. This is part of the reason a tyre insert in the rear wheel is a good idea, because you’re often smashing into things a lot faster than you first anticipate. It holds its line darn well in such circumstances – you can really lean on the fork to take the brunt of the impacts, and the slack geometry encourages you to stand up, bend your elbows and push your weight forwards onto the front wheel, allowing the rear to skip around more freely.
Perhaps the biggest surprise though is just how well it climbs. The seat angle puts you in a great pedalling position, and the long back end helps to stabilise weight distribution when the gradient kicks up. The low-pressure 2.6in tyres also put a load of rubber onto the trail surface, reducing the chance of wheel-spin when you need to leap out of the saddle to conquer a technical feature. There isn’t a lot of lift from the front wheel on steep climbs, but having fitted the shorter stem and higher rise bars, more concentration is required at the grips to manage the wiggle.

I love that Cotic has built the BFeMAX with such a short seat tube – a 180mm dropper post is a real treat for me, and there’s actually room to spare with the current OneUp dropper. You work your arms and legs a lot more on a hardtail, so it’s fantastic having more freedom to move around. There are lots of other great practical touches on this frame too, like the external cable routing, threaded bottom bracket shell, ISCG 05 chainguide tabs, and the myriad of bosses for bolting on bottles and tool kegs.
What could be improved?
While I do love the stability of the BFeMAX, I’m intrigued to see what it would ride like with a shorter rear end. A two-position dropout, or perhaps sliding horizontal dropouts would allow the rider to tweak the rear centre measurement to suit their preferences. Of course the additional complexity would drive up the frame cost, and building a shorter rear end while maintaining sufficient tyre clearance introduces a significant design challenge.
The overall quality is impressive otherwise, though the frame has suffered a few paint chips over time. Clearance is pretty tight through the seatstay bridge with the 2.6in Eliminator, so I’d recommend those in wetter climates (I’m looking at you, Britain!) consider a 2.5in tyre at most in the back to provide sufficient mud room.


And what’s next?
As mentioned earlier, I’m looking to switch out the rear tyre for something a little lighter and faster rolling. Rather than the heavier GRID Trail casing, I’d be keen to try out the Specialized Purgatory tyre in the lighter GRID casing. I was also really impressed with the sticky Butcher T9 tyre that came on the new Stumpjumper EVO, so I’d love to wang one of those on the front of the BFeMAX.

Given the frame is rated for use with a 120-160mm fork, it’d be interesting to see how it handles with a shorter fork again, and turning it into more of a trail bike. In the meantime, I’m going to try the Lyrik with a Formula Neopos inside the air spring – a clever compressible volume spacer that I’ve had good experiences with previously. I’m also going to seek out some Torque Caps for the front hub, as it’s a simple way to boost rigidity between the fork dropouts and wheel, while also making wheel installation and removal easier.
That aside, we’d love to hear what you folks think of our Cotic BFeMAX test bike. What do you think of the changes we’ve made so far? How would you build one up? What would you like to see us test on here next? Be sure to let us know your questions and thoughts in the comments below!

Cotic BFeMAX build specs
- Frame | Heat Treated Chromoly Steel, Ovalform Top Tube, Reynolds 853 Downtube, 0mm Travel
- Headset | Cane Creek 40 Series ZS44/EC44
- Fork | RockShox Lyrik Ultimate, Charger 2.1 RC2 Damper, 42mm Offset, 140mm Travel
- Wheels | Stan’s NoTubes Flow CB7, Carbon Fibre Rims, 29mm Inner Rim Width
- Tyres | Specialized Butcher GRID Trail 2.6in Front & Eliminator GRID Trail 2.6in Rear
- Drivetrain | SRAM GX Eagle 1×12 w/GX Alloy 32T Crankset & XG1275 10-52T Cassette
- Brakes | SRAM Code RSC, 180mm Centerline Rotors
- Bar | Spank Spike 800 Vibrocore, Alloy, 30mm Rise, 780mm Width
- Stem | Spank Split, 31.8mm Clamp Diameter, 33mm Length
- Grips | Spank Spike Lock-On Grips, 30mm Diameter
- Seatpost | OneUp V2 Dropper Post, 31.6mm Diameter, 180mm Travel
- Saddle | BikeYoke Sagma, 142mm Width
- Size Tested | Medium
- Confirmed Weight | 13.72kg (without pedals)
- Frame RRP | £549 (Approximately $977 AUD)