It’s nice when you feel at home on a bike, while we can’t exactly call it our own it feels like it, we’ve grown quite attached indeed. The Strive could almost have been purpose built for our favourite local trails, but we doubt the German designers at Canyon have ever ridden this far abroad. The rocky, steep and raw nature of Sydney’s Northern Beaches (we are not just talking about Manly Dam here) begs for a bike that’s capable of getting rowdy, just take a look at the locals and what they are riding and more importantly how their bikes are setup.
Around here it’s all about meaty rubber, powerful brakes and wide gear ranges and quality travel. While some riders set up bikes like they’re racing the Enduro World Series we don’t go quite that far, the speeds are never that high or descents for too long, and of course there aren’t any clocks waiting for us to cross a line at the bottom.
So we’ve found the Strive a great bike for the rugged rides we love, and are still enjoying playing with setup and the parts spec to see what happens when we do.
Let’s have a look at what it’s looking like right now ahead of another summer of excellent riding. Get ready for some serious tech talk!

- Frame – Canyon Strive CF Race, size medium. Rider is 180m tall, 72kg.
- Fork – RockShox Lyric RCT3, 160mm travel, w/ two Bottomless Tokens fitted
- Rear shock – RockShox Monarch Plus RCT3 w/Debonair can and three Bottomless Rings fitted
- Wheels – Wheel Works Flite Carbon, 35mm internal width, DT Swiss hubs
- Tyres – Maxxis Minion DHF 3C MaxxGrip EXO TR 2.5” WT and Maxxis Minion DHR II 3C MaxxGrip EXO TR 2.4” WT
- Shifters – SRAM XO
- Rear derailleur – SRAM XO
- Front derailleur – Don’t be silly…
- Crank – SRAM XO 170mm length, 32T direct mount chainring
- Cassette – SRAM XO
- Chain Guide – *eThirteen
- Saddle – SDG
- Grips – Ergon GE1
- Post – FOX Transfer, Factory w/Kashima coating
- Handlebar – Renthal FatBar Carbon
- Stem – Renthal 45mm
- Brakes – SRAM Guide Ultimate levers and Avid CODE callipers, 200/180mm Centerline rotors, SRAM metal sintered brake pads
- Pedals – Shimano XTR Trail, limited edition 25th anniversary edition.
- Bottle cage – Syncros MB Tailor cage Right Micro HV+ Bottle Cage
How’s the Shapeshifter going?
The number one question we are asked on the trails is how the Shapeshifter is holding up to the test of time, and if we’ve had issues like they, unfortunately, were originally plagued with. The bike arrived with a Shapeshifter that wasn’t 100% we believe it was due to incorrect setup, inflating the chamber while it was closed which damaged the unit. That was during the first ride, since then it has never skipped a beat, and has worked perfectly.

Canyon will surely come up with a better solution for the remote lever, though, it has never found a perfect home on the bars, we’re running it upside down on the opposite side and is relatively straightforward to actuate with a right thumb.
Do we use the Shapeshifter much on the trail?
Yes, a lot. In fact, if we didn’t use it and left the Shapeshifter in ‘descend’ mode it would climb like a sack of wet potatoes, it’s not ideal, to say the least. But if you utilise it to your advantage, practice activating it so it is quick and easy, the advantage is great.

As we mentioned in our initial review of the Strive we found the Shapeshifter system required a bit of practice to become fully acquainted with it. The system works by shifting the position of the upper shock mount back and forward which has a dramatic effect on the suspension travel amount, feel and geometry of the bike. By pressing and holding the lever it opens the lock on a small air chamber, then as you unweight the rear end of the bike it’ll open, pushing the shock forward into climb mode. To drop it back to descend mode you hit the lever and lean back into the bike and it’ll compress the air chamber, pulling the upper shock mount back.
Our gripe with the system is that it is not exactly 100% clear to determine which mode the bike is in when you’re hammering down the trail, there is a tiny little green indicator on the linkage, but it’s hard to see at the best of times. Practice is key, it is easy for us now.
Read more on the Shapeshifter and what it looks like in our full review of the Strive here – Tested: Canyon Strive CF.
Any trick suspension setup with the fork?
The Strive originally came with a 160mm travel Pike, but we reviewed the Lyrik RCT3 and it’s stayed put since. We appreciate the increased sturdiness of the Lyrik with its beefy chassis when were yanking on the brakes or pinning through rock-strewn ugliness, and it seriously feels more like a BoXXer downhill fork in its spring curve, so damn plush. It is setup with 25% sag.
You can read our full review of the Lyrik here – Tested: RockShox Lyrik RCT3.

While we clearly rate its impact gobbling abilities on the descents, it is a fork we also find quite efficient when climbing too (sounds crazy, we know). With such a supple and low-friction breakaway action, you’re able to hold a line and maintain momentum when climbing rough surfaces, the fork gobbles up mid-sized bumps while you focus on putting down the power in what position you feel comfortable in.
We’ve fitted two Bottomless Tokens in the fork to add progression, helping the bike ride a little ‘poppier’, with a firmer end to the suspension stroke you have a little more to push off when preloading the bike to jump it around the trail onto different lines or to pop a little easier off the lip of a jumps.
And out the back?
The Monarch RCT3 has been totally sweet, super smooth and the three-stage compression control is something that we use a lot during any ride. We select open mode only for the fastest pedal-free descents, the middle setting for pretty much 80% of riding and the third firmest setting saved for only the smoothest and longest climbs. We set it to around 35-40% sag in descend mode which sounds like a lot and was suggested to by Fabien Barel but we’ve found that although it is a lot of sag it works best this way.
We were curious though to see how the bike would react to fitting Bottomless Rings in the air chamber of the rear shock, a very simple process like the fork. After fitting the spacers we found the bike to not wallow so deep under rider input and weight shifts, it resisted bottom-out a little more and we would use the open mode of compression adjustment more without it feeling too soggy underneath us. It also reacted better to hopping, jumping and preloading the lips of jumps helping us move the bike around a little easier.

The hybrid anchors.
Yes, the rider of this bike is particularly sensitive to brakes, often succumbing to bad arm pump and hand pain on even the tamest descents, maybe a result of breaking both arms 12 years ago. Thankfully brakes are improving rapidly, and thus we’re happier! The Strive was originally specced with the SRAM Guide RSC, they were nice feeling brakes with a very consistent lever feel and fair amounts of power, especially with the organic pads swapped for metal sintered.
The next brakes on trial were the SRAM Guide Ultimate, which used the same lever but with an upgraded calliper that was built to manage heat better and utilised a cleaner bleeding process.
Check out our review of the SRAM Guide Ultimate brakes here: TESTED: SRAM GUIDE ULTIMATE BRAKES
Ultimately, we found the Guide Ultimates still not what we needed for the long and steep descents that really tested our strength, no matter how we bled and maintained the system we found fading braking power from heat and heavy usage on the longer descents.
So then we wanted more, and like we’ve seen on many pro’s bikes at the EWS and World Cup DH circuit, many riders are reverting to the old Avid CODE brakes, or at least the CODE calliper and Guide lever.


The CODE is a few years old, still carrying the Avid label where all the modern brakes from the brand carry the SRAM label. We chose to combine the Code calliper and Guide lever to keep the weight down, the CODE levers are mighty tough but perhaps a little overkill for this purpose.
SHHHHHH!

The hard rubber chainstay protector doesn’t do too much in the way of silencing chain noise against the frame, so we gave it a bit of extra dampening with a wrap of Frameskin the Australian brand well-known for their bike protection, much quieter indeed. Check them out here.
Up and down, sit down.
This is the third post we’ve had fitted to the Strive, initially specced with a RockShox Reverb which was plagued with squishy play and was never 100%. The second was the latest version of the Reverb with its new internals and it performed flawlessly for many months of hard riding, RockShox knew they had work to do for consumers to put their faith in a product that for the most part has had a rough ride, and they’ve nailed it. The new one feels the same but works perfectly.
The third post was the long-awaited FOX Transfer, and we’re huge fans. We’re confident in calling it the best post that we’ve ever tried with its simple installation, ergonomic thumb remote and consistent performance.


What’s driving the Strive?
One part of the bike that has demanded very little attention from us is the drivetrain, in fact, all we’ve done is upgrade to the lighter direct mount chainring and drop down from 34T to 32T for a lower range. And we also changed the gear cable, other than that this drivetrain is unstoppable. Original chain, cassette and it’s still super quiet and smooth.
Cranks are 170mm in length, shorter than usual but 5mm of clearance from the trail below can go a long way at times.

How Enduro of you.
What’s better, weight on your body or your bike?
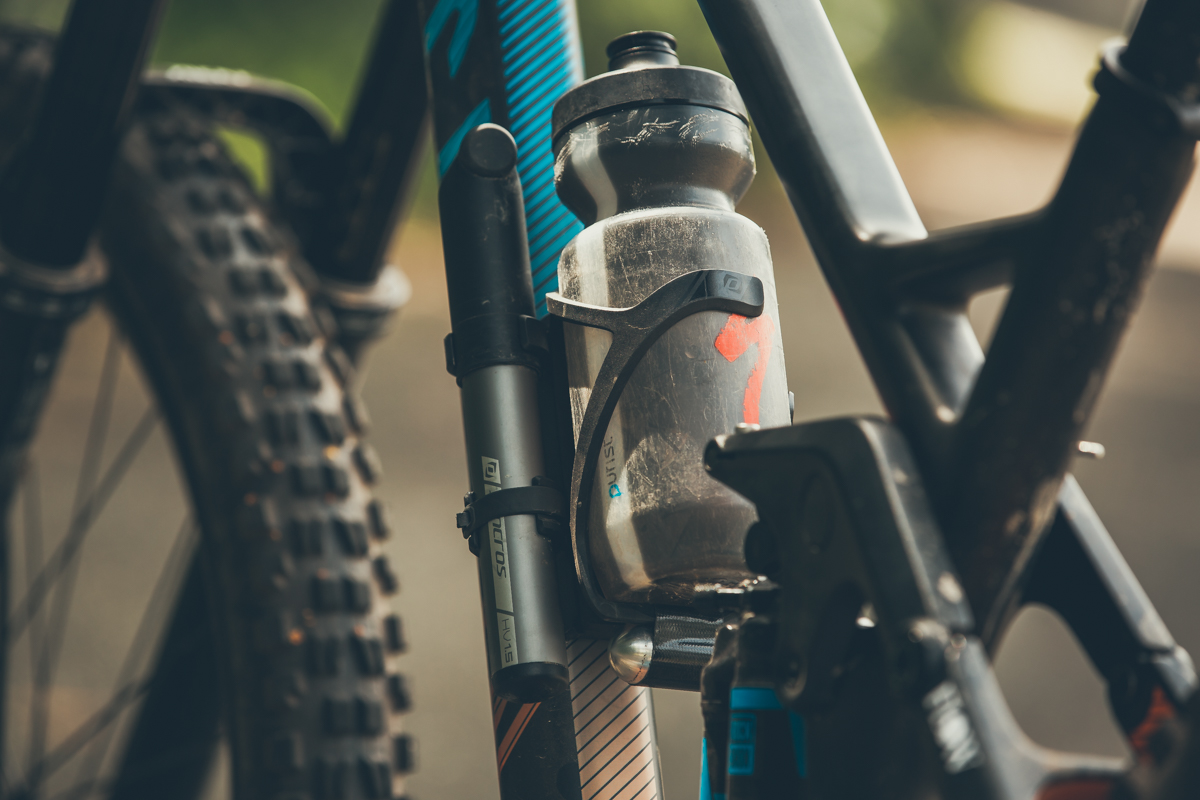


Carrying spares and water on the bike instead of on the body is a good thing for a few reasons, we find taking weight off your back helps you move around easier, but more importantly you don’t forget it if it’s always there. We carry a tube zip-tied under the seat, and the nifty Syncros Matchbox Tailor Cage HV 1.5 combines a bottle cage, pump and multi-tool kit in one.
We’ve been carrying the new mountain bike tubeless specific Dynaplug Micro around with us lately, and so far it’s saved us from having to perform the messy job of fitting a tube on the trail when a puncture occurs. The plug system has successfully sealed three punctures without a hiccup, and so we don’t leave home without it we’ taped it to the bottom of the bottle cage. Click here to heck out more on that little lifesaver.

Big rubber, wide rims, loads of air.
It’s more than just the big and meaty tyres that gives this bike so much grip, it’s also the whopping 35mm wide carbon rims, custom built by Kiwi brand Wheelworks. You can read all about the Wheelworks wheel building process and just why they feel confident in offering such a warranty here, in our interview with Wheelworks founder Tristan Thomas. We recommend you have a read, as there are some pretty interesting aspects to the process and Tristan does a great job of dispelling some popular myths about wheels.

Replacing the 23mm wide SRAM wheels wit the 35mm Derby rims was a revelation, the width allowed us to drop tyre pressures to below 20psi and what that did to the bike’s traction was phenomenal.
Have a closer look at these wheels here: Wheel Works Flite Carbon.


Maxxis have begun making tyres specific for wide rims, the new WT (wide trail) pair of Minions are a perfect match for this bike and its wheels.
That’s about it if you have any setup tips or advice you wish to share, leave a comment in the Facebook section below. Time for a ride!