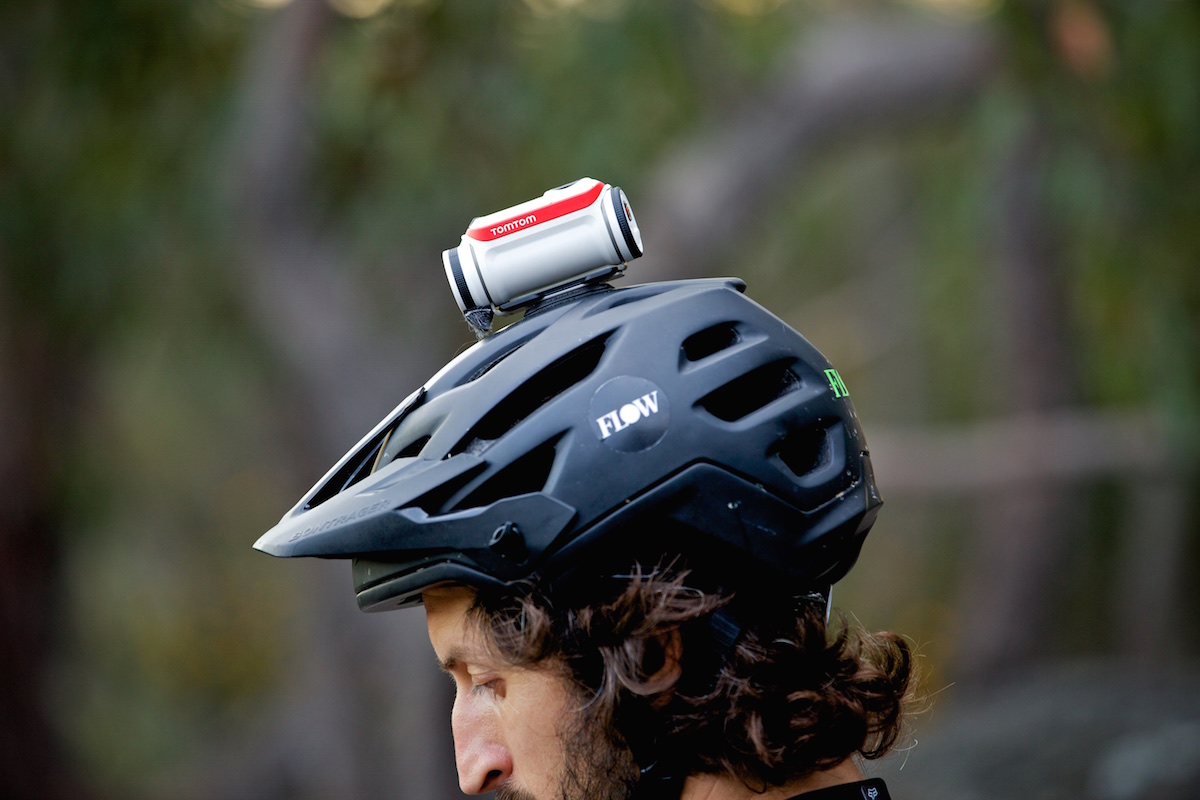
The wearable camera market might be more saturated than the mattress in a Wicked campervan, but that hasn’t deterred TomTom from entering the fray. Best know for their navigation equipment, they’ve have come out of left field with the new Bandit camera and produced something unique with genuine benefits over the competition.
While we admittedly haven’t used every single helmet camera on the market, of the half dozen or so that we have played with lately, the Bandit is the best. It’s crammed to bursting with features, but manages to keep the actual operation side of things simple, and that’s the key to a good product in our mind. There’s enough happening out on the trail already that you don’t want to have to dedicate too much thought to peripheral things, like helmet cameras.
[divider]Size and mounting: Heavy, but secure.[/divider]
The TomTom Bandit’s cylindrical shape is bigger and weightier than much of the competition, and that’s perhaps its biggest drawback – you do notice the 191g when helmet mounted and you’ll want to tighten your helmet up a couple of notches to stop it moving about. That said, the stick-on mount is low-profile, so the weight is kept close to your melon, reducing the top-heaviness to a degree.
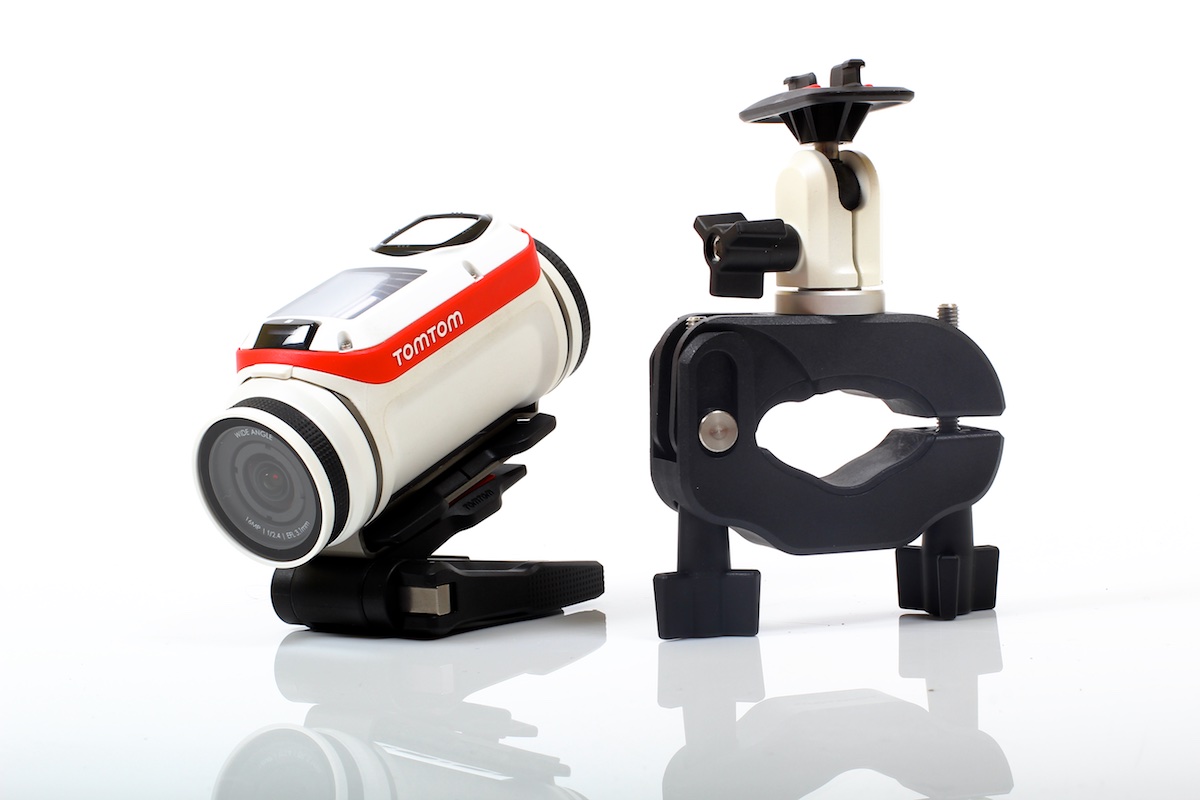
The Premium pack we reviewed comes with a whole motza of mounts, including a very large bar mount, flat surface mounts and versatile 360-degree pitch mount. You also get a GoPro mount adaptor, which is a smart move as there are hundreds of good GoPro mounts out there already. We regularly use some nice CNC mounts produced by PRO which are designed for the Shimano Sports Camera, and these worked well with the TomTom too.
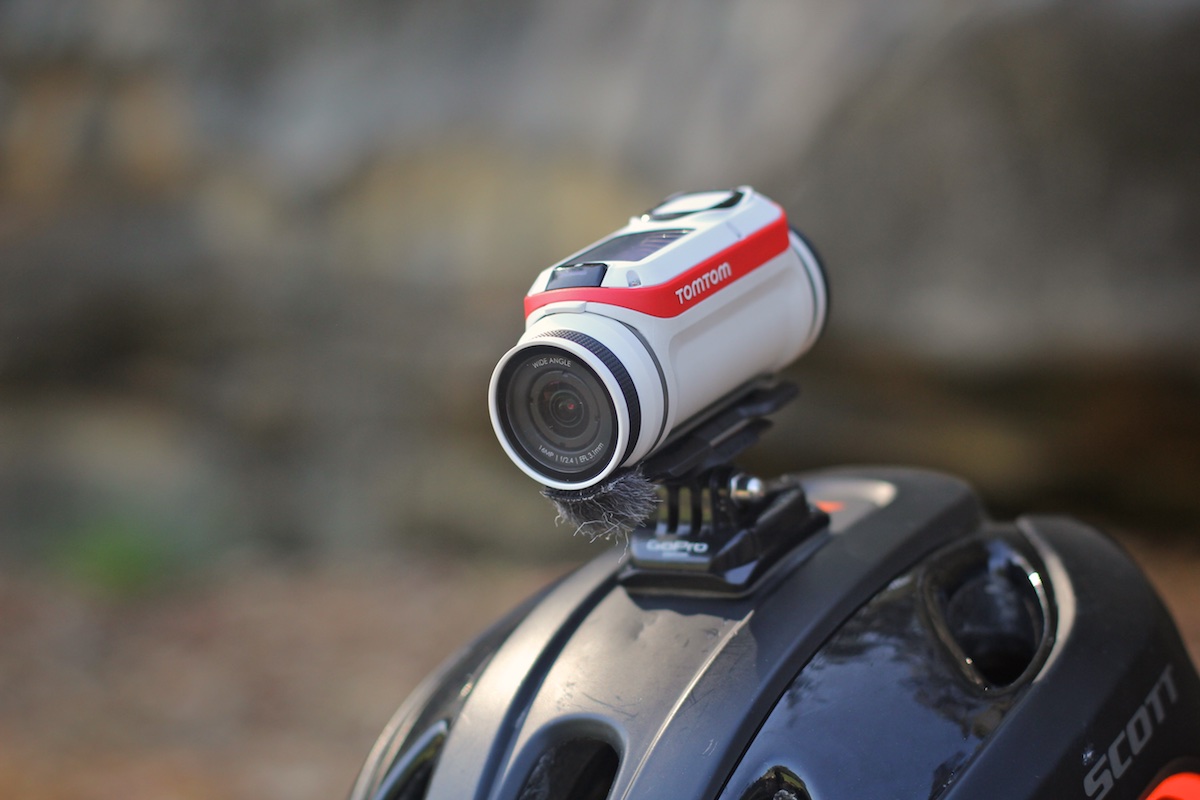
We had no worries running the camera on helmets, on the bars, under the seat rails and we used a GoPro chest mount too without any worry.

Rather than relying on software to auto-adjust the horizon line, the whole unit can be rotated in the mounting bracket, so you’ll always have a level horizon, even if you mount the camera off centre or you need to run it on a funky angle. (If you run the camera upside down, as we did on a chest mount, then you’ll still need to flip the footage in your editing program). We did find that it was possible to accidentally bump the camera and end up with a skewed horizon line. This was most apparent when running the camera under the seat rails, pointing backwards, as our legs would brush the camera and make it rotate in its bracket. Perhaps there needs to be some kind of locking mechanism for this rotating adjustment?
A unique spring loaded ‘jaw’ system attaches the camera to the mounts, and we experienced no footage ruining rattle or vibration, which we’ve encountered with other cameras that have less secure mounting hardware.

[divider]Menu: Big icons, simple layout.[/divider]
If you’ve used any TomTom device before (we use their running watch too) then the menu operation will be familiar. Big icons make it clear what mode you’re in, so you could easily pick up this camera and start recording without ever consulting the instruction manual. The main screen also tells you at a glance if you’ve got wifi connectivity (for the app), a GPS signal, plus remaining battery/SD card life.
You navigate through the settings with a four-way button, and it’s fairly intuitive. There’s also no lag between pressing the button and the camera responding, which is an issue on some cams, particularly older GoPros.
[divider]Clever ‘Batt-Stick’: Cordfree charging and file capture[/divider]

The Bandit’s battery will shoot for up to three hours at 1080p/60fps apparently, but if you need more juice, then you’ll appreciate the removable battery. In fact, the ‘Batt-stick’ is more than just a battery – it also houses the Micro SD card. You can plug it straight into any USB outlet to recharge or transfer the files too, which means you don’t need any extra cords or card readers, which is a boon in an era where everything in life needs an adaptor, charger or some kind of proprietary cord! We even charged it off a crappy phone cigarette lighter phone charger in the car without issue.
[divider]Shooting and modes: All the usuals, including 4K[/divider]
The battle of resolutions and frame rates rages on, ensuring you can watch your footage on any screen from your phone to the cinema. Slow-mo is taken care of with the option of recording as slow as 1/4 speed at 720p, while at the opposite end of the spectrum you can shoot 4K at 15fps. We’re happy to run 1080p/60fps for all of our shooting.
We think the quality of the footage is as good as we’ve seen. As with all helmet cameras, the size of the lens and sensor means that the conditions you’re shooting is have a huge bearing on the quality of the footage
You’ve also got burst photo mode, time lapse options or a standard photo mode (which you can trigger with your remote from the end of your selfie stick).
In terms of the optics and footage quality, it’s hard to give a completely objective assessment without a back to back comparison. Still, we think the quality of the footage is as good as we’ve seen. As with all helmet cameras, the size of the lens and sensor means that the conditions you’re shooting is have a huge bearing on the quality of the footage – lots of light helps, as do smoother trails or else you need to add lots of stabilisation in editing.
[divider]Operation: Separate buttons and remote[/divider]
Why don’t all helmet cameras have this? The Bandit uses two completely separate buttons to start/stop recording, so even if you don’t hear the beeps, you’ll know if you’ve just started or stopped the camera.

Even better is the neat remote, which is small enough to fit to the bars next to your grip. Like the camera itself, it has separate start/stop buttons, plus a flashing light to confirm when you’re recording. Unlike other cameras we’ve used with remotes, pairing it to the camera involved zero screwing about.
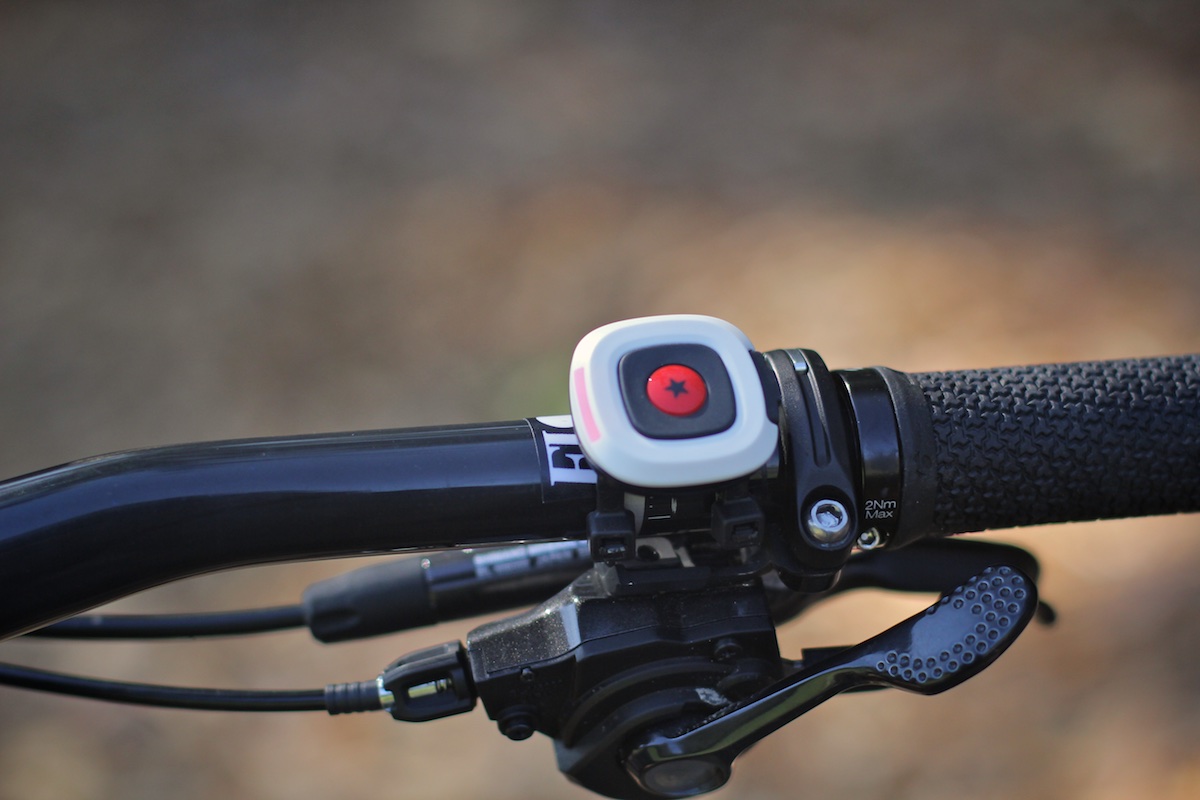
The supplied straps didn’t offer a tight enough attachment for the remote on our handlebar, so we used a couple of zip-ties instead.
[divider]Sensors galore: GPS, automatic footage highlighting[/divider]
Part of the Bandit’s appeal is its GPS functionality and how this ties in with the seriously slick Bandit phone app. We found that the camera generally located a GPS signal quickly, even out in tree cover.

The camera takes all this GPS information, then combines it with input from other built-in sensors to automatically ‘highlight’ your footage using inputs like speed, acceleration, g-forces, deceleration, vertical distance, rotation and heart rate (if you’ve got a heart rate sensor). These highlighted bit of footage are then earmarked for speedy editing, which is explained more below.
[divider]Phone App: Very clever instant editing[/divider]
Much of TomTom’s marketing hoohah about this camera is based around its speedy in-App editing software. It’s very smart really. Connect the app to your phone via wifi and you can not only get a live view (and it is pretty much live, there’s also no lag at all from camera to phone) but you can create and export finished movies, with sound tracks and all, in just a couple of minutes.

In its speediest form of editing, you select ‘create story’ from the menu then simply shake the phone and the camera will assemble all bits of footage it detects as being most noteworthy (e.g. when you’re going fastest, or when you have a big impact) into a little video sequence. You can then add music or an overlay (speed, g-forces or heart rate) and then save it for uploading to your Facetube account.

In practice, we preferred to have a little more control over the process. While the automatic highlighting works well, we got better results when we manually selected our own highlights. This is an easy process too – you can watch the clips back and then when you see a section you want to include in your video, just tap the little star button. Once you’ve assembled your favourite moments, you can trim them to length and assemble them into a timeline.
Once we got the hang of the process, it took us about two or three minutes to assemble an edit. Sure, it’s not cinema ready, but for sharing the experience quickly it’s impressive!
[divider]Other drawbacks: Not waterproof, wind noise[/divider]
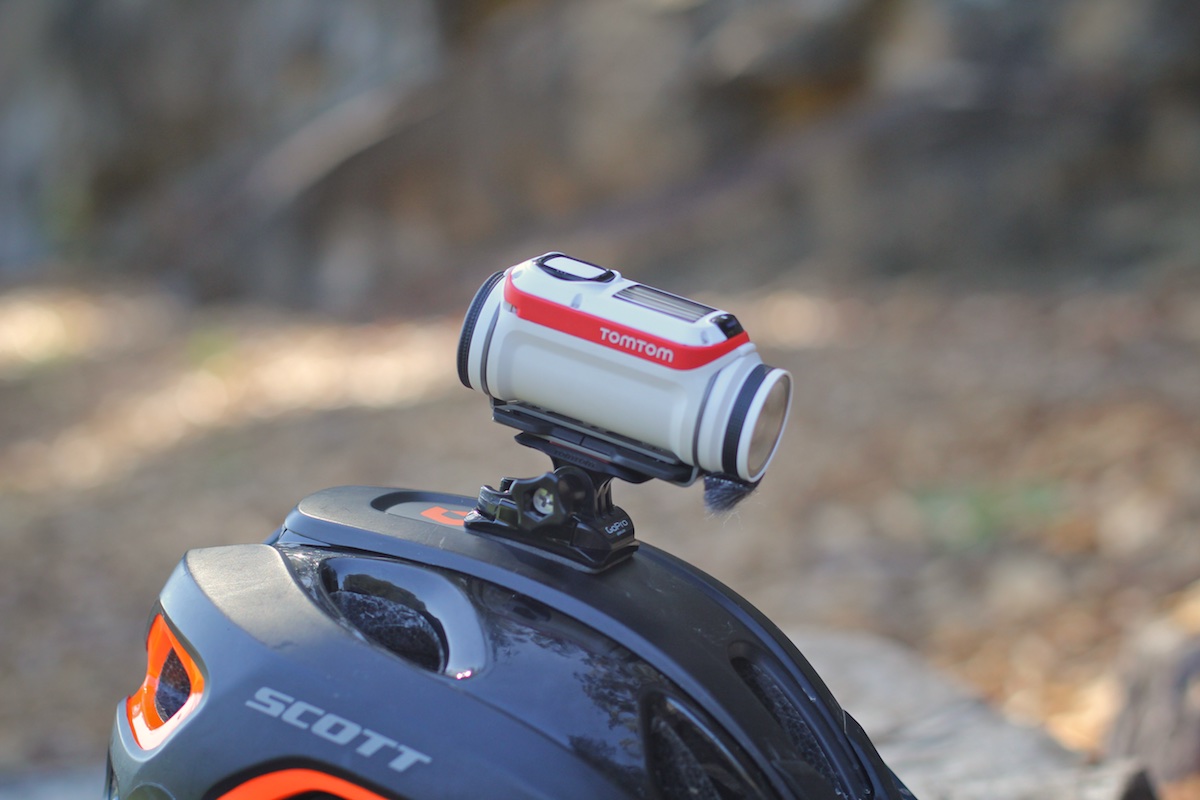
If you’ve got the Basic pack, then the Bandit isn’t waterproof out of the box. It is splash proof, but you’ll need to fork out for the separate waterproof lens, or buy the Premium pack instead. With the waterproof lens fitted you can go take photos of all the pretty fish down to 40m. The only other issue is we found the microphone is badly affected by wind noise about a 20km/h. Luckily you get a funny little stick on ‘beard’ for the camera that goes over the microphone and makes the Bandit look like a distinguished old professor, removing most of the wind noise.
[divider]Final thoughts:[/divider]
The helmet camera market is a crowded arena to compete in, which makes it even more impressive that TomTom’s very first offering is so great. In this era of (over)sharing of our every experience, the Bandit is an amazing tool for not only recording your ride in more detail than ever, but getting it out to the world very fast. We’re clearly impressed!

