What’s my ideal sag? How do I set up rebound damping? What volume spacers should I be using?
There are a lot of questions when it comes to setting up the suspension on your mountain bike, and truth be told, there are a lot of answers out there. Of course every rider is different, and no two trails are the same, and that means suspension setup will vary from bike-to-bike. Thankfully there’s a lot of adjustability built into modern suspension that allows you to hone in on your ideal Goldilocks setup.
In our previous guide we concentrated on how to setup suspension forks. Here we’ll be looking at the other end of the bike; the shock.

Having tested a bazillion full suspension bikes over the past couple of decades, we’ve learned a lot about different suspension designs and shocks. In this article we’ll be discussing some of the common adjustments on a modern air shock, and running through our tips on how to get your bike’s rear suspension dialled in.
This guide is designed to be applicable whether you’ve got an XC bike with a Float DPS shock and a remote lockout, or a big travel e-MTB with a Float X2 that has 4-way adjustable damping. Although this is specific to air shocks, there will still be some information in here for coil shock users too. And while we’re using Fox suspension as the primary example, many of the same tuning tips will apply to RockShox and other brand’s shocks too.
How to find your mountain bike’s shock tune
First and foremost, if you want to achieve an accurate and effective setup, it’s important to know as much about the shock on your bike as possible.
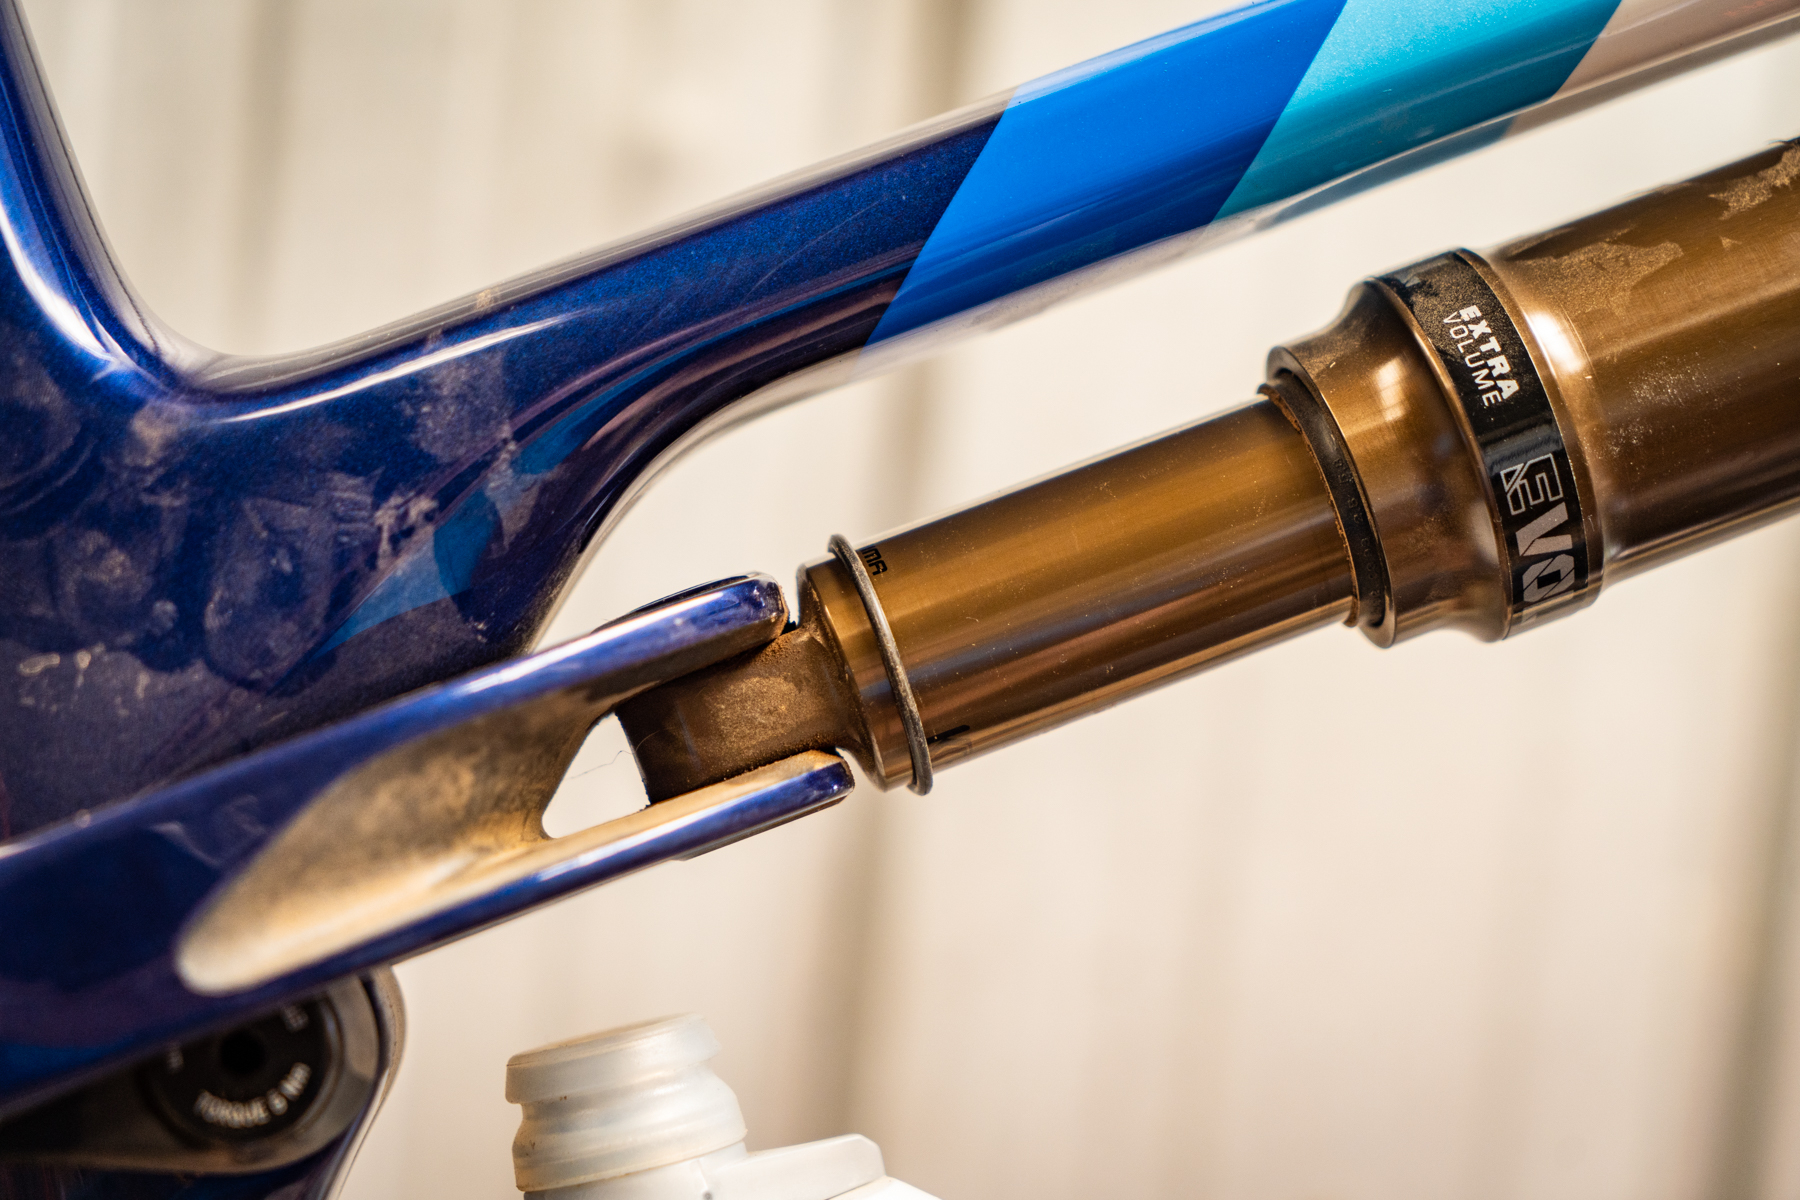
You should be able to find the basic specs on the bike manufacturer’s website. For further detail, older generation Fox shocks have a 4-digit code on the side of the air can that you can input into the Help section on the ridefox.com website. Newer shocks come with a nifty QR code, which will take you directly to the spec page.

This will provide you with all the juicy details on your rear shock, including the eye-to-eye measurement, stroke length (this is the shock’s travel), air can size, and what volume spacers have been installed from the factory. It’ll also tell you what adjustments you have, and it’ll give you detail about the internal compression, rebound and lockout tunes.
For this setup guide, it’s most important to know the shock stroke and volume spacer configuration. Shock stroke is particularly important, because it’s going to help you with setting up sag.
There are quite a few variations to the shock stroke, and it doesn’t always equate to the length of the exposed stanchion. Sometimes there might be 60mm of stanchion showing, but the stroke is actually 55mm. You want to know the exact stroke length in order to achieve the most accurate setup when measuring sag and travel usage.
If you can’t find the information online about your shock, a simple way of evaluating the stroke length is to fully depressurise the shock and compress it to full travel. If you’ve got a Float X or a Float X2, you’ll need to sit on the bike and give it a bounce to make sure you’re fully compressing the shock and the bottom-out bumper. Once fully compressed, air the shock back up to pressure and measure the total distance between the O-ring and the wiper seal. That’s your shock stroke.
Research the base settings of your suspension
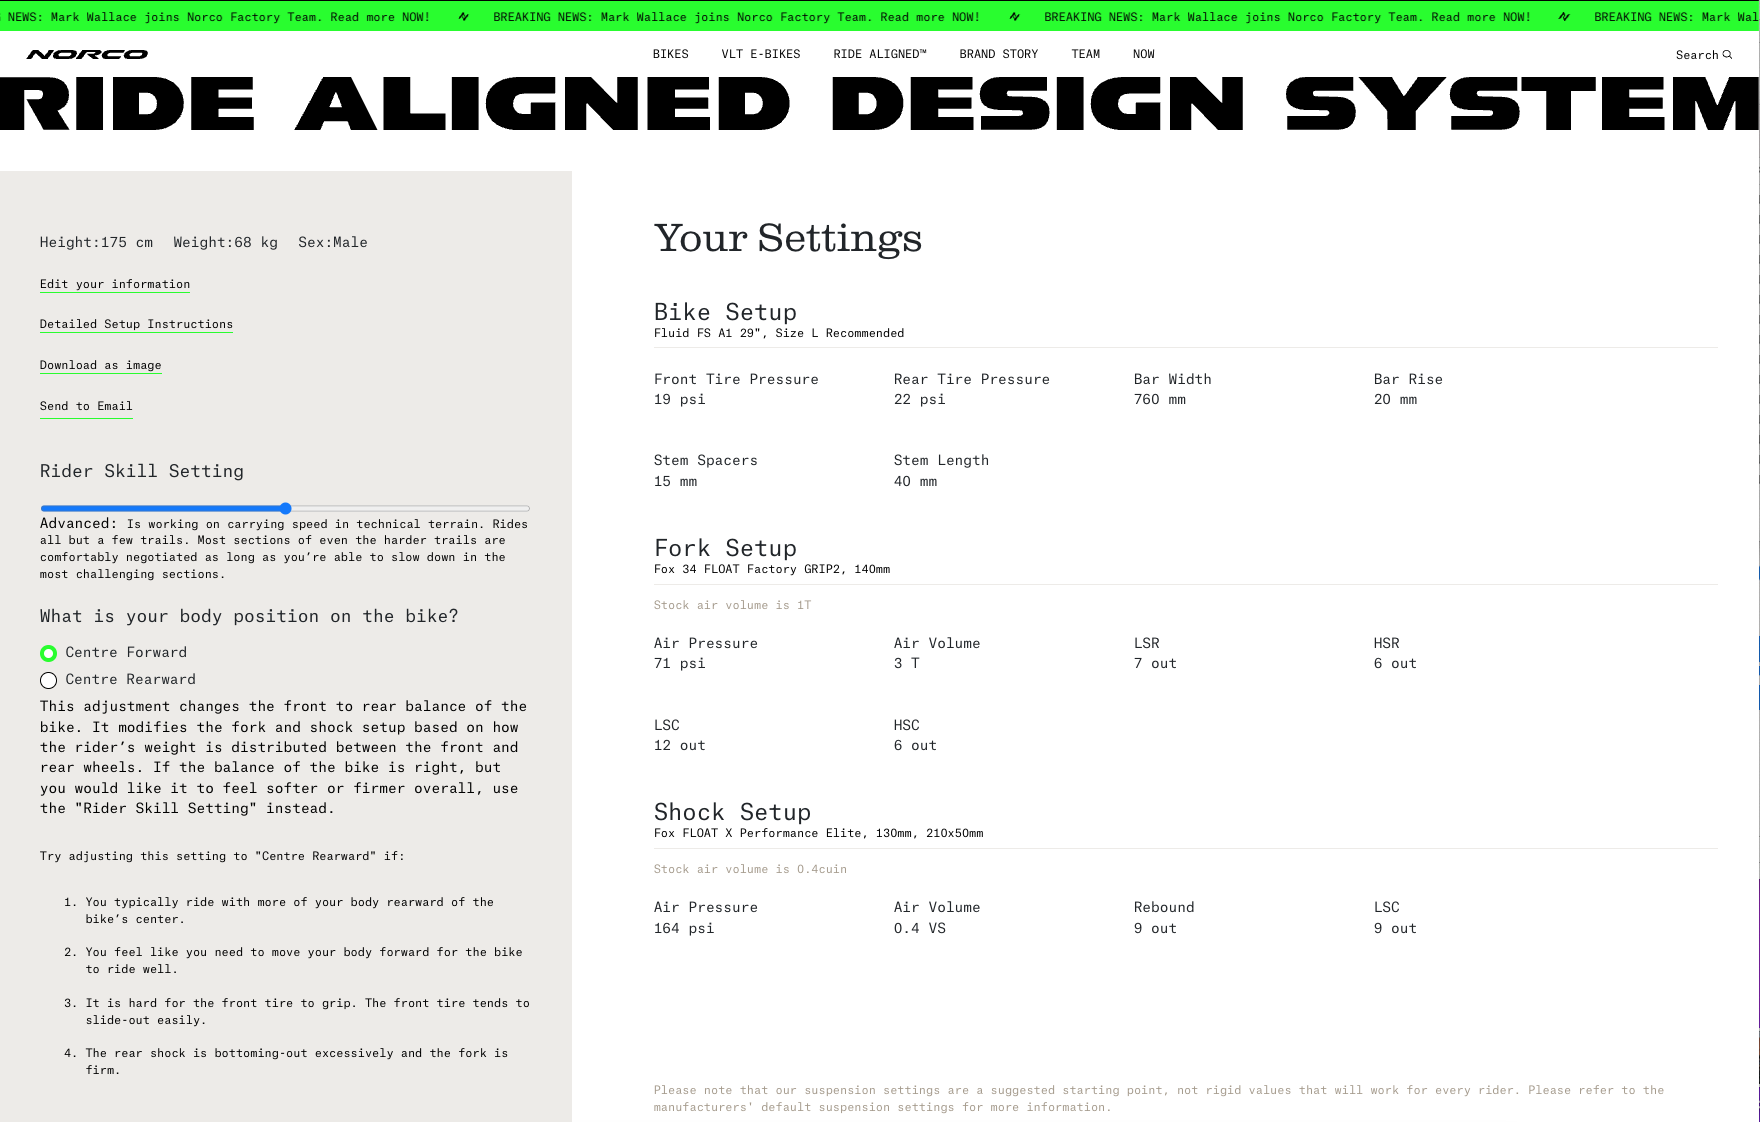
There are some other useful resources for helping to get the suspension dialled in on your bike. Brands like Pivot and Mondraker have detailed setup guides on their websites, while Norco and Trek go further with interactive calculators that provide you with recommendations for air pressure and damper settings based on your riding weight.
We’re big fans of these setup guides, as they provide owners with a useful starting point for suspension setup so that they can get the most out of their new bike from the get-go.
Unfortunately not all bike companies are so helpful. Canyon and Polygon are two examples of brands that offer very little setup information for their mountain bikes, which is a problem given they’re sold direct-to-consumer. We’d love to see those brands, and others, make more of an effort to help customers dial in their bikes.
Whatever bike you own, it’s worth checking out the manufacturer’s website to see if there are any resources in regards to suspension setup. Contact the brand directly if you can’t find what you’re after.
If you’ve bought your bike from a local dealer, ideally the staff will help you to get it set up before leaving the store. At the very least they’ll be able to provide you with some suggestions. You’re primarily after the recommended sag figure for the rear shock, which, as we’ll come to shortly, is one of the most important aspects when it comes to suspension.
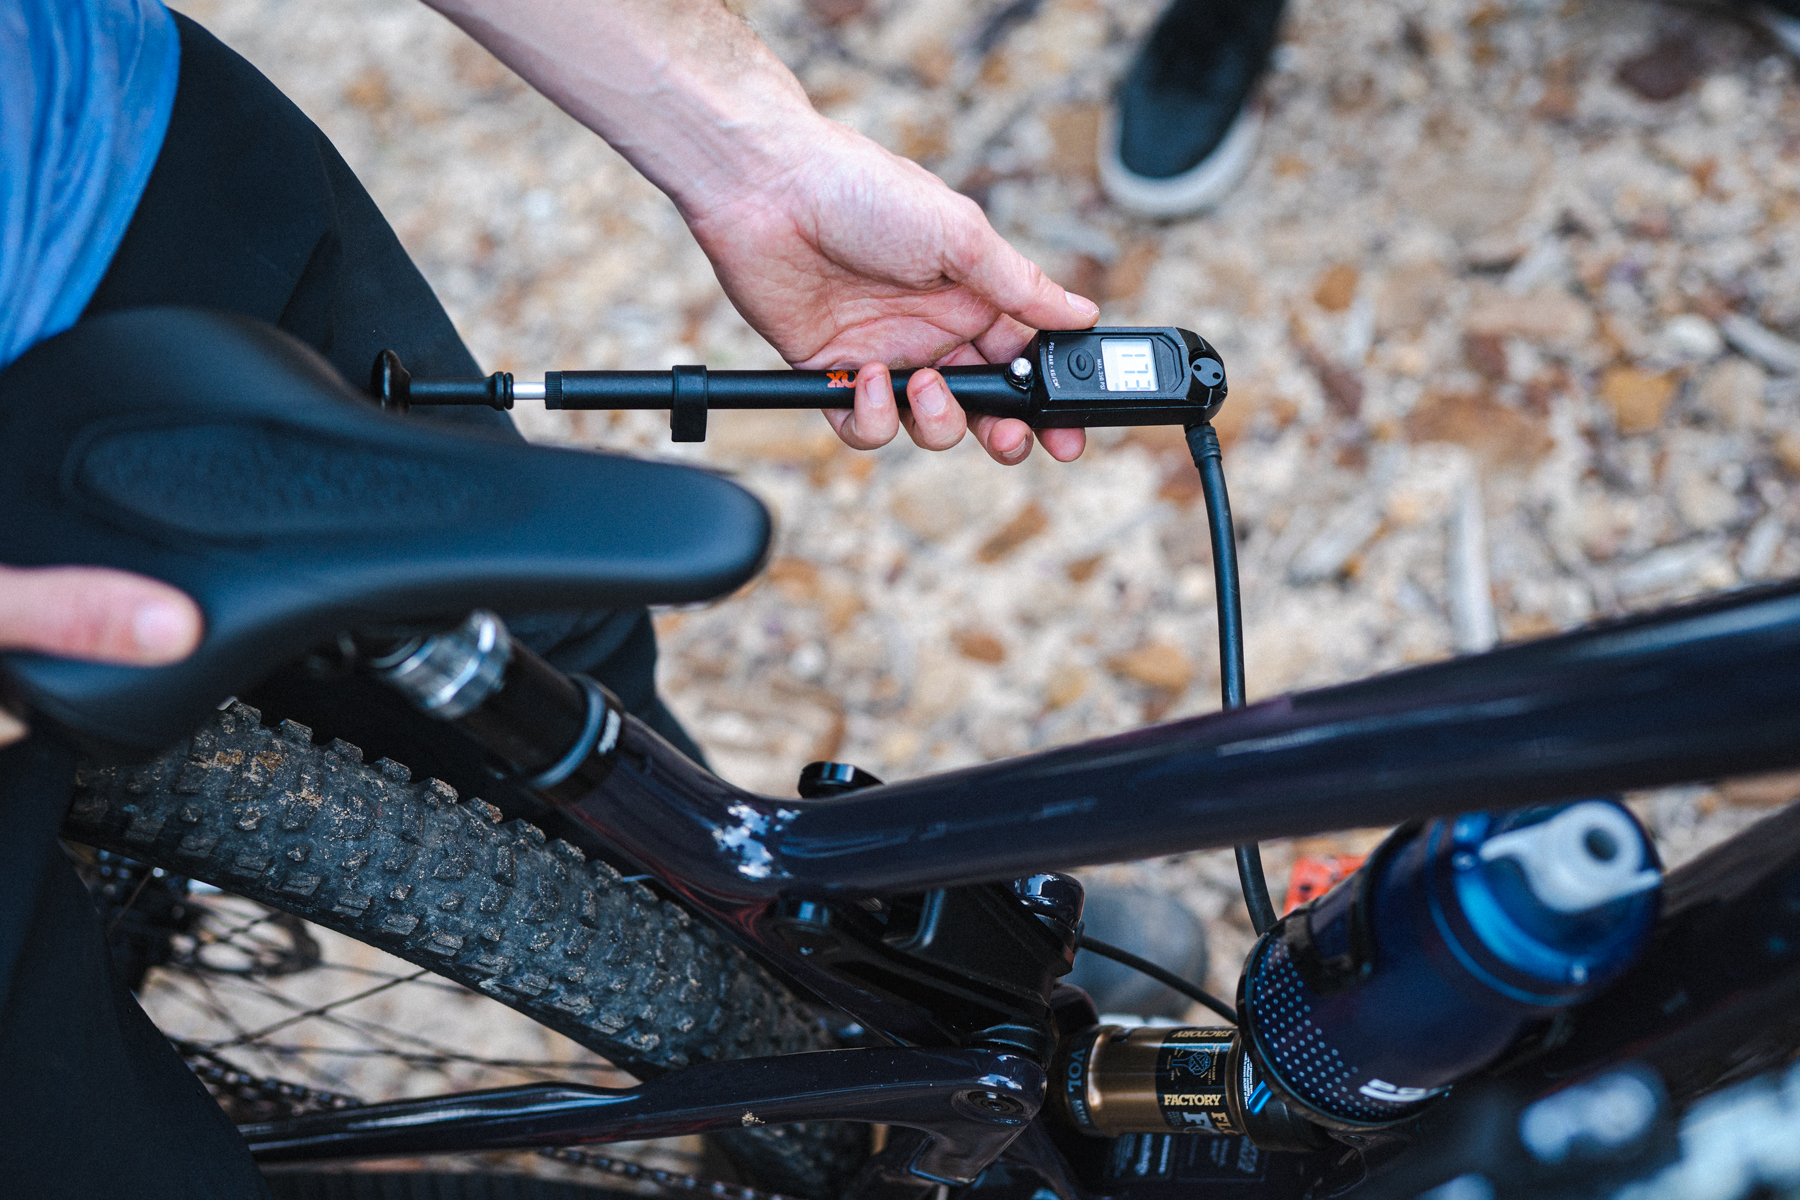
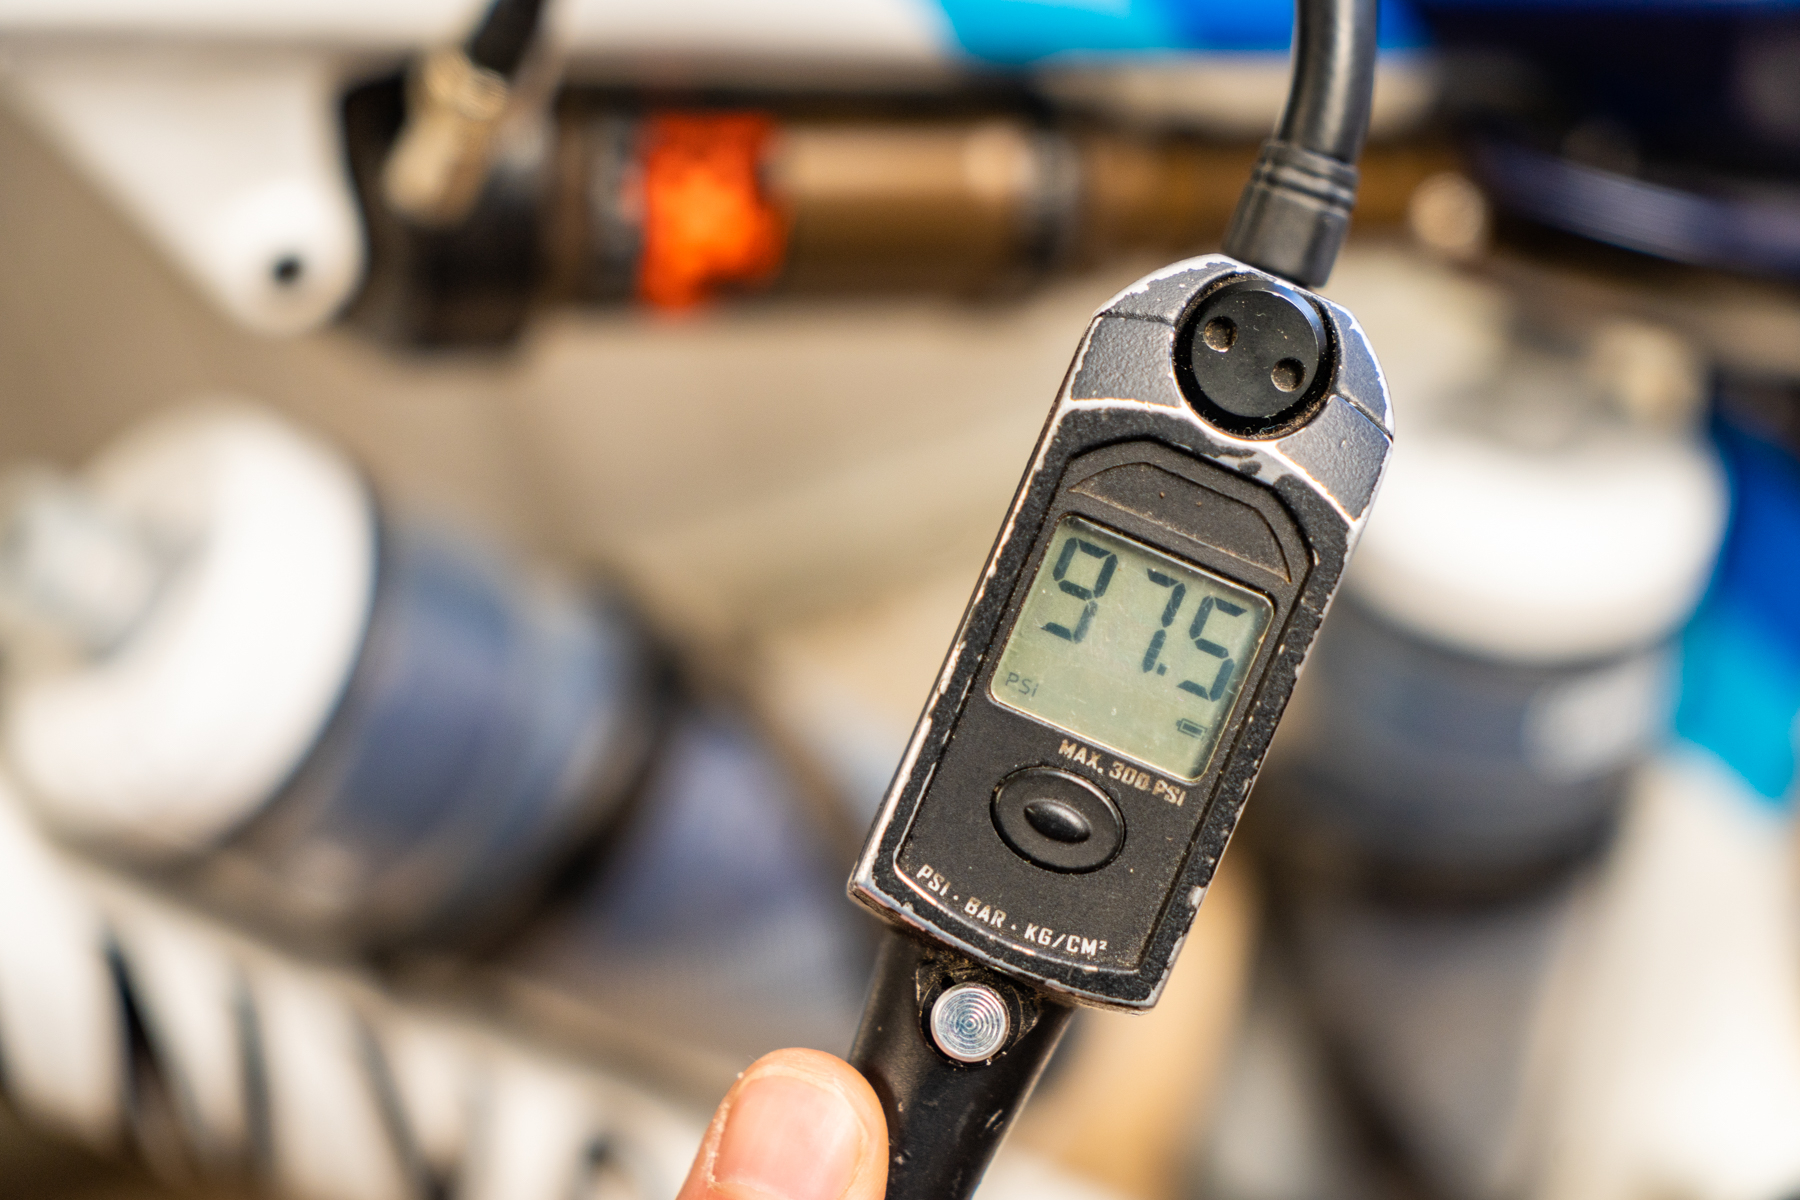
Get a digital shock pump
We already mentioned this tip in our fork setup article, but we’re going to mention it again here. Don’t bother with a cheap analogue shock pump, invest in a high quality digital pump instead. They’re more accurate and easier to read, which provides a significant advantage when making adjustments.
The accuracy is particularly important on full suspension bikes with low leverage ratios and lower operating pressures. That’s because a small change in pressure (just 3-5 psi) will have a noticeable effect out on the trail.
A quick note here; when you thread the pump onto your shock’s air valve, a small amount of air will be released from the shock and into the pump. Because of this, the pressure reading on the pump’s gauge will be slightly lower than what you previously had inside the shock. Don’t worry, this is totally normal, and it’s not due to your shock leaking air.
Additionally, when you remove the pump, you’ll hear a small hiss of air being released. Again this is not due to a leaky shock or pump. It is simply the residual air from the pump being released after it has disconnected from the shock’s air valve.
Wind off all the adjusters
To prepare your bike for checking sag, it’s crucial to ensure that all of the damping adjustments are set to their most open position. That’s because you want to avoid the damping from influencing the shock’s position when measuring sag.
If your shock has a lockout, make sure it’s flipped to the fully open position. Do the same thing with any compression adjusters, winding them anti-clockwise until they stop in their lightest setting. Repeat the process with the rebound adjusters, winding them anti-clockwise all the way to the fastest setting.
While you’re doing this, it’s a good idea to count the number of clicks available with each dial and lever. Understanding the total range of each adjuster will be useful for dialling in your damper settings later on.
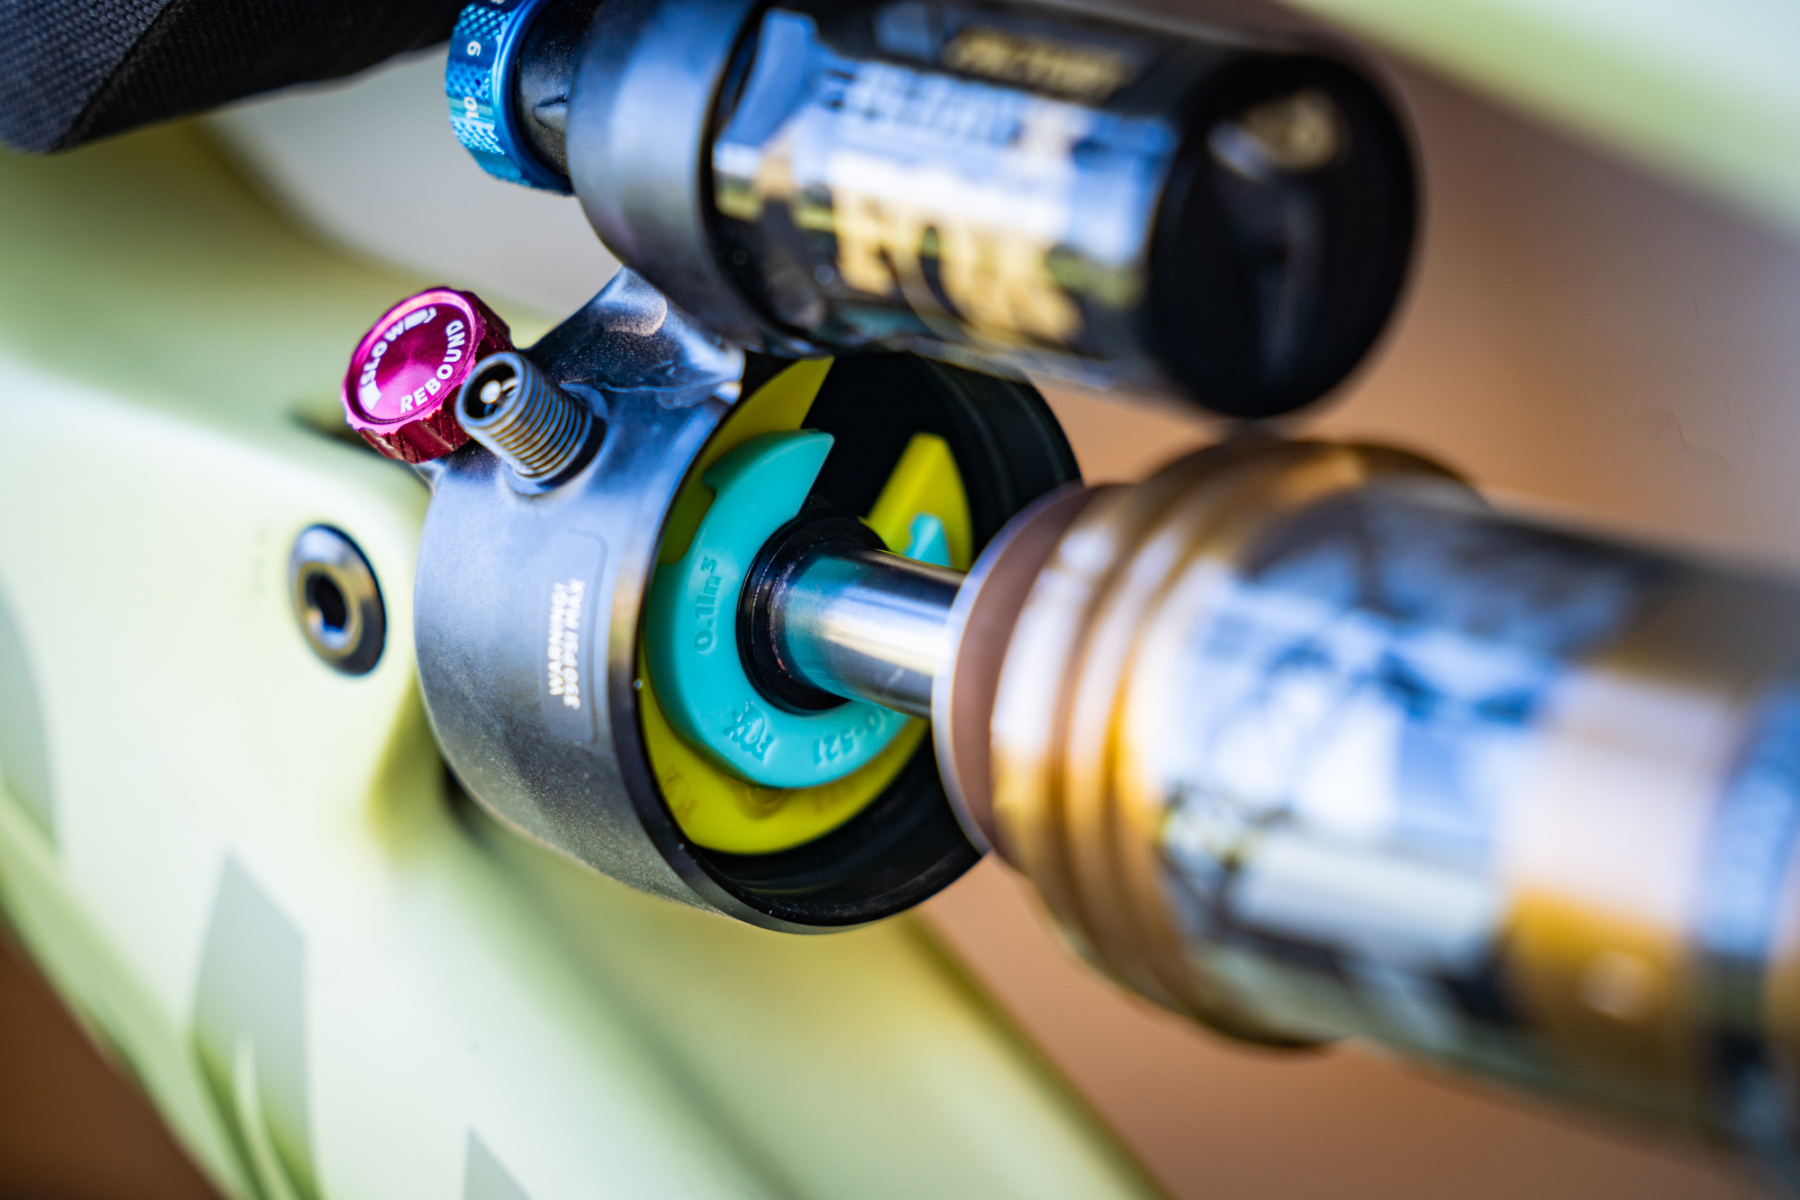
Equalising the air chambers of your rear shock
Before we attach the shock pump, there’s a crucial element of suspension setup that you’re going to need to wrap your noggin around.
This is due to modern air shocks featuring both a positive and a negative air chamber. These two chambers are separated by the main seal head, and the air pressure inside them is designed to self-equalise using a simple but clever system.
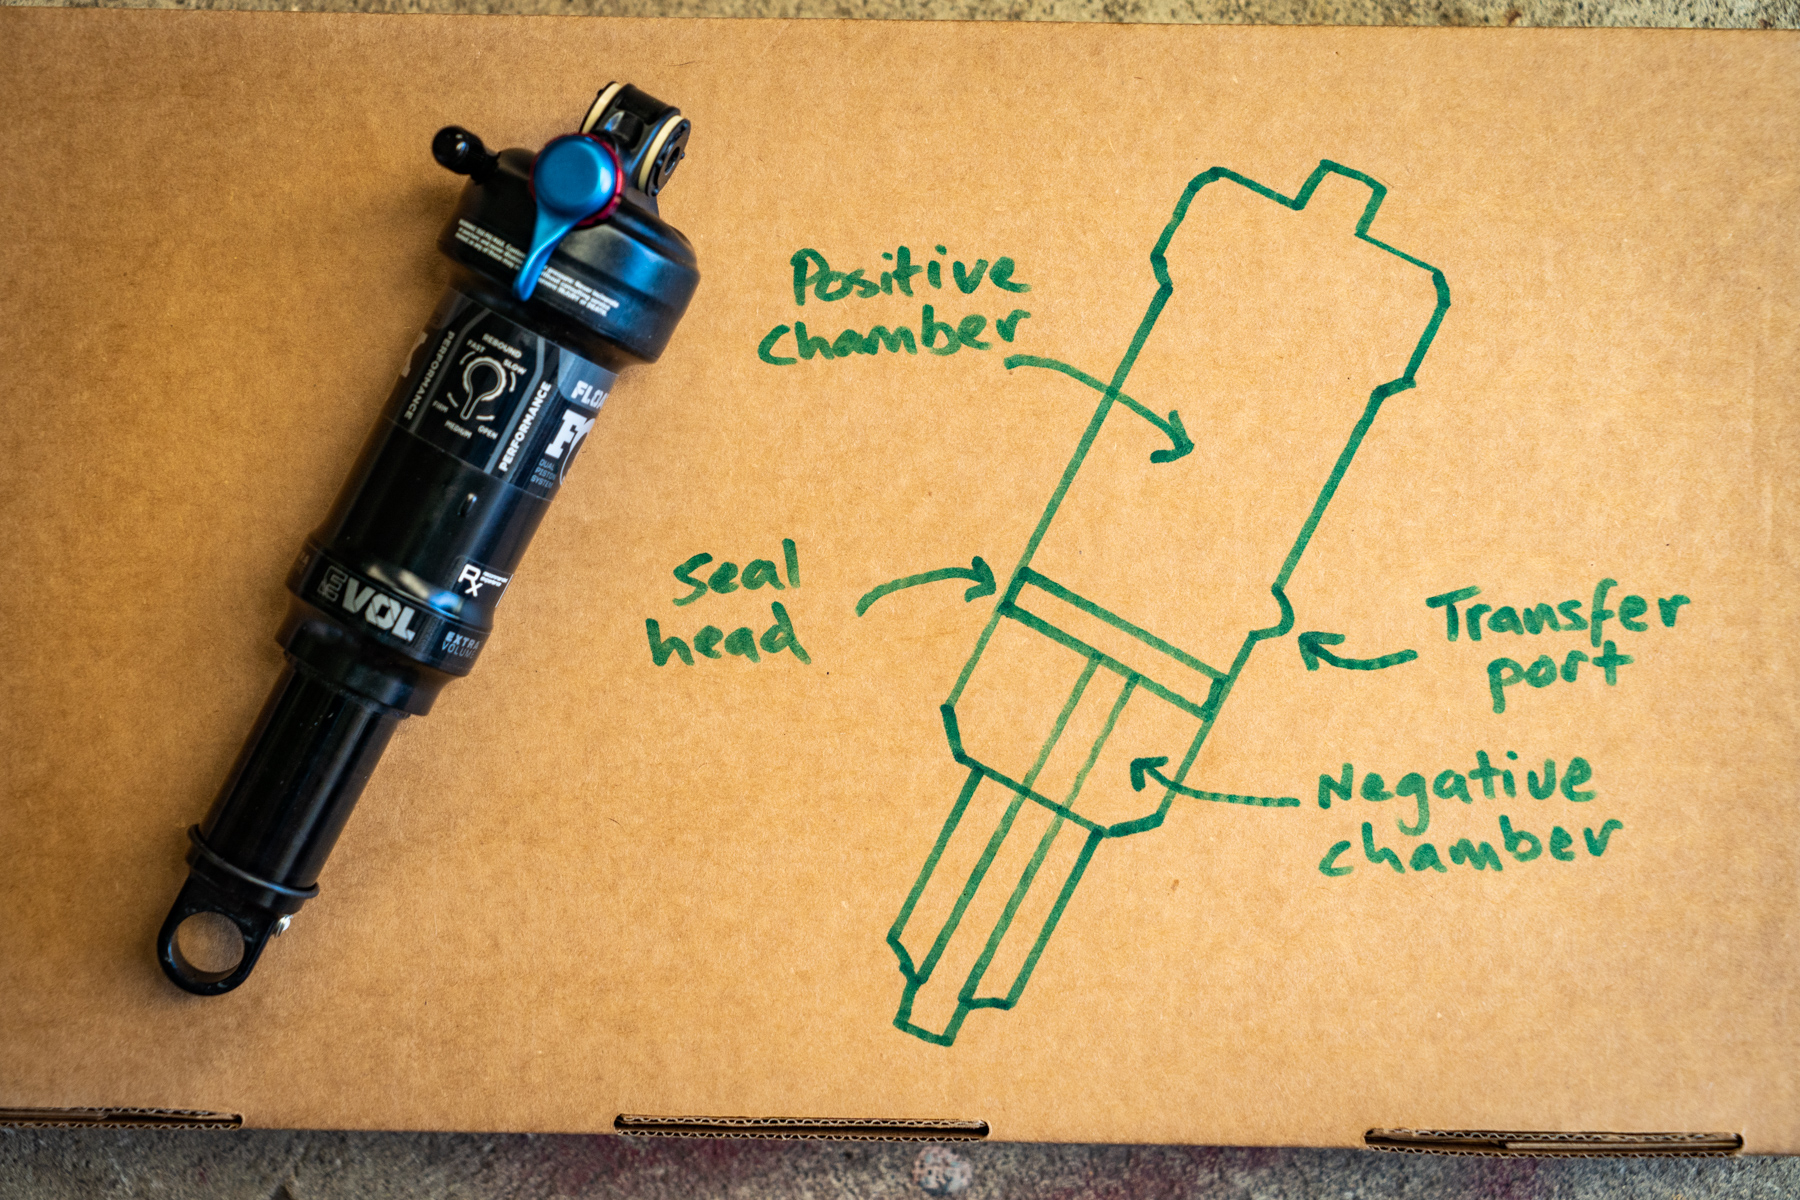
When you add pressure to the shock, air from your shock pump fills the positive chamber. Compress the shock 10-20% into its travel however, and the main seal head passes over a small notch in the air can. This notch is known as the ‘Transfer Port’, and it creates a tiny channel that allows air to pass from the positive chamber into the negative chamber. This equalises the pressure between the two, and it’s a very important part of setting up your rear shock.
To properly equalise the chambers, you’ll need to slowly compress the shock to 10-20% of its travel. You’ll hear a hiss from inside the shock, which is air passing from the positive to the negative chamber through the transfer port. Compress and extend the shock slowly around this position a few times to ensure that the chambers have fully equalised.
During the equalising process, you’ll find that the pressure reading on your shock pump will have dropped slightly. As such, it will be necessary to add pressure, equalise and check the gauge reading several times during setup.
How to check your rear shock sag
The foundation for getting your suspension set up correctly is to ensure you have the correct sag.
Sag is how much the shock sinks into its travel when you’re sitting stationary on the bike. Every full suspension bike is designed with a specific sag number in mind. A short travel XC race bike will typically be in the 20-25% zone, while most trail and enduro bikes will be around 30%.
To check sag, first ensure you’re wearing your typical riding kit including shoes, helmet and a pack if you use one. Find a flat surface next to a wall, mount the bike and assume your riding position. Leaning one grip against the wall to balance yourself, bounce up and down a few times on the suspension to break through any initial seal stiction. On the last bounce, plonk your bum back down on the saddle and remain seated.
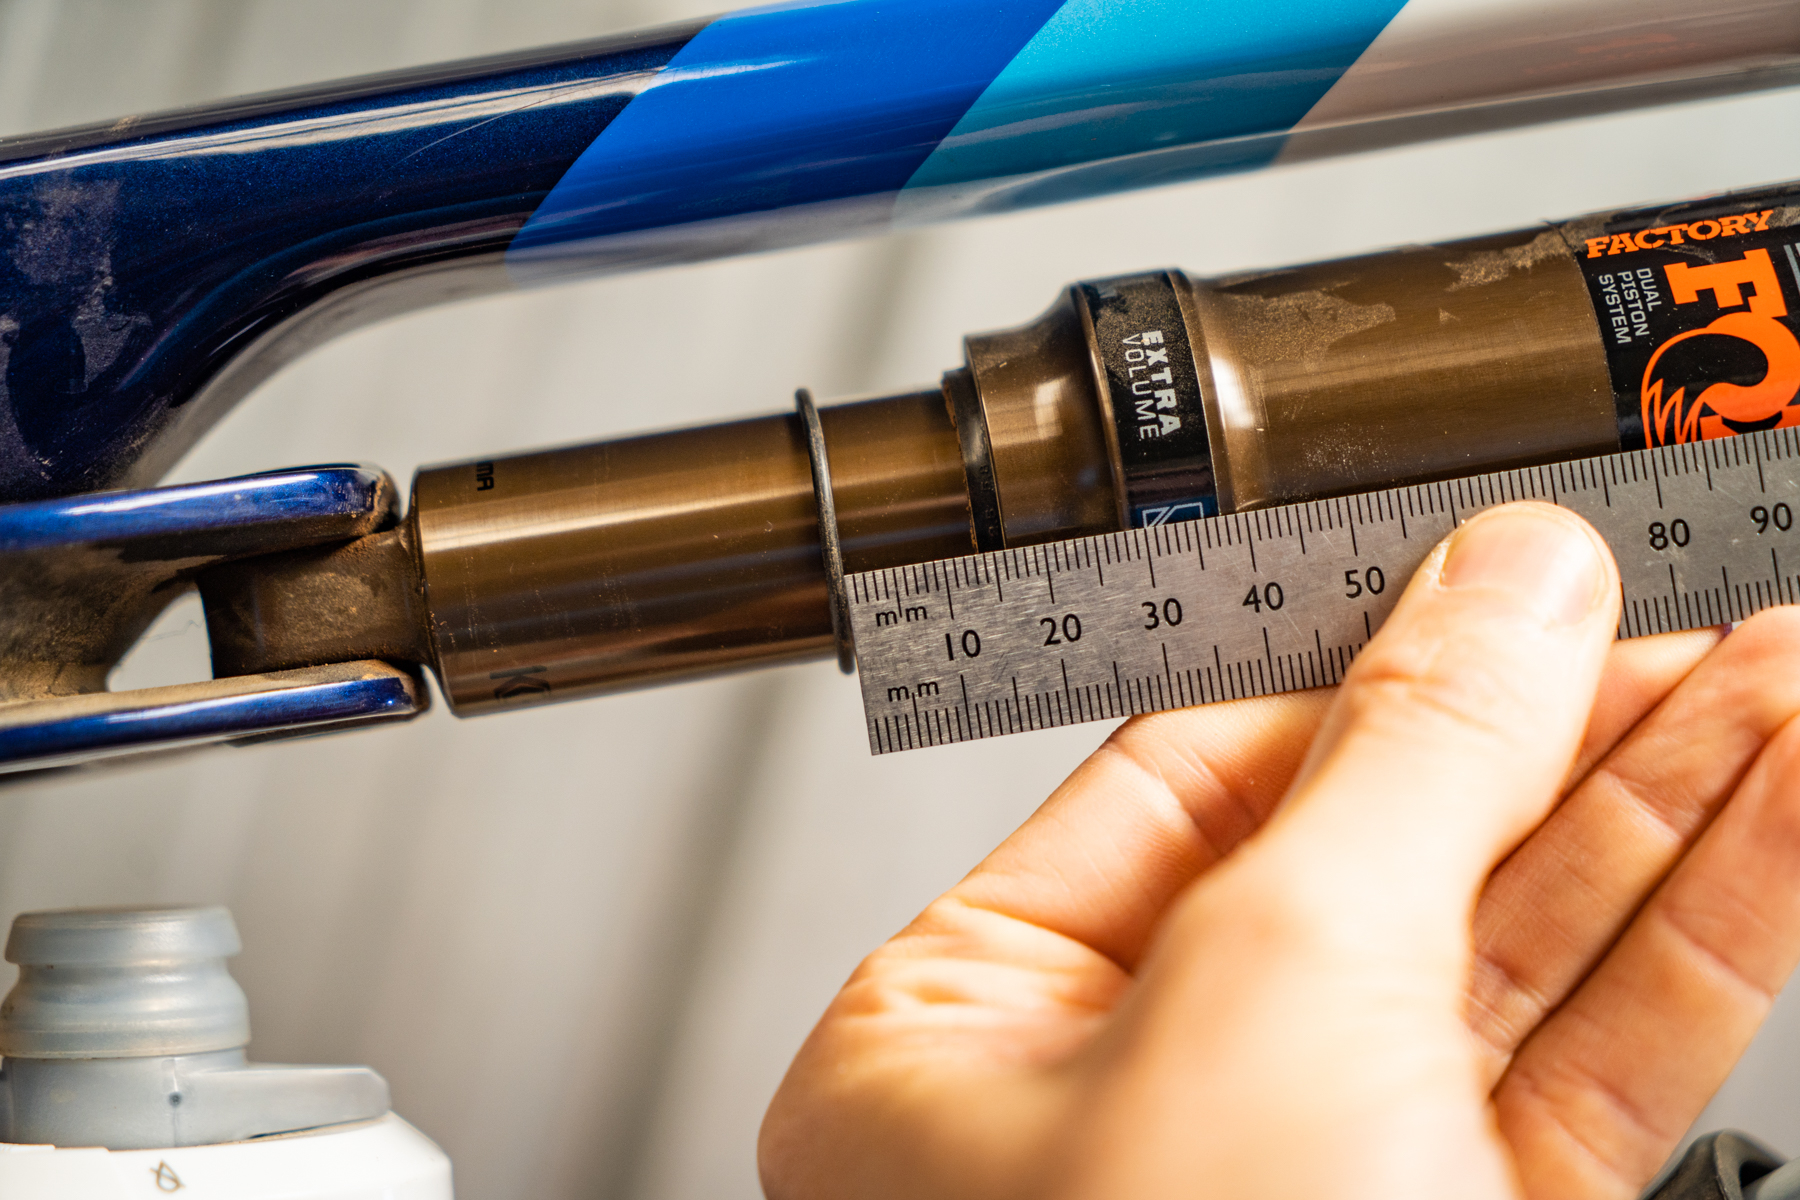
Once the shock has settled in place under your weight, push the O-ring right up to the wiper seal, then gently dismount the bike without dislodging the O-ring.
Now lift up the rear wheel off the ground to ensure the shock fully extends. This is particularly important with a heavy e-MTB, as the rear shock tends to sag into its stroke under the weight of the bike alone.

With the rear wheel off the ground and the shock fully extended, measure the distance between the O-ring and the wiper seal. This is your sag in millimetres, which you can translate to a percentage of the total shock stroke.
For example, if you measured 15.6mm of displacement on a shock with a 60mm stroke, that would work out to be 26% sag.
Now it’s at this point that you’ll want to refer to your bike brand’s recommendations for sag. As mentioned above, most trail and enduro bikes will be around 30%, which is a good place to start.
Of course this number isn’t set in stone, and you can go either side of it depending on what you’re trying to achieve. Be wary from straying too far however. Small changes in sag make a noticeable difference, not just to how soft the suspension feels initially, but also to the overall ride height and dynamic stability. We’ll get a bit more onto that shortly.
Adjusting rear shock air pressure
If you’ve go too much sag, or not enough, you’ll need to adjust the air pressure in your shock to compensate.
As you’ll know from our earlier discussion, it’s absolutely crucial to equalise the two air chambers when you’re adding or removing air pressure. For every change in 5-10 psi, be sure to slowly compress the shock 10-20% into its travel, then extend it slowly, keeping an ear out for that hiss of air. Repeat this compression and extension process several times to ensure the chambers have fully equalised.
After you’ve made your pressure adjustment and equalised the shock, it’s time to recheck sag. Mount the bike and follow the same procedure outlined above. You can leave the shock pump attached during this entire process.
Once you’re happy that you’re at the right sag position, you’ll want to confirm what pressure you have inside the shock. Lift the rear wheel off the ground to ensure the weight of the bike isn’t artificially increasing the pressure reading on the pumps’ gauge. Give the gauge a few seconds to settle, then note down your baseline pressure. This will be an important reference point when making any further adjustments.
How to use mountain bike shock air volume spacers
Once you’ve got the air pressure and correct sag dialled in, its time to move onto volume spacers.
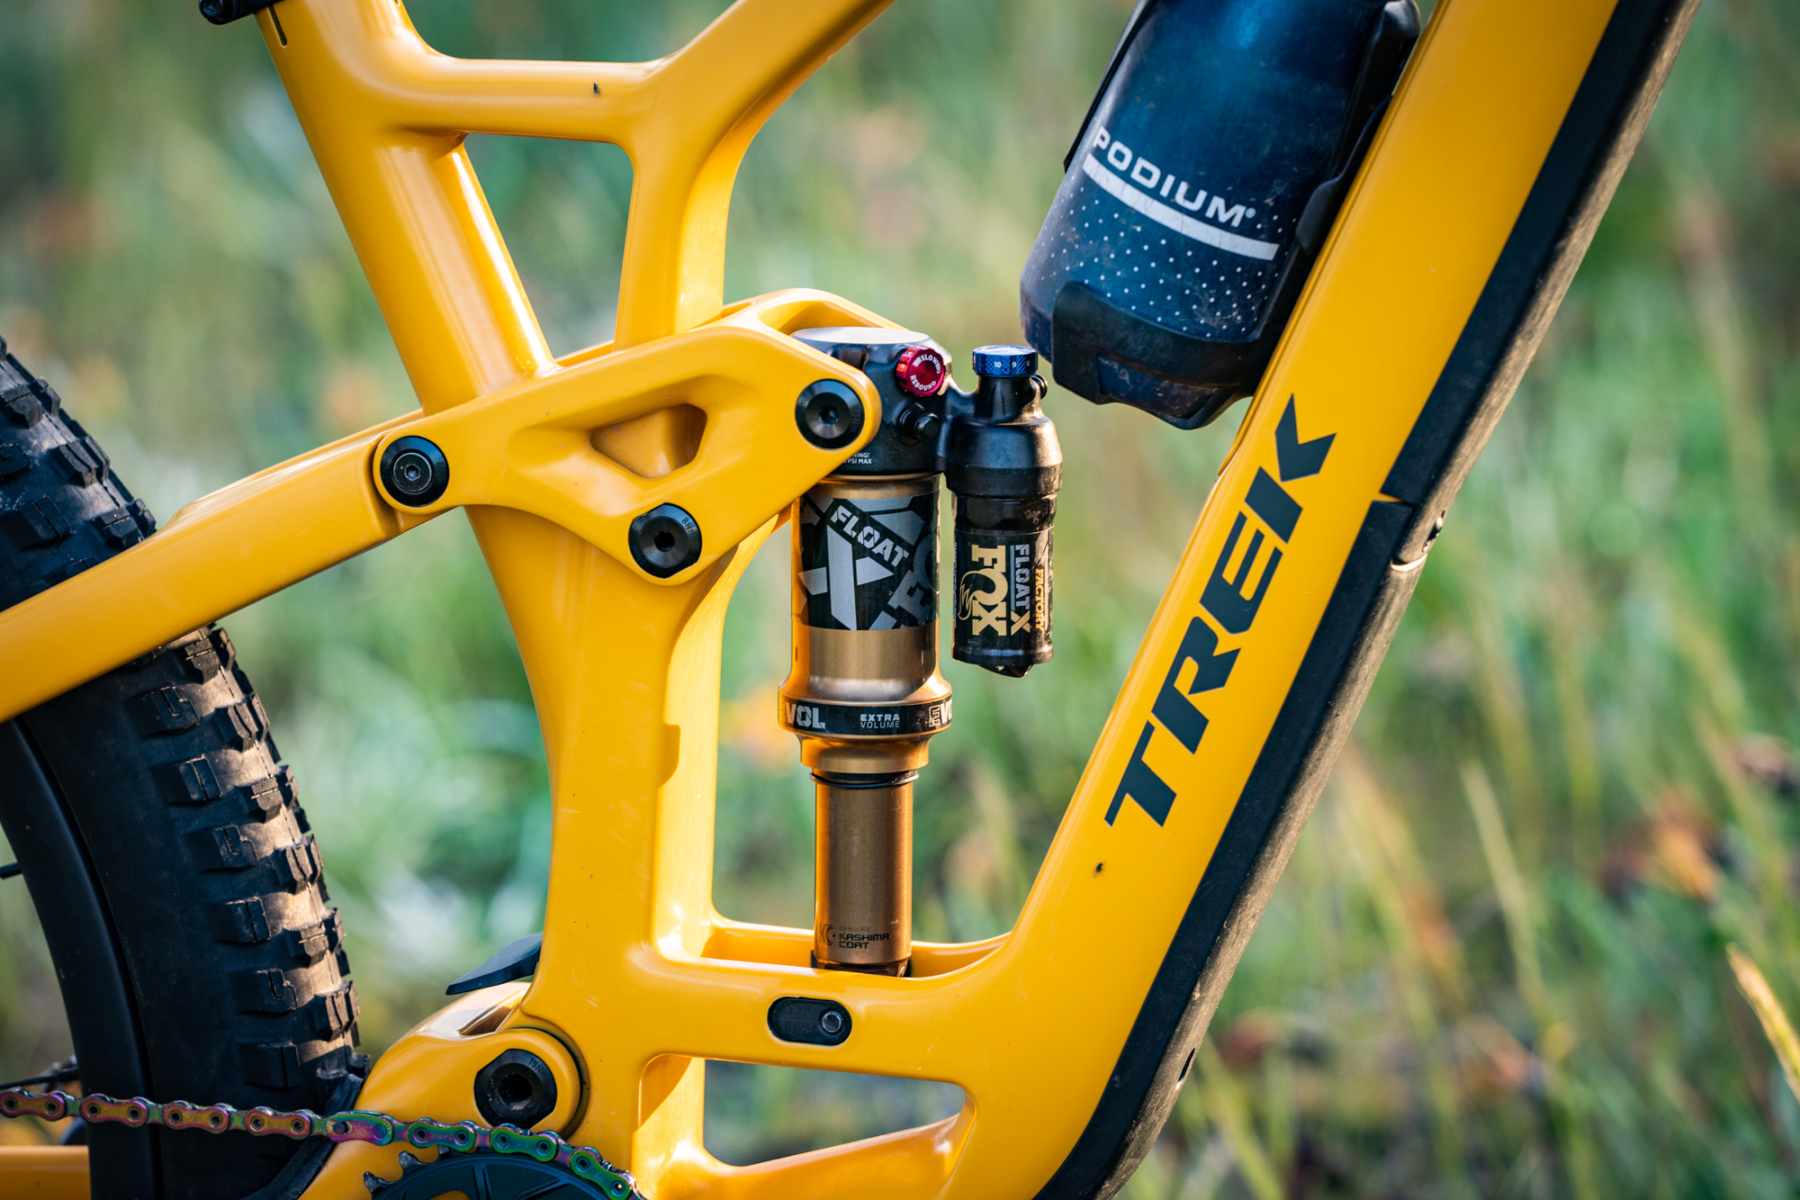
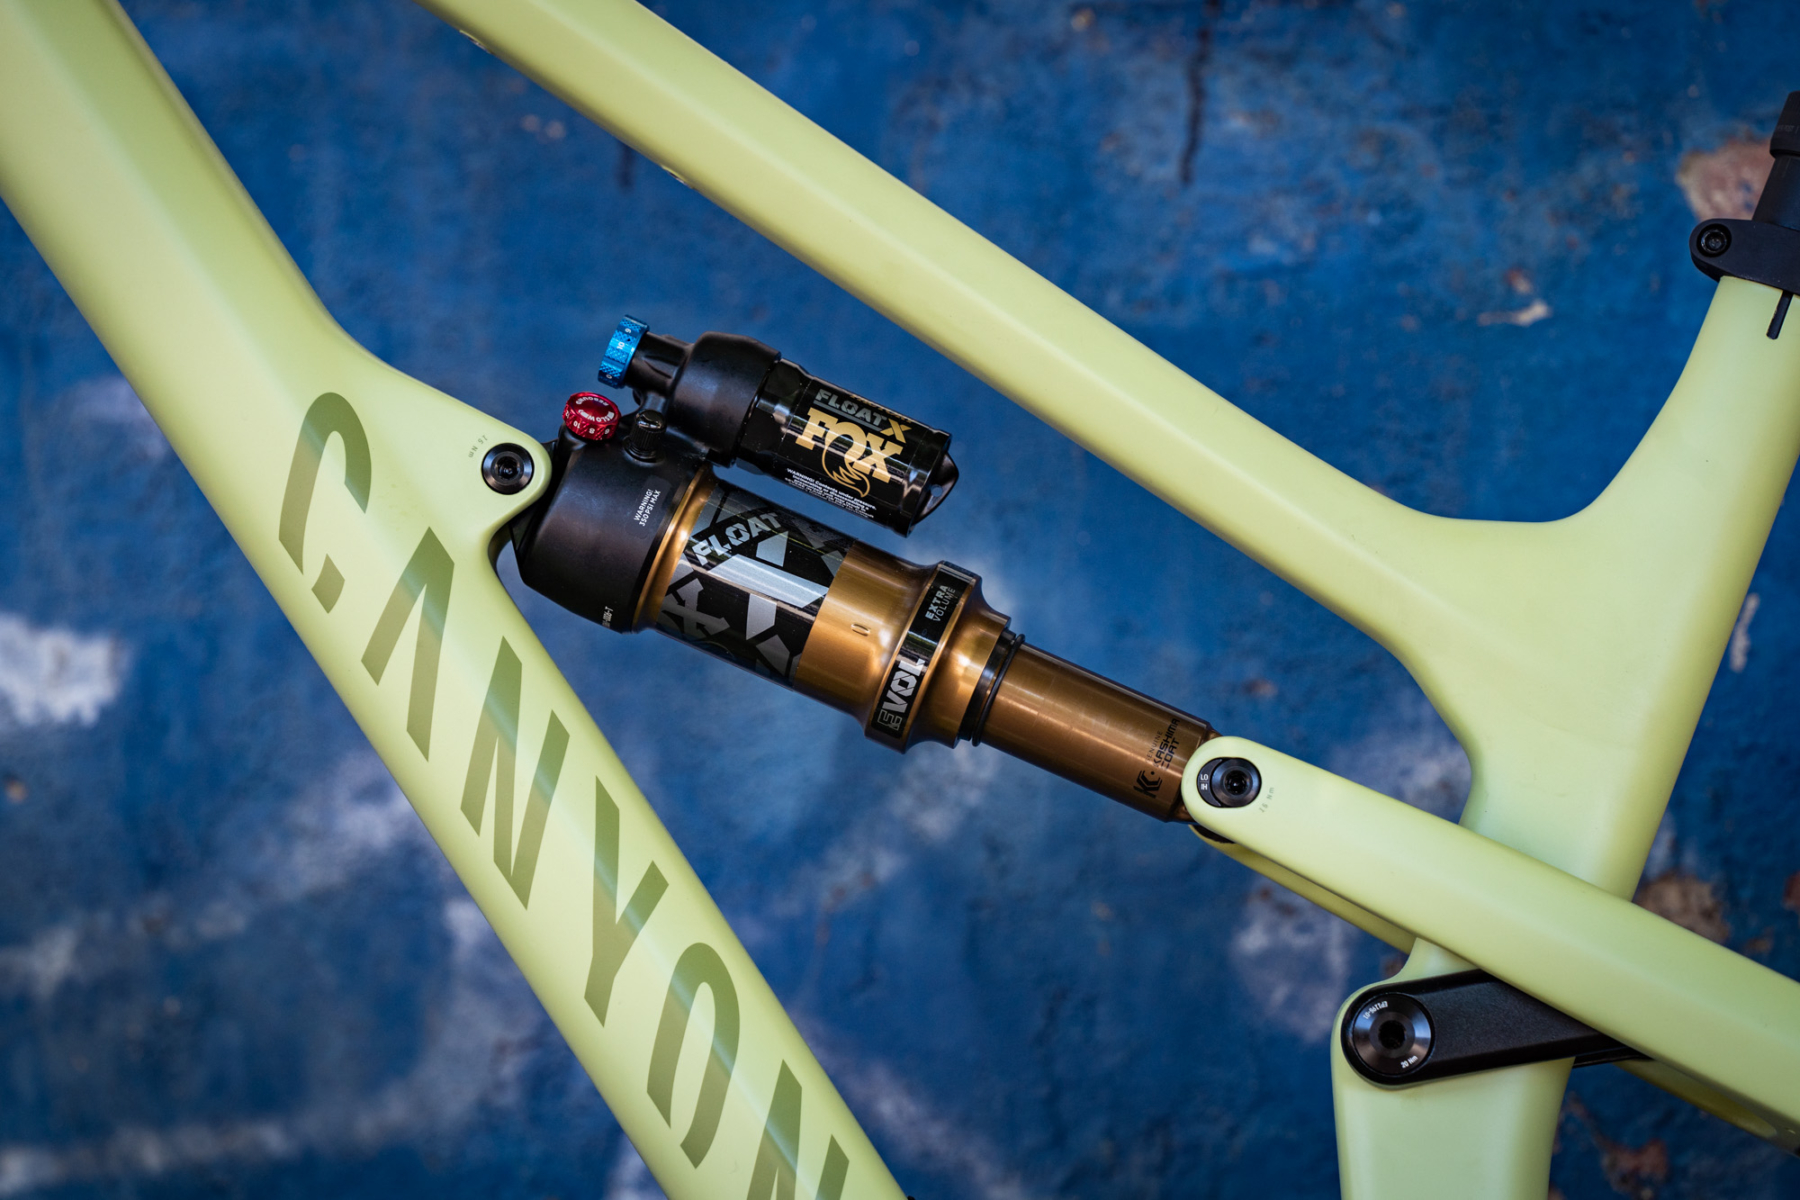
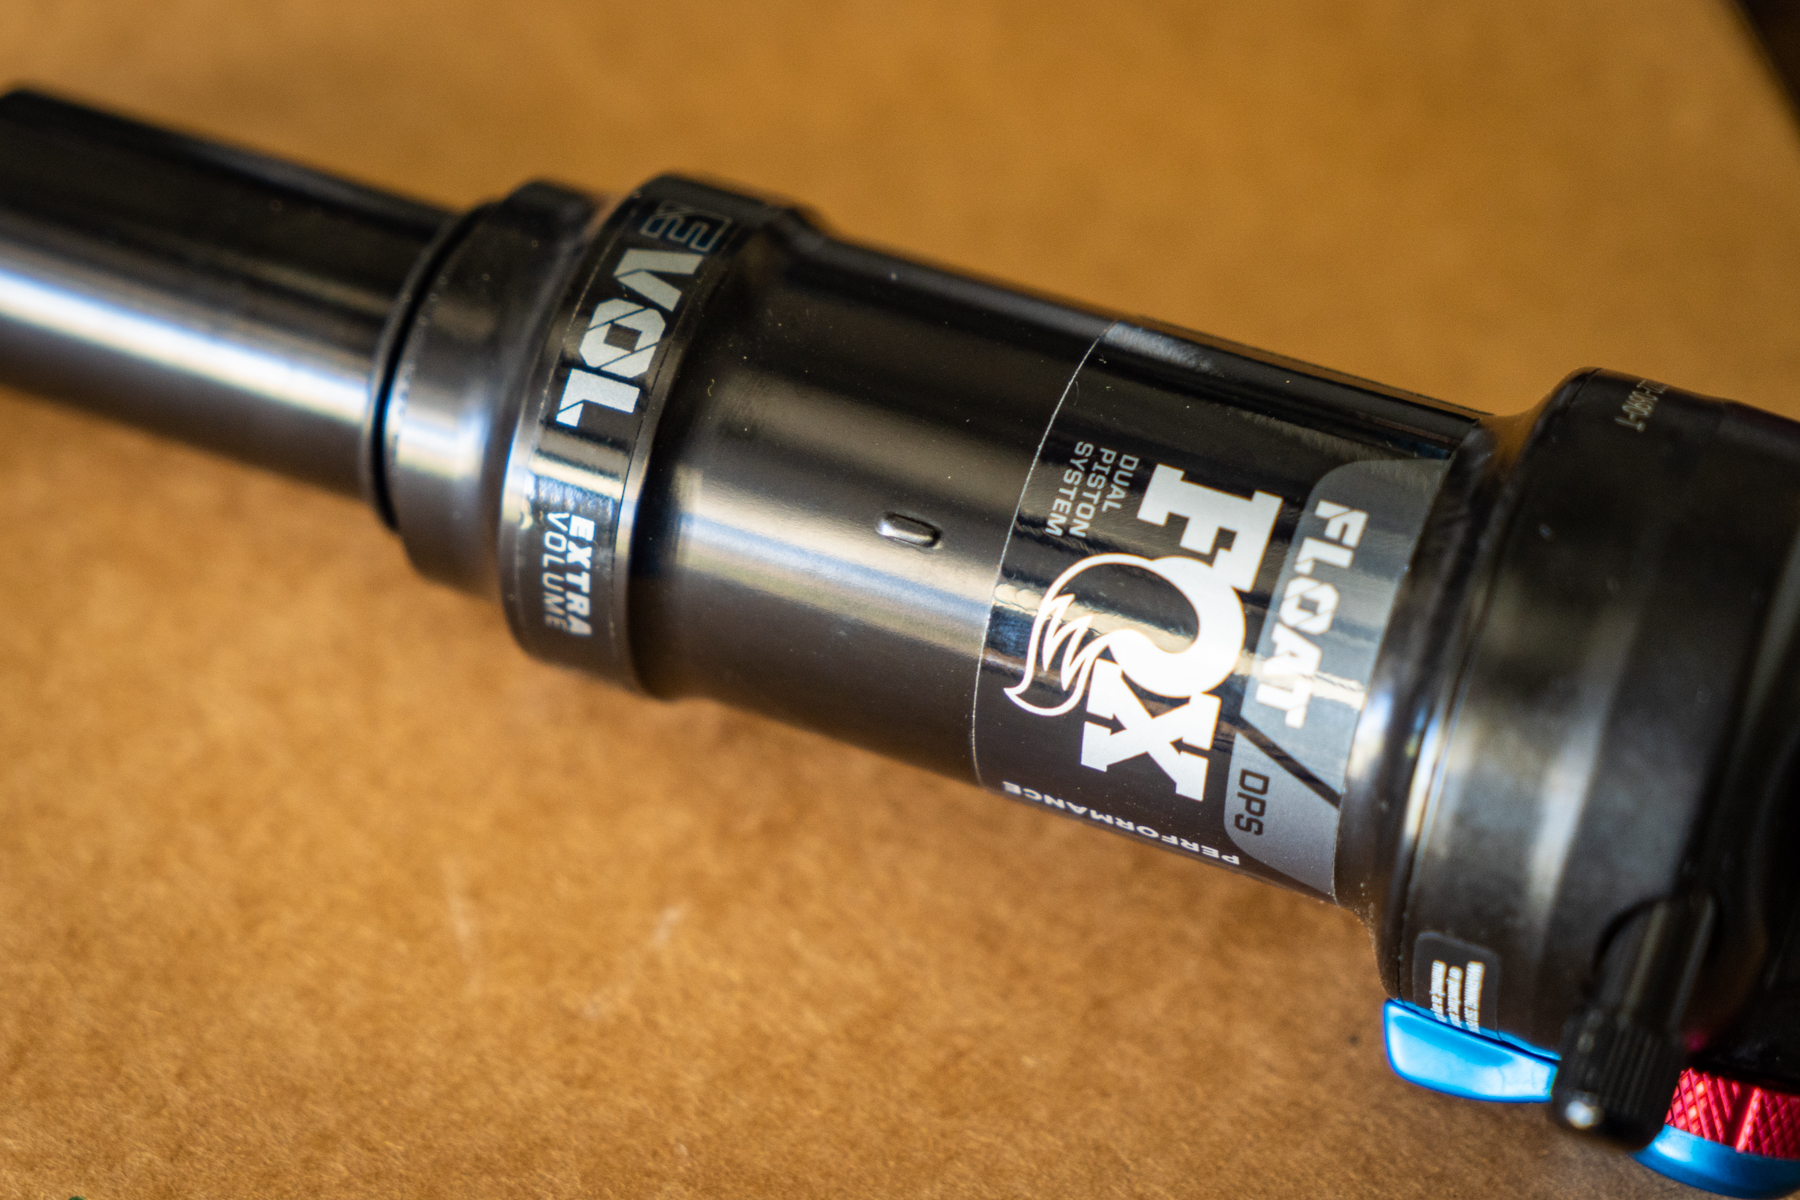
Volume spacers are plastic pucks or bands that sit inside the shock’s air can. They can be added or removed to modify the shock’s available air volume.

Fitting a bigger volume spacer (or more of them) reduces air volume. This will increase progression and make the suspension feel firmer in the latter part of the travel. While this does reduce the chance of bottoming out, it can come at the expense of big-hit compliance.
Fitting a smaller volume spacer (or less of them) increases air volume. This will make the suspension more linear, which gives it a softer and more active feel in the latter part of the travel. It’ll allow you to achieve full travel more easily, though it also increases the chance of bottoming out.
There’s no rule on how many volume spacers you should be running, since there are so many variables from bike-to-bike and rider-to-rider. If we’re talking about an identical bike and shock however, a heavier rider will generally require a bigger volume spacer in order to provide greater bottom-out support. In comparison, a lighter rider will require a smaller volume spacer to allow them to access all the travel.
The Bounce Test
It is possible to get an understanding of whether you need to make any changes to your shock’s volume before you even hit the trails.
Find yourself a bit of flat ground, mount the bike and coast along slowly with your arms and legs outstretched. You then want to bounce on the suspension as hard as you possibly can without letting the tyres leave the ground. Throw your whole bodyweight into the movement, and give the suspension several good compressions.
Dismount the bike, lift the rear wheel off the ground to ensure the shock has fully extended, and measure the distance between the O-ring and wiper seal. In this carpark test you want to be using around 90% of the shock’s available travel.
If you’ve used substantially less than that, it’s likely that your shock is too progressive, and you could do with moving to a smaller volume spacer. If you’ve used more, or even bottomed out the shock, then it’s likely that your shock is too linear, and you could do with moving to a bigger volume spacer.
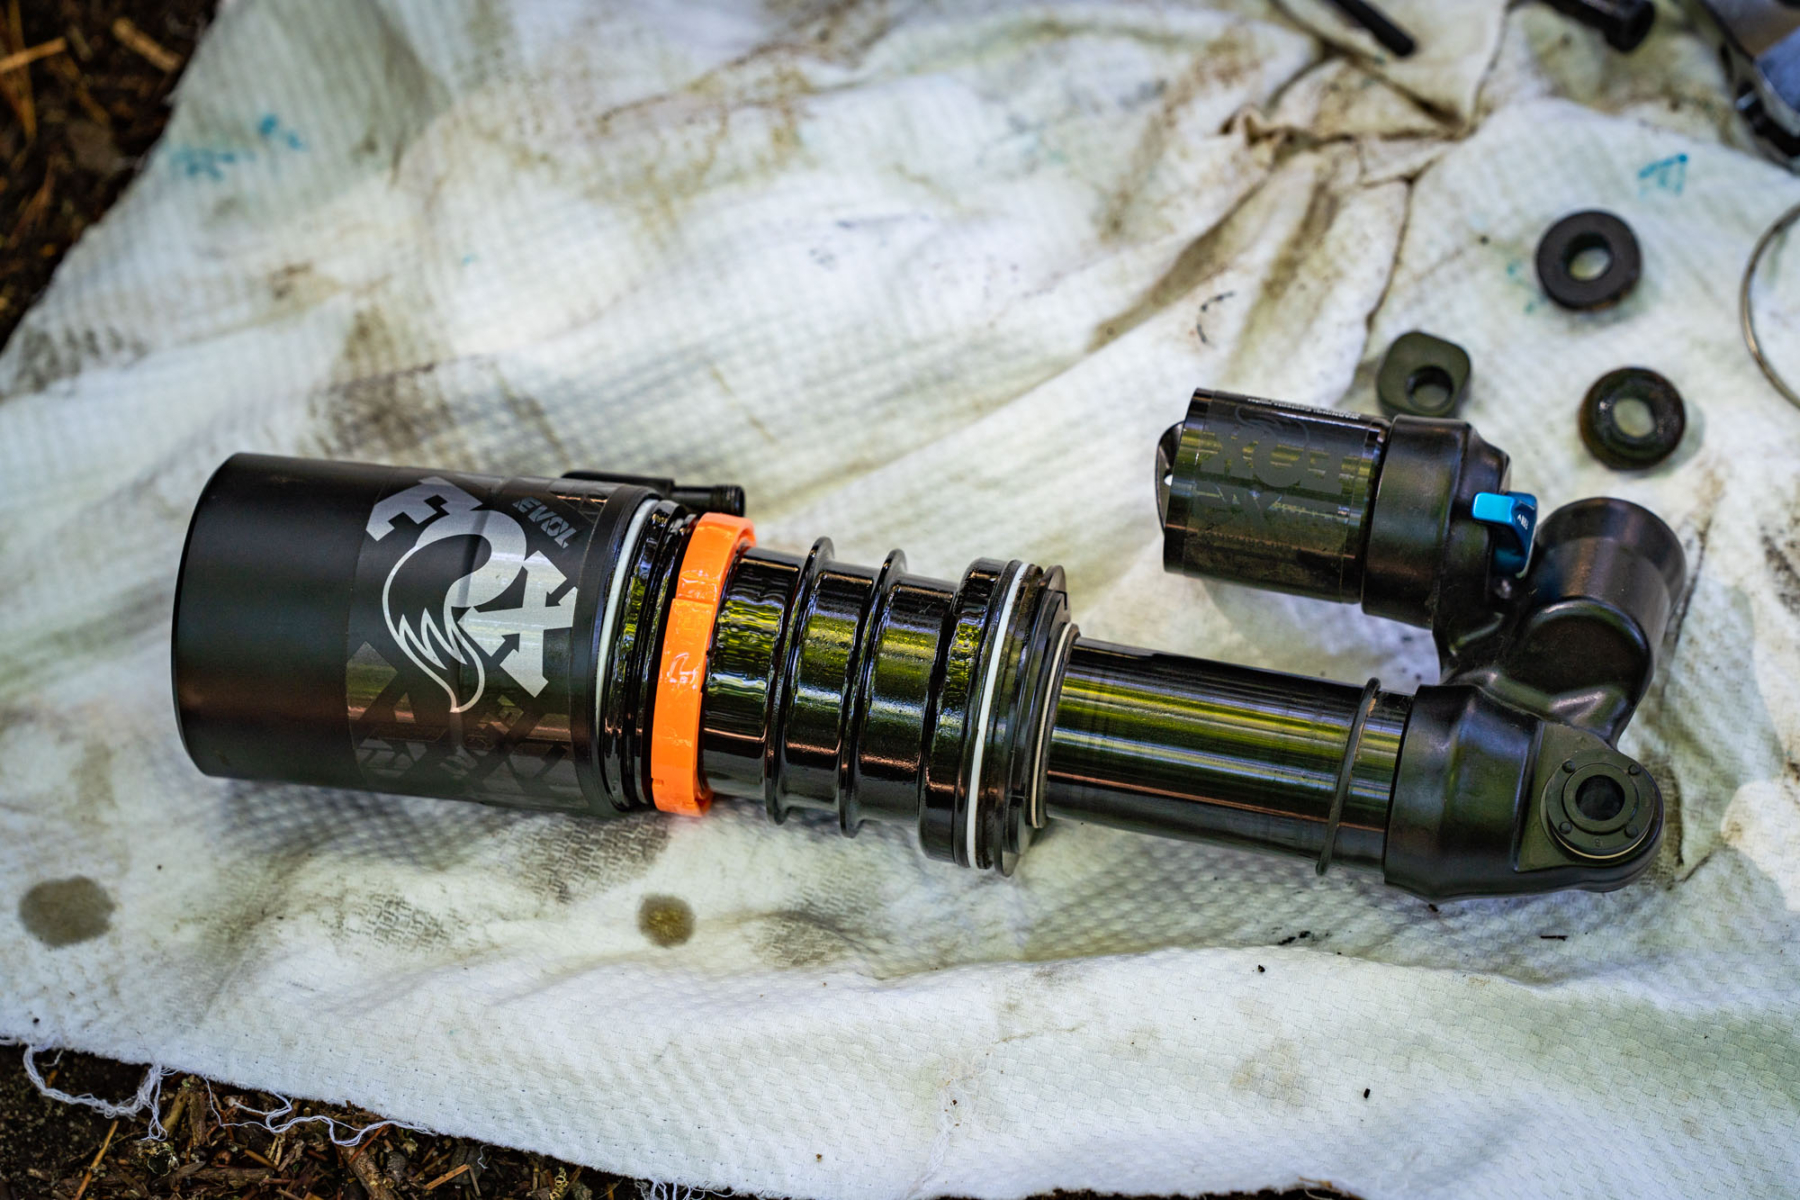
Fox sells specific volume spacer kits for each of its shocks. Whether you have a Float DPS, a Float DPX2, a Float X or a Float X2, there’s a specific set of volume spacers for each one. It’s also worth noting that there is a minimum and maximum limit to the volume spacers you can run in each shock, so you’ll need to know that information before you start messing around.
For a detailed guide on how to change volume spacers, check out the Fox website for a full list of service procedures. Most home mechanics will be able to do this, but if you’re not experienced on the tools, seek out the help of your local bike shop.

Rechecking sag & travel use
If you do change volume spacers, you’ll want to inflate the shock back to your baseline pressure, equalising the two air chambers as you go.
Because volume spacers primarily alter the spring curve in the latter part of the travel, you should be able to use the same starting pressure to achieve the same sag as before. And by keeping the air pressure and sag the same, this will allow you to isolate the change in suspension behaviour and whether the new volume spacer has made an improvement.
To check the new spring rate, perform the same test as before. Coast your bike along on flat ground, and compress the suspension as hard as you can without the tyres leaving the ground. Measure the travel used, and aim for that 90% mark.
Outside of this test, you can use the shock’s O-ring as a travel indicator throughout each ride.
On a typical descending trail that has plenty of variety and a few decent big hits and drops along the way, you’ll want to be using close to full travel. But if you’re bottoming out the shock on a regular basis, there’s a good chance you need to upsize to a bigger volume spacer to increase bottom-out support.
How to adjust your mountain bike shock’s rebound
After getting your air pressure and volume set, it’s time to move onto rebound damping.
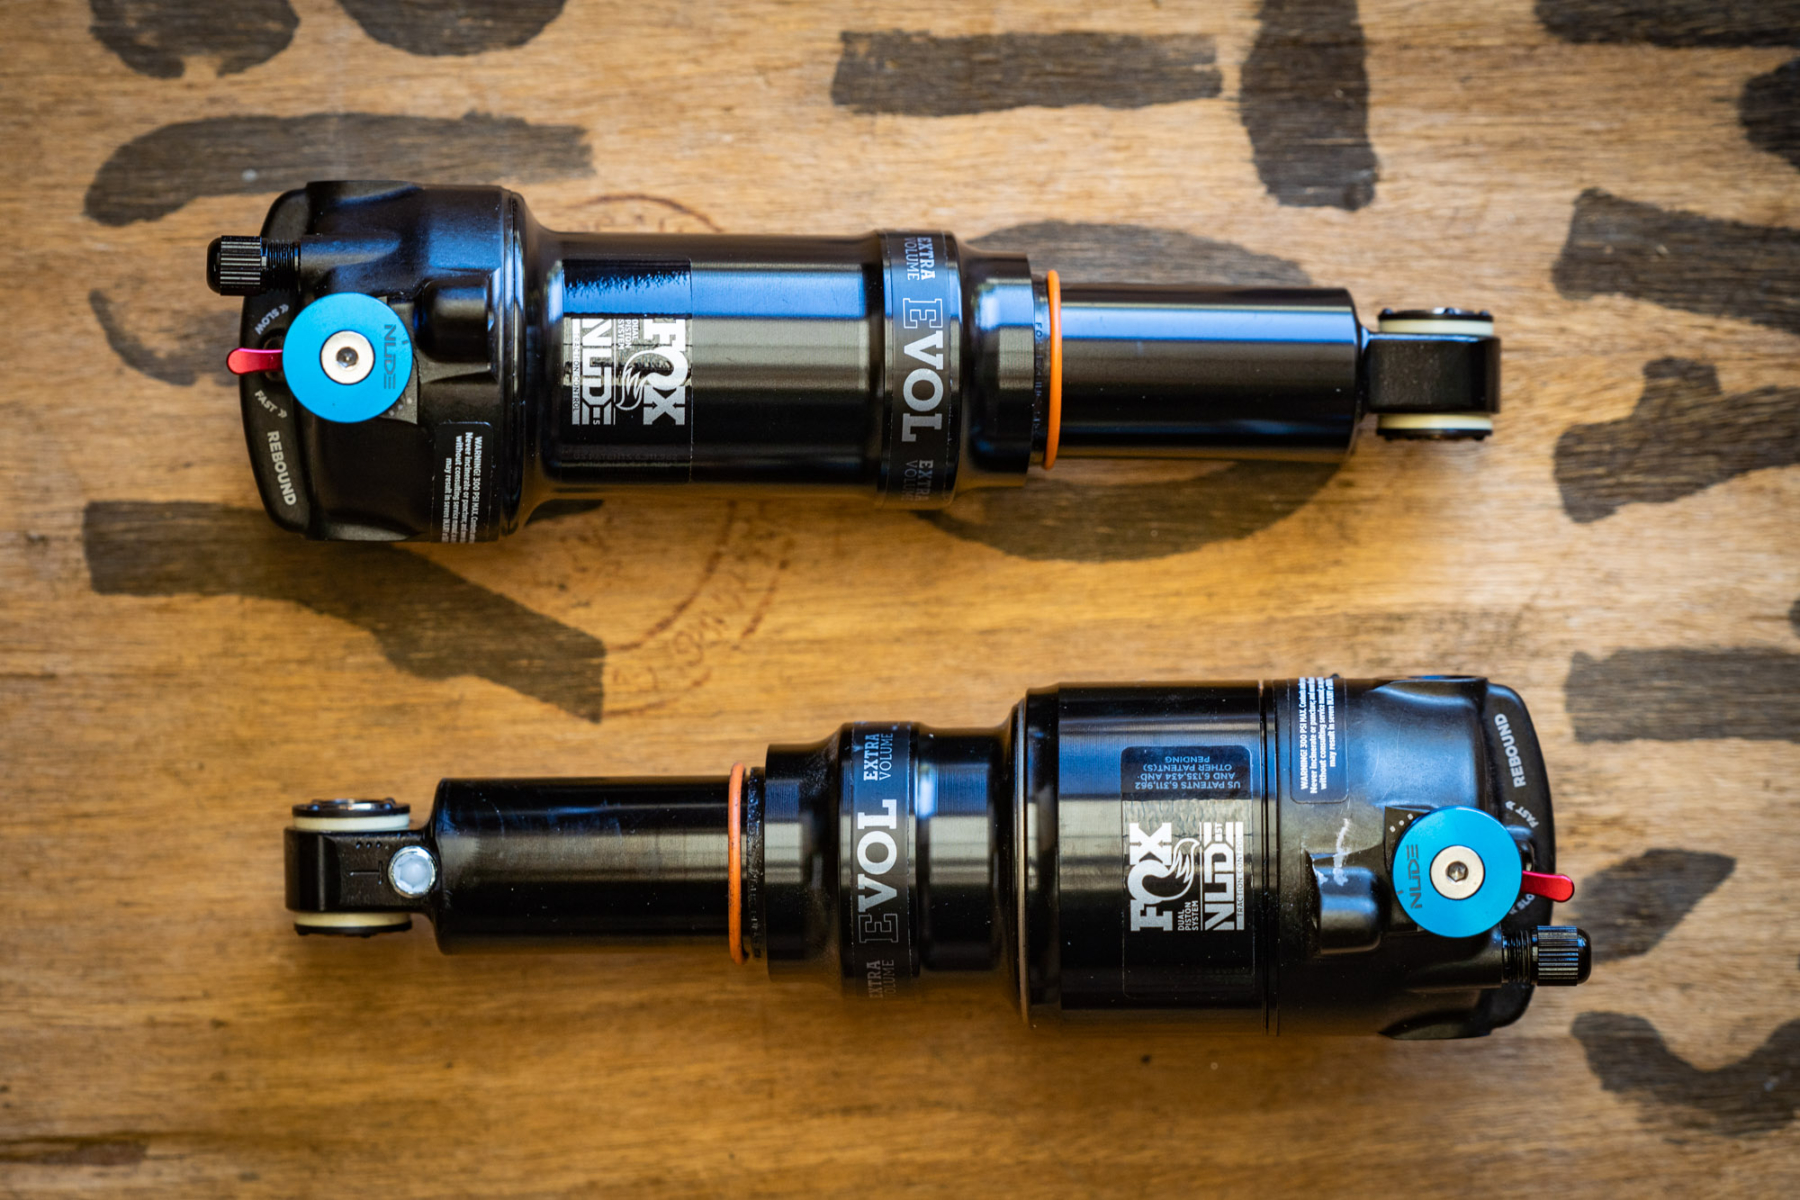
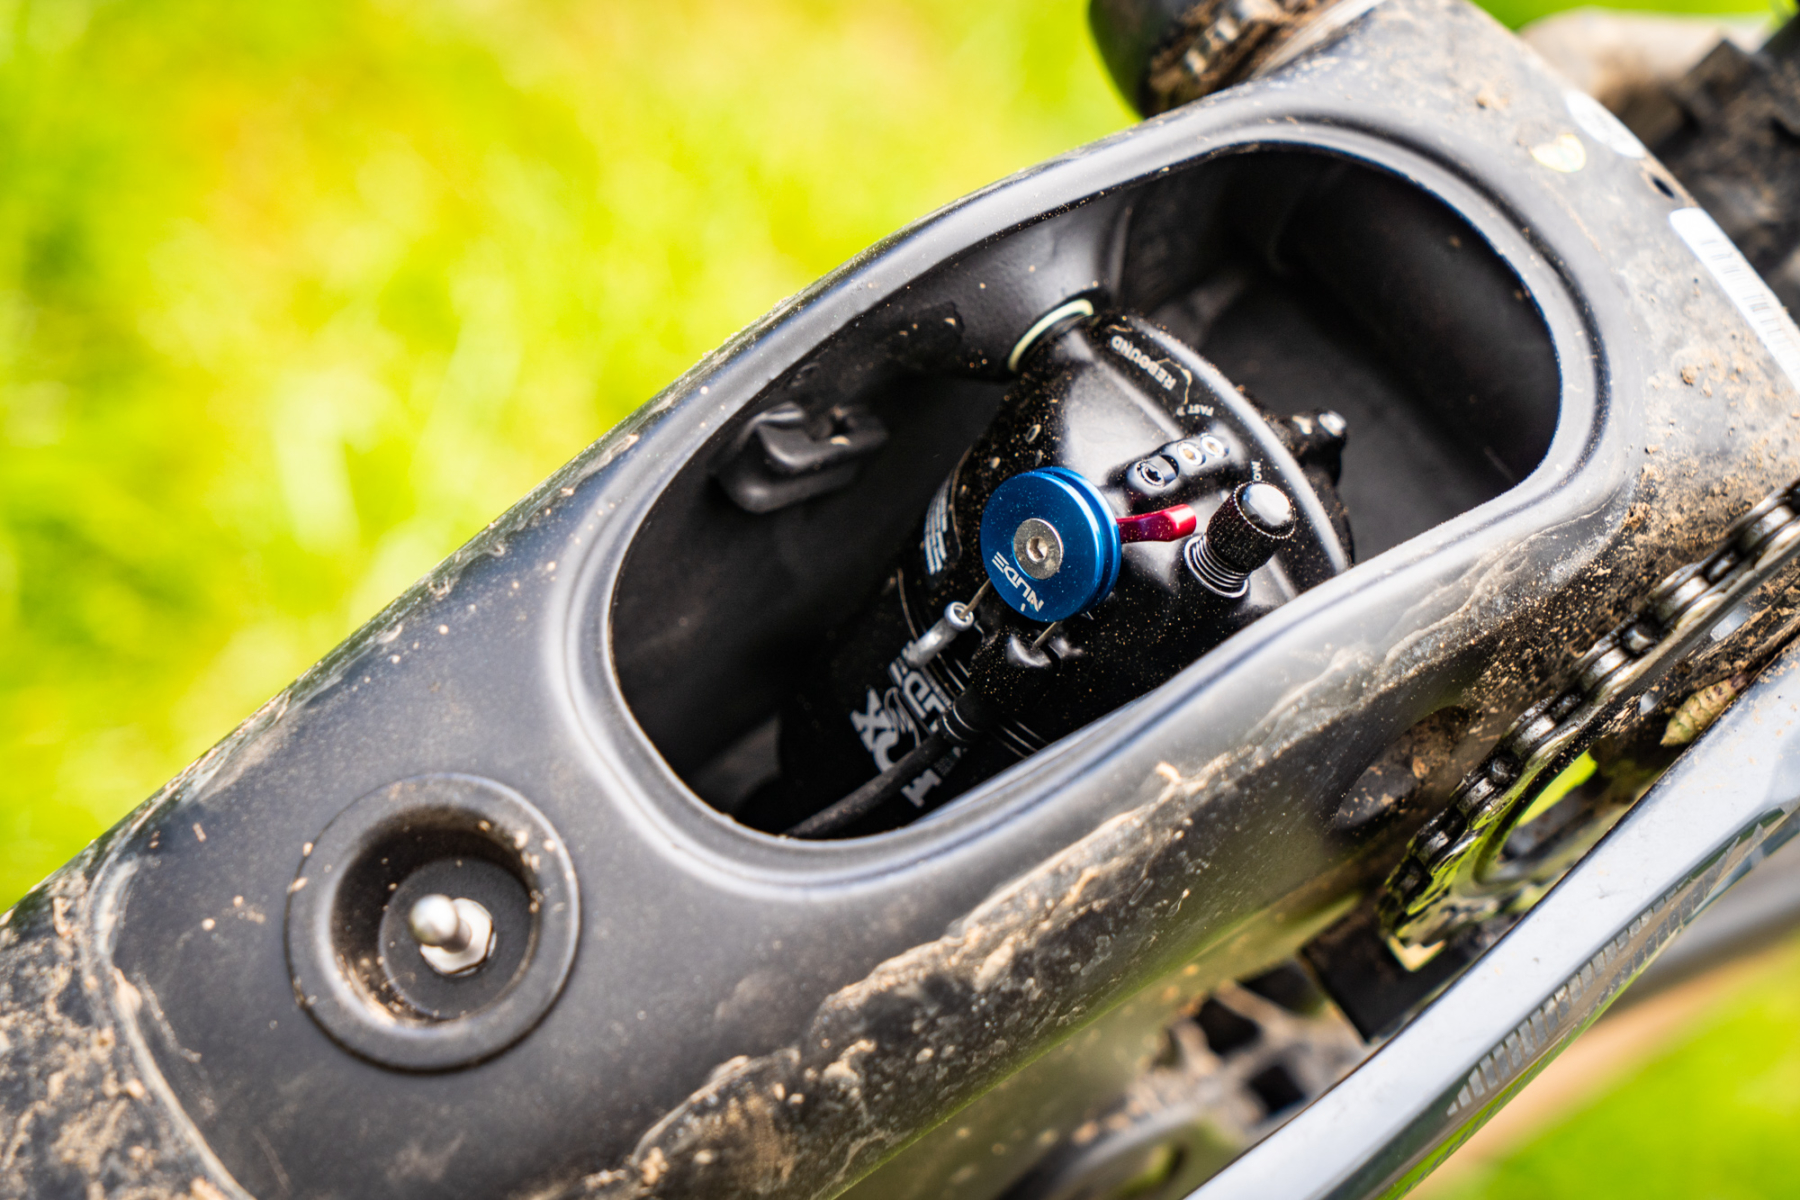
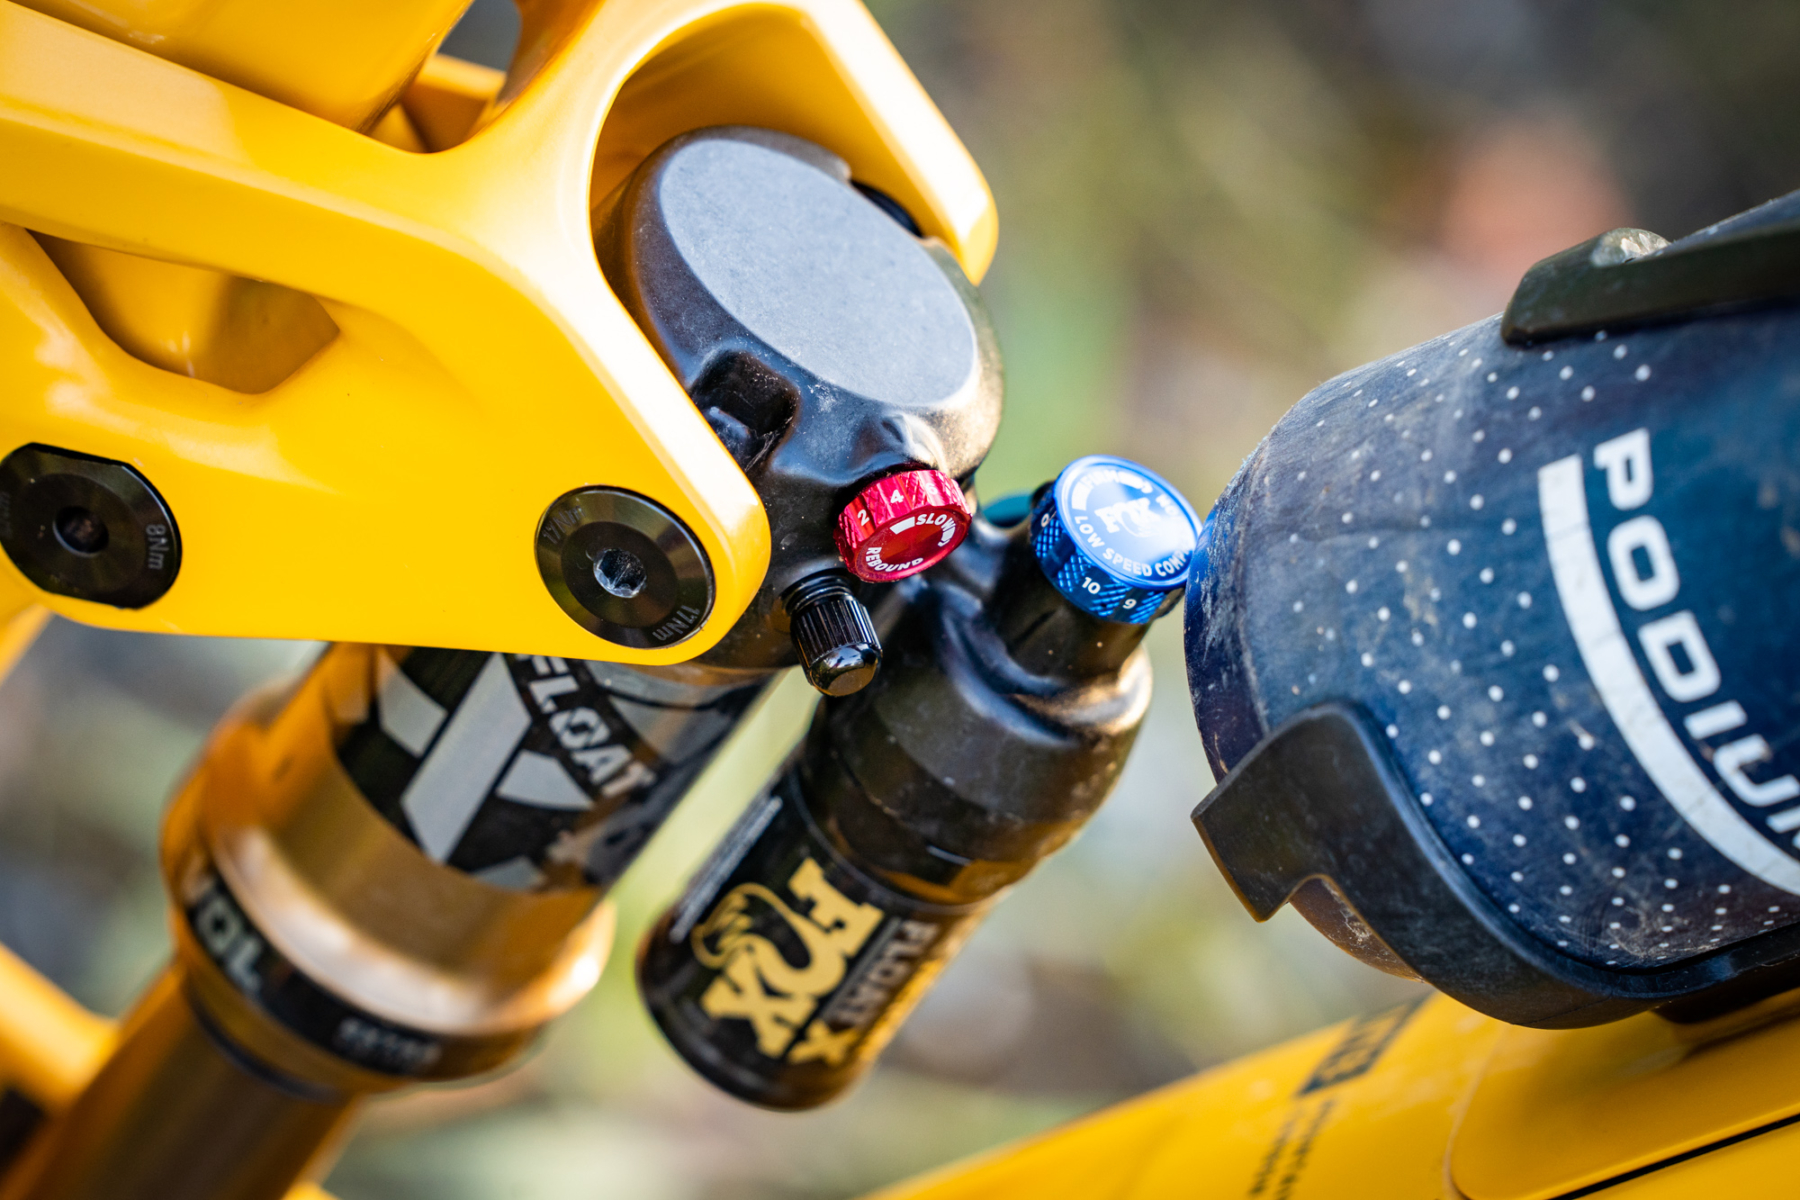
Rebound damping affects how quickly the suspension returns after it has been compressed. It’s adjusted via the red dial (or lever) on the shock. Winding it clockwise will slow down the rebound, and winding it anti-clockwise will speed up the rebound.
Your ideal rebound setting is directly related to the spring rate. So the more pressure you have inside the shock, the slower you’ll want the rebound damping to control the shock’s extension. This means that heavier riders will generally have their rebound setting closer to the slower side of its range. Lighter riders will usually have the rebound setting wound closer to the fastest setting.
To get a feel for how it influences the suspension behaviour, it’s useful to have a bounce around a carpark so you can try the shock’s rebound damping at the fastest and slowest settings. You’ll find that the fastest setting will make the shock feel like a pogo stick, which will make the bike want to buck you on bigger landings. The slowest setting will reduce the shock’s ability to recover quickly enough, causing to ‘pack down’ on repeated impacts and feel harsh on the trail.

Once you’ve experienced both extremes, try out the rebound damping in the middle position. This’ll give you a quick impression of where about you need to be in the range, and you can tune from there.
Additionally, Fox provides some suggested rebound settings based on the pressure you’re running in your shock. Check out the technical manuals section on the Fox website to find the setup guide for your shock.
The other method for dialling in rebound damping is to stand next to your bike on a flat surface and place your hands on the saddle. Push down on the shock until it’s at the sag point, then release your hands from the bike as quickly as possible. As you release your hands, pay close attention to both the shock and the rear tyre. You want the shock to return quickly, but the tyre shouldn’t lift off the ground. If it does, slow down the rebound damping a click and repeat the process.

High-speed rebound adjustment
Now it’s worth noting here that the vast majority of Fox shocks have a single rebound dial that controls the low-speed rebound damping. However, high-end Float X2 shocks actually come with two adjusters. One controls low-speed rebound damping and the other controls high-speed rebound damping.
The process of setting up the high-speed rebound adjuster is much the same as outlined above. When pushing down on the saddle and compressing the shock however, you’ll need to push it much deeper into its travel and with more force, in order to engage the shock’s high-speed rebound circuit. Again, you want to watch the rear tyre and shock during the extension. You’re after that nice and fast rebound setting, without the tyre leaving the ground.

Outside of these setup tips, there are other factors that will influence your preferred rebound speed. If you’re hitting enormous jumps for example, you may wish to have a slightly slower high-speed rebound setting in order to avoid the shock from bucking you on the landings. Conversely, an enduro racer that’s on a wide open track with lots of rocks and roots may prefer a faster setting to increase comfort and grip.
Rear shock compression damping setup
Compression damping controls how fast or slow the shock moves when it’s compressed. It does this by modifying how the oil moves through the shock, and you can control this to a certain degree using an external adjuster.
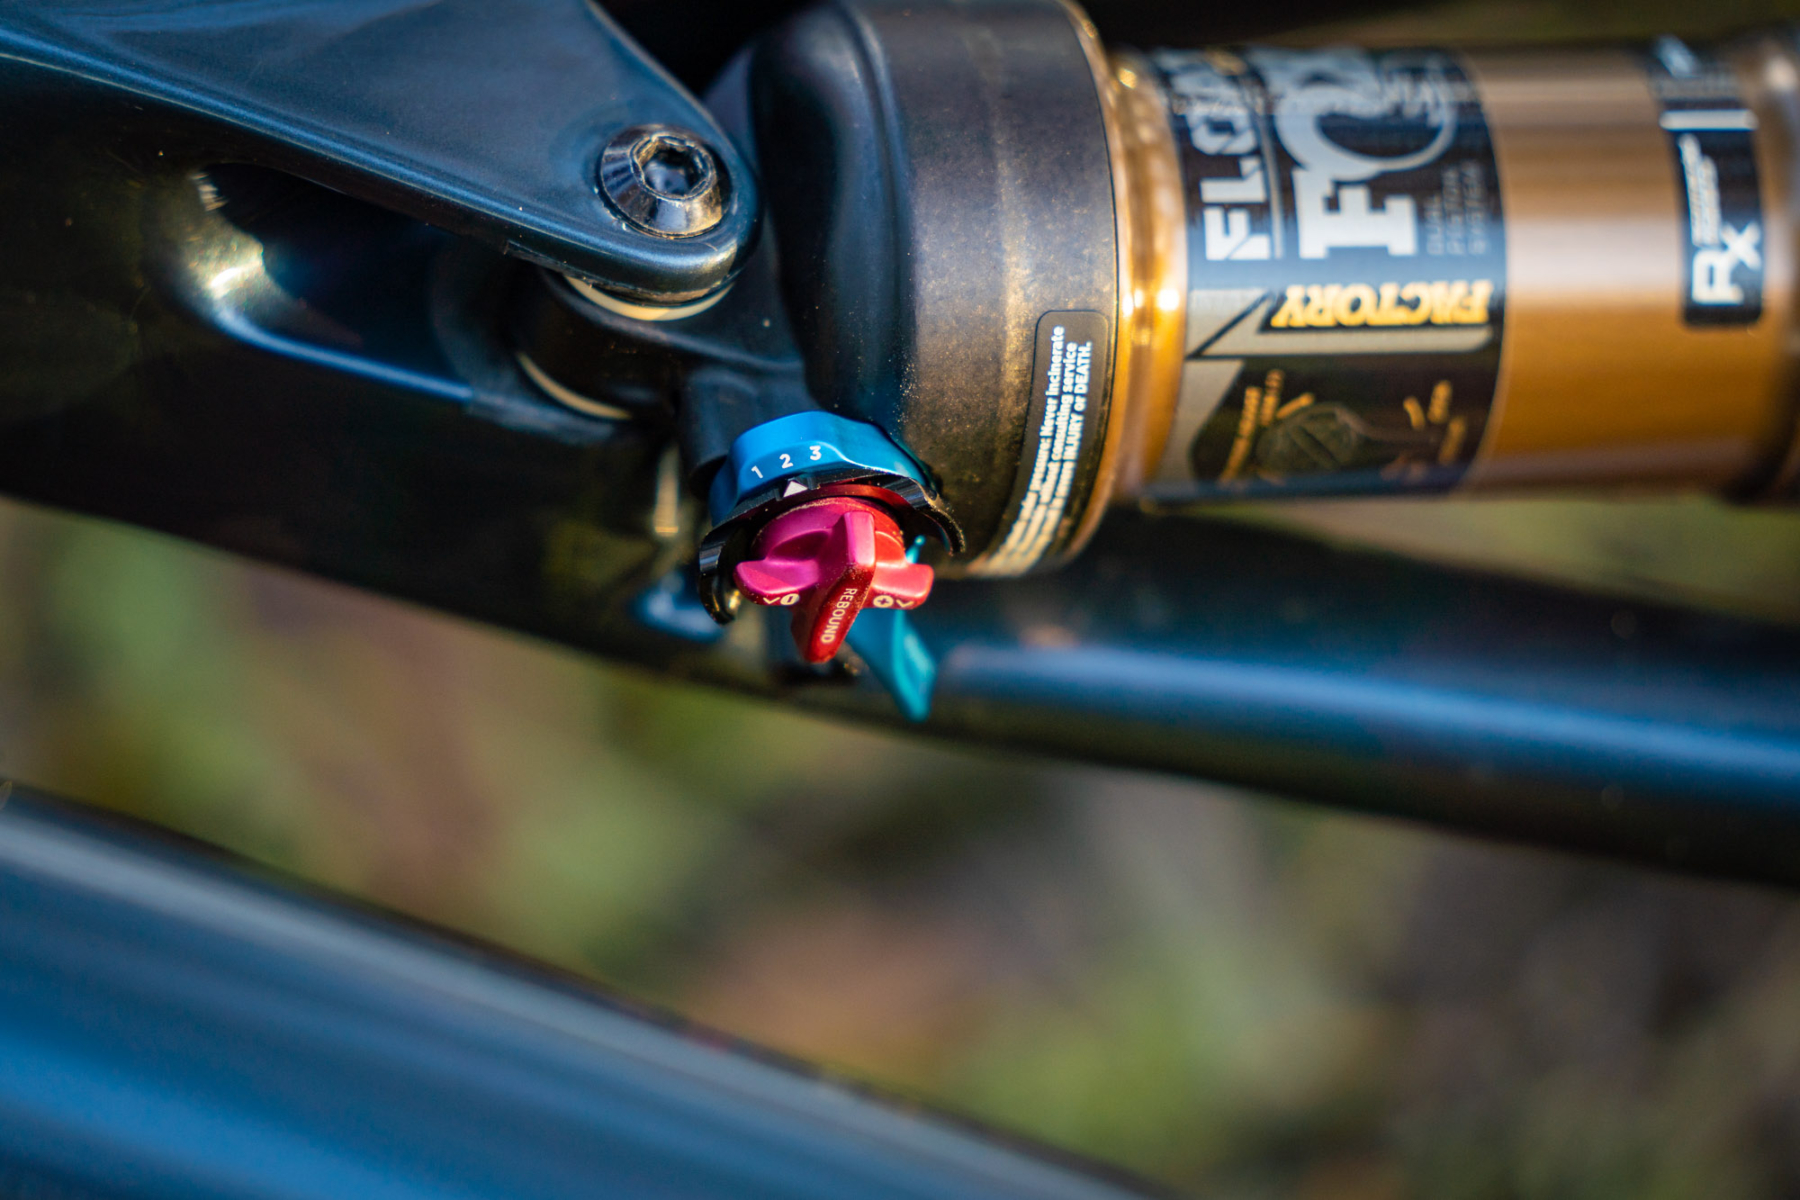
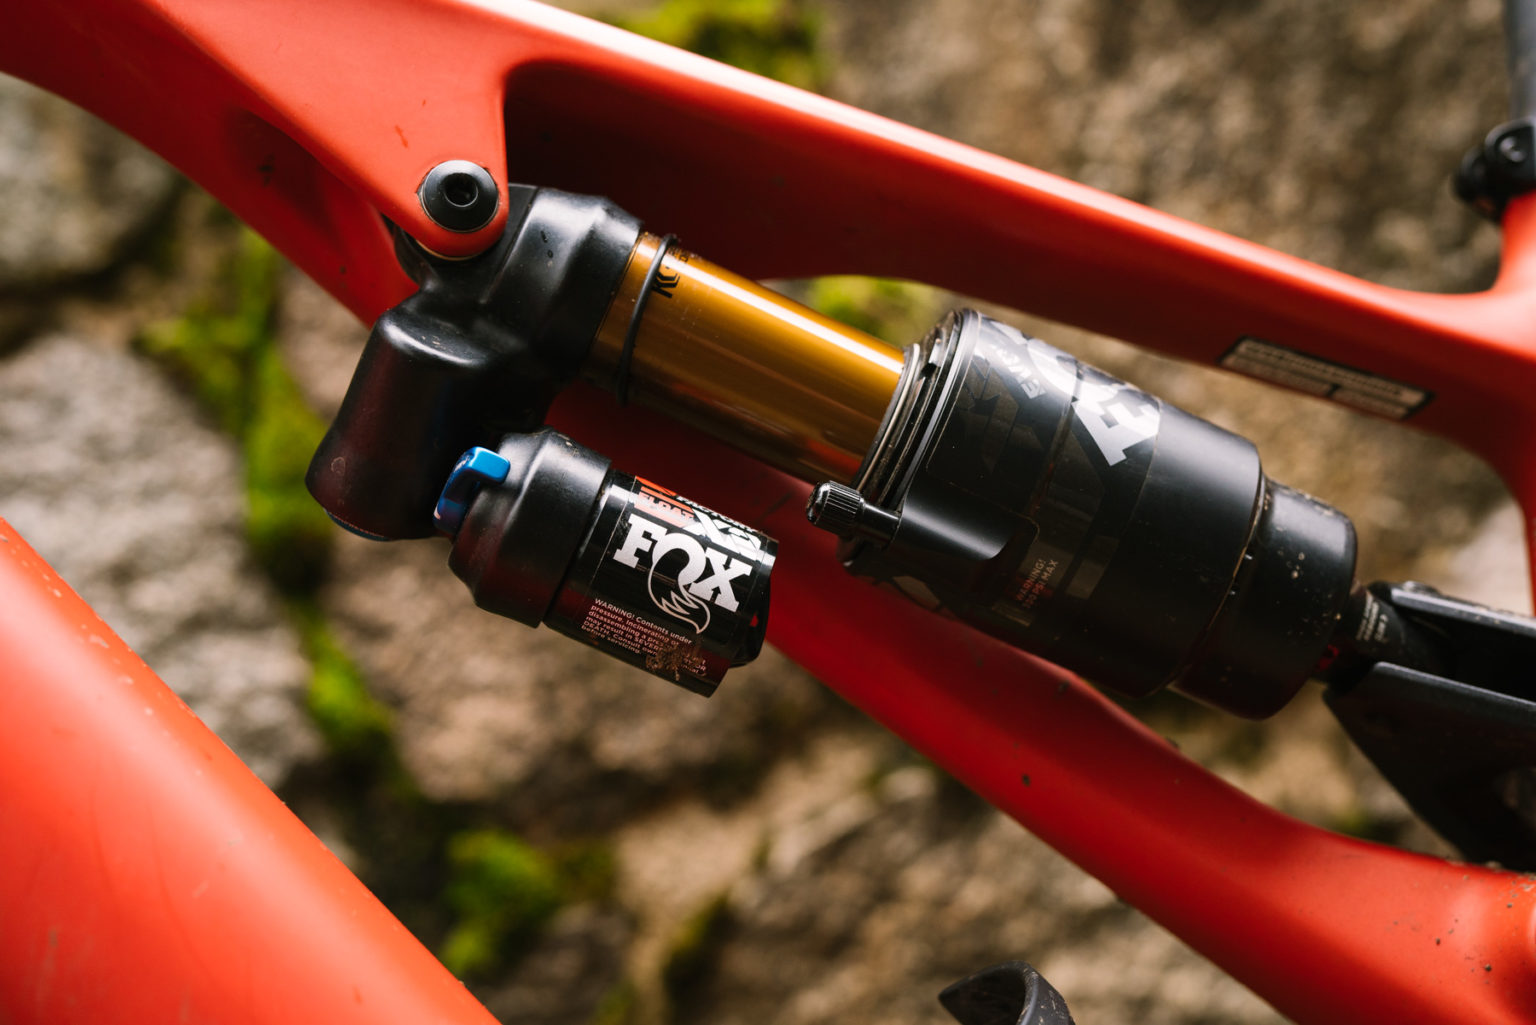
On a Fox shock, compression damping is adjusted via a blue lever or a blue dial, or sometimes both.
Wind these adjusters clockwise and you’ll increase damping, which slows the shock’s compression down and makes it feel firmer. Wind the dial anti-clockwise, and you’ll decrease damping, speeding up the compression rate and making the shock feel softer.
It is important to note that there are different external adjustments on different shocks. Furthermore, higher-end Factory Series models will feature more adjustability than the more basic Performance Series shocks.
For example, if you’ve got a basic Float DPS shock, you’ll have a single lever that offers three compression positions: Open, Medium & Firm. These settings are simple and pretty self-explanatory. When riding off-road, you’ll typically want to leave the compression damping in the Open position to provide maximum grip and bump absorption. On smoother trails and up longer climbs, the Medium position increases compression damping to firm up the suspension, improving pedal efficiency and lifting the bike’s dynamic ride height. The Firm setting is usually only useful for riding on bitumen.
On some Float X and Float X2 shocks, things get a little more tuneable thanks to a low-speed compression dial. This allows you to tweak the low-speed compression damping, which affects how the shock responds to slow-speed inputs. Typically these are forces caused by rider weight shifts, which includes pedalling, braking, and moving around the cockpit.
To counter these forces, increasing the shock’s low-speed damping will provide a firmer feel to the initial travel and help to lift the bike’s ride height. Add too much low-speed damping however, and you can end up reducing comfort and traction.

Rear shock high-speed compression damping adjustment
In addition to low-speed damping, some of the high-end Float X2 shocks add a high-speed compression adjuster.
Now it’s important to clarify that when we’re talking about low and high speed damping, we’re not referring to your riding speed, but rather the shaft speed of the shock itself. You could be riding flat out into a berm, and the compression rate of the shock may only be engaging the low-speed damping circuit. Conversely, you could be cruising along a trail and encounter a sharp rock edge, and the impact could be enough to trigger the high-speed damping circuit. It’s important to understand this distinction in order to correctly dial in your high and low-speed adjusters.
Put simply, the high-speed compression controls how the shock responds to high-speed forces. These are typically more violent impacts caused by the trail, like a harsh square-edge hit from hammering through a rock garden, or landing a big drop to flat.

As for setting your compression damping, there’s no hard and fast rule like there is for sag and rebound damping. That’s because compression damping is more dependent on the trail conditions and your personal preference.
For example, a high-level racer who’s bombing down really steep and fast trails will generally prefer more compression damping to increase support and maintain their bike’s dynamic stability. In comparison, an intermediate trail rider is likely to prefer a lighter compression setting to maximise traction and comfort.
During the setup process, it’s useful to try both extremes of the compression adjustment so you get a feel for how it’s affecting the bike. Then try out the middle setting, and start adjusting in either direction until you get a setting you like.
Again, Fox does have some recommendations in the technical manuals section of its website. However, there is plenty of scope for experimentation, which we’ll get onto shortly.

Take notes
As we’ve mentioned before, it’s a great idea to record your baseline settings during the setup process. Create a new note in your phone and jot down shock sag, air pressure, and your current volume spacer configuration. Record how many clicks of rebound and compression damping you’re running, as well as the total number of clicks in each dial so you know where you’re at within the range.
If you end up getting confused after making too many different adjustments during a ride, you can always reset back to your original settings. You can do the same thing if you lend bike to a mate and they mess around with the air pressure and dials.
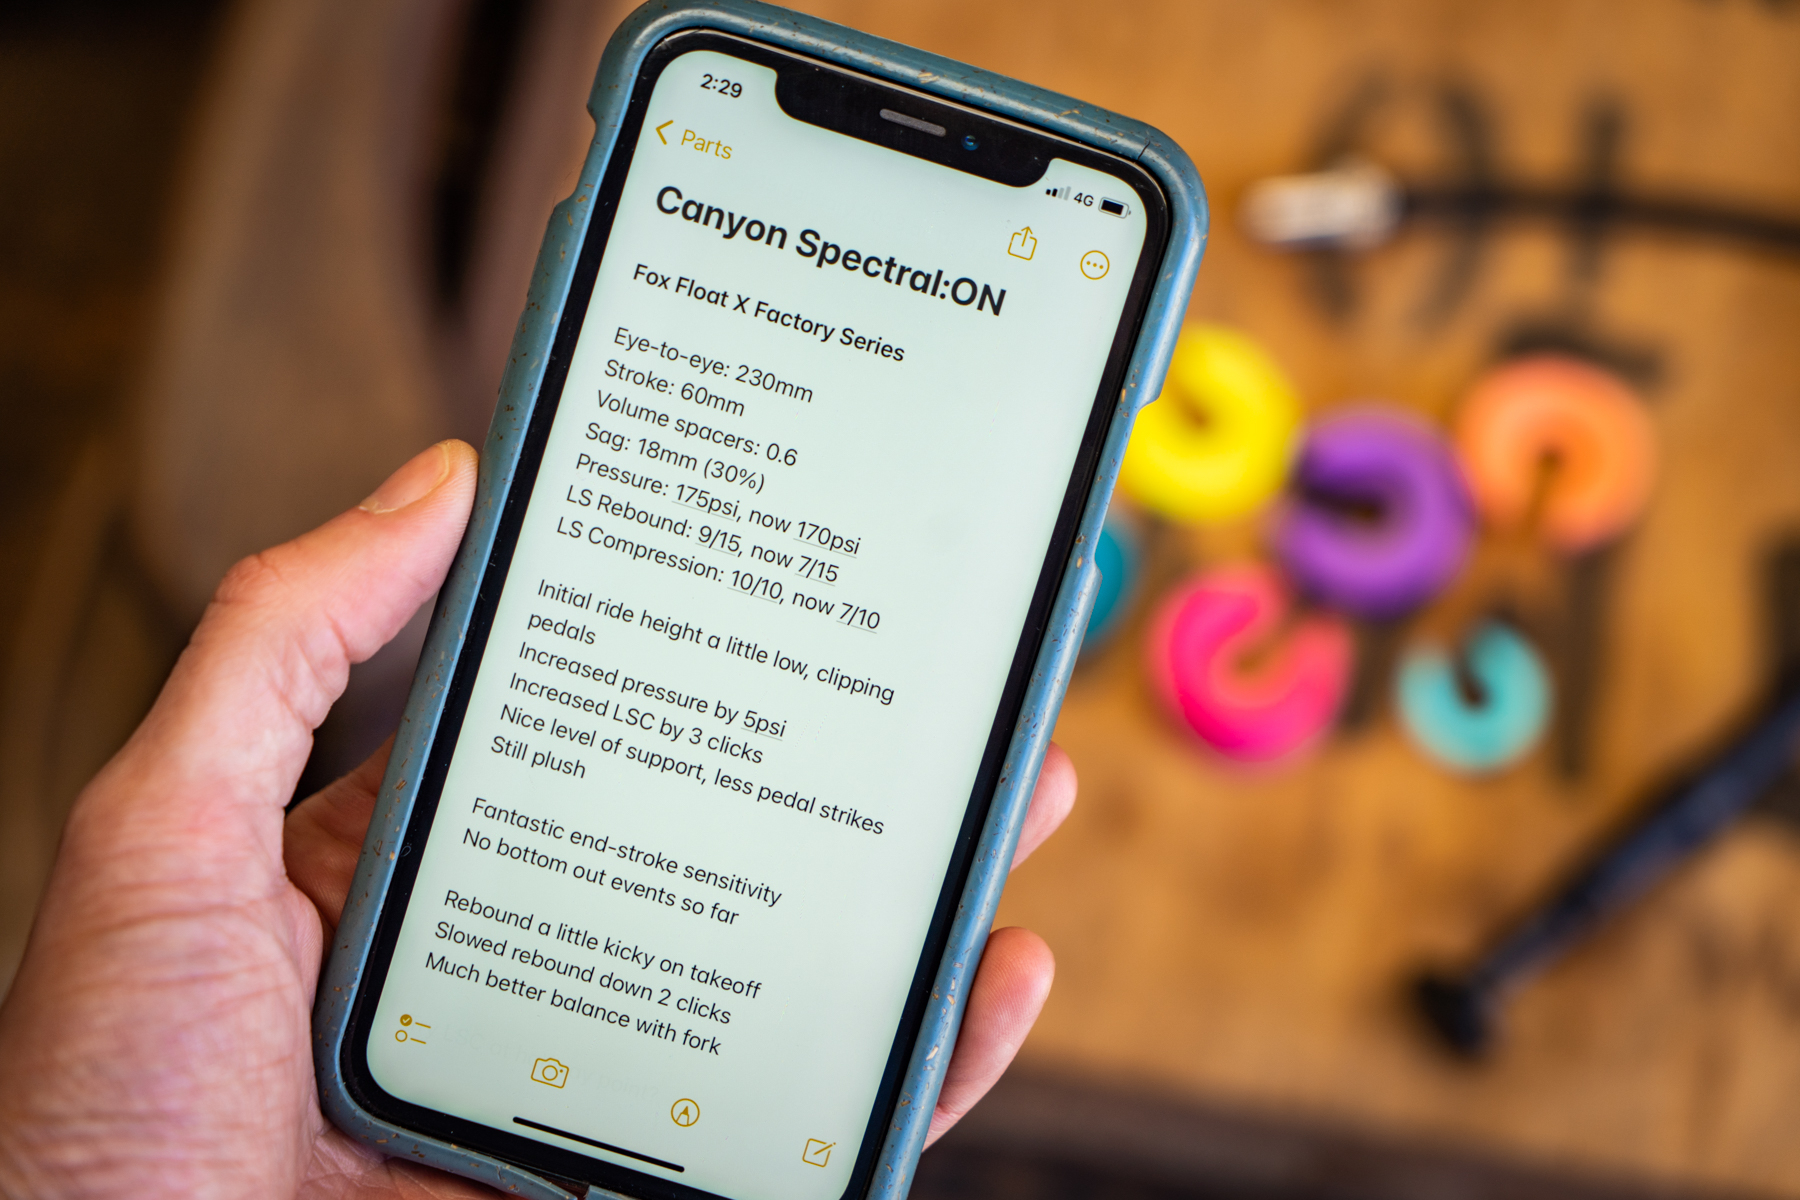
As well as recording your baseline settings, be sure to note down any adjustments you make over the next few rides. If you add a couple of psi, or speed up the rebound a couple of clicks, record it in your notes to see how your tuning progresses.
We also use this note system to jot down any specific events that happened or characteristics noticed during a ride. Perhaps the suspension felt like it was spiking on several repeat hits? Maybe you bottomed out on a landing that you don’t normally bottom out on? Maybe you felt like there was too much feedback through the pedals? Note these experiences down, and use them as prompts for making adjustments when you’re back home.

Rear shock trail tuning & balance
As you spend more time on your bike, you’ll gather more feedback on what the suspension is doing and where you think improvements could be made. This feedback will evolve as you get used to the bike and as your skills progress. You might also pick up on different characteristics from riding new trails.
For example, you might decide to reduce sag to provide a slightly firmer feel at the pedals and increased ground clearance for technical climbs. Or you may wish to increase sag to drop the BB and slacken out the head angle for steep descending.
Speaking of, it’s a good idea to check your sag every now and then. This is particularly important with a new shock, which will bed in over the first few rides. As such, you may need to increase the pressure slightly from your initial setup.
If you do end up changing pressures or volume, you’ll likely need to make an adjustment to the rebound damping to compensate. If you’ve added 10psi or gone to a larger volume spacer, consider slowing the rebound damping by a click.
Another important aspect to evaluate on the trail is the overall balance of your suspension. Ideally you want the shock and fork to give a similar feel at both ends of the bike. Pay attention to the compression and rebound, and try to match the two together. You may also want to check out our fork tuning tips article if you haven’t already.

Suspension setup using bracketing
If you’re looking to really hone in on your shock’s damping, it’s worth setting aside a bit of time to perform some bracketing.
Find a section of short trail you know well, about 200m in length is fine. You’ll need a good bit of variety to the trail with a few drops, rocks, roots, berms and pedally sections.
Ride the trail with your stock setup, then return to the start and pick one damping adjustment. Set that dial two clicks in the direction you’re keen to try, then ride the section of trail again.
Did it feel better? Try another two clicks and ride the trail again. If it felt worse, go back to your original setting and ride the trail again. Now try another two clicks in the opposite direction and repeat the process.
This process is called ‘Bracketing’, and it’s a great way to hone in on what damper adjustments are doing, and what characteristic you prefer. The key is to only pick one adjustment at a time, and only make small changes. Otherwise you run the risk of confusing yourself.

Rear shock maintenance & servicing
Outside all of this measuring and bracketing, one of the most important tips we have for getting the most out of your bike’s suspension isn’t to do with tuning at all. Nope, one of the best things you can do is to service your shock regularly.
Ultimately, it doesn’t matter how fancy your bike is, or how many adjustments your high-end shock has, if the seals are bone-dry and there’s air in the damper, your suspension won’t be performing properly.
According to Fox, you want to get your rear shock serviced every 125 hours of ride time, or once per year (whichever comes first). Though if you ride a lot, or in particularly dusty or muddy conditions, you’ll want to halve that service interval.
Routine servicing will ensure that all of the seals are doing their job, and that the internals are properly lubricated. Not only will you prevent premature wear of your shock, your suspension will also be plusher and more responsive.

Custom tuning
While we’re on the topic of servicing, it’s worth noting that authorised Fox service centres can also perform custom tuning.
This won’t be something that every rider needs. It tends to be more important for those who are outside the typical bell curve (very light and very heavy riders), who are unlikely to get the optimal performance out of the stock shock tune that’s designed for an average 75kg rider.
There are other reasons you may wish to get a custom tune. Riders with a certain riding style may need more support than stock damping can provide. You might have bought a second hand shock with an internal tune designed for a different bike, or you may have simply upgraded to a new frame and decided to bring your existing shock with you.
In any of those above cases, a custom tune could very well be worth seeking out as part of a full service. After all, suspension is one of the most important aspects of a modern mountain bike, and it’s worth taking the time to get it right.